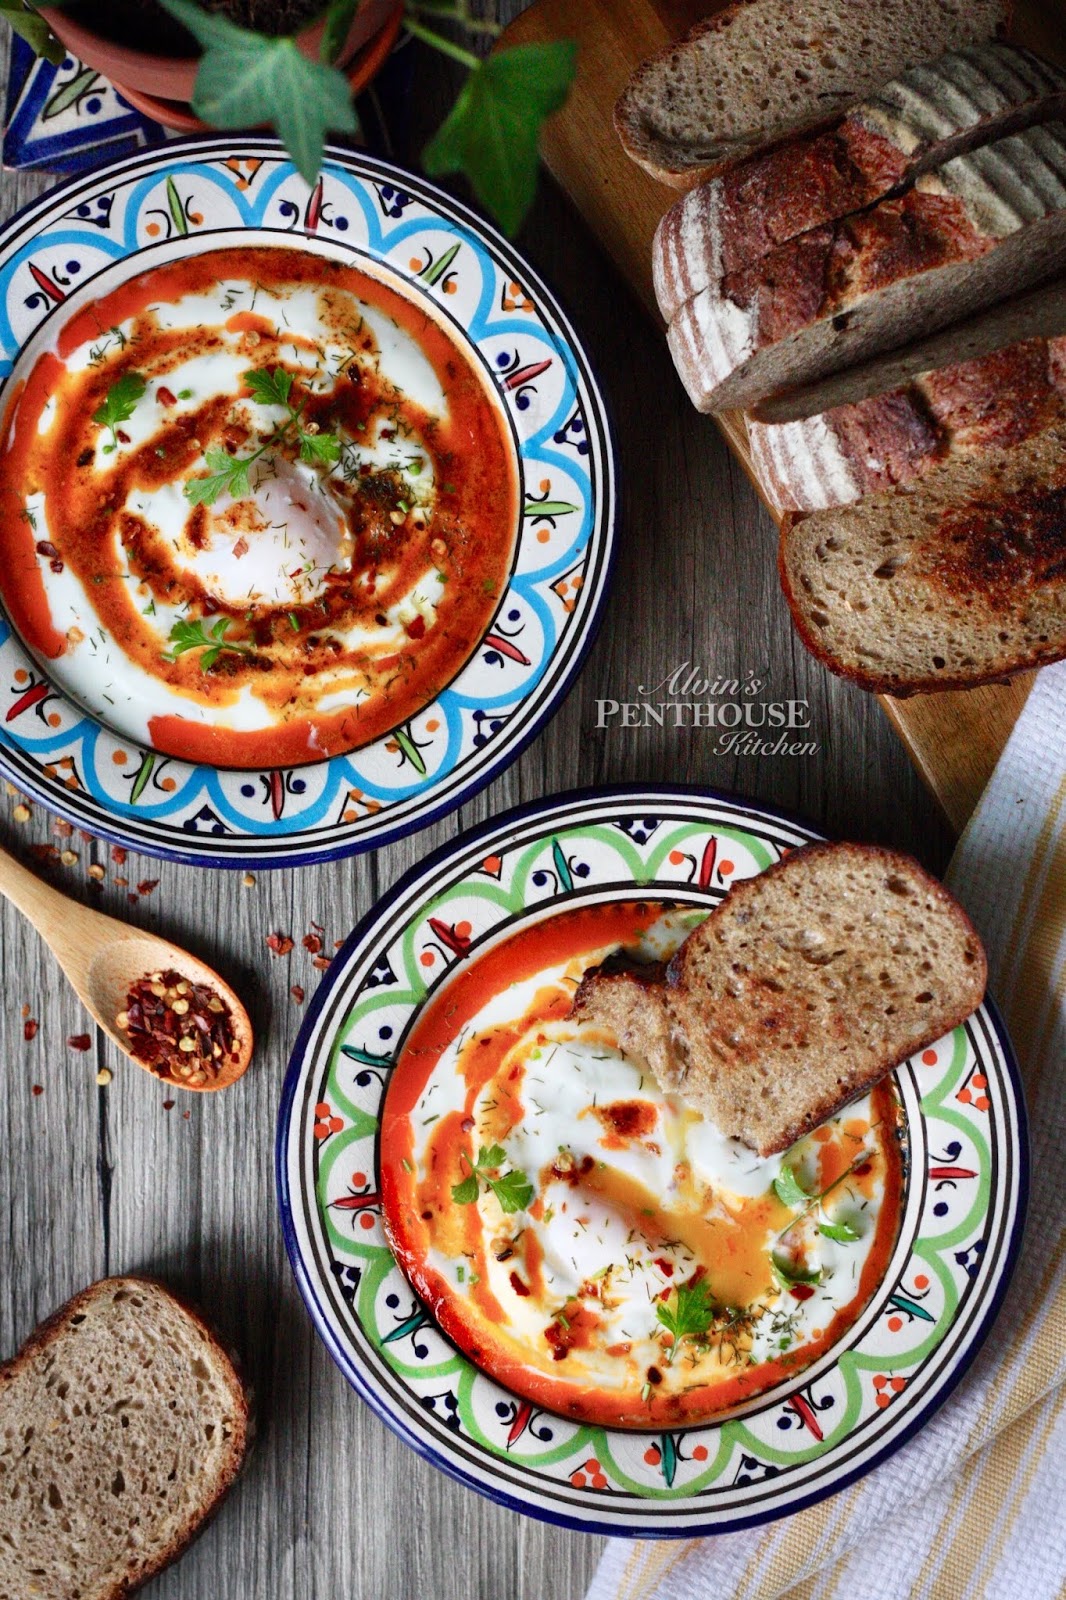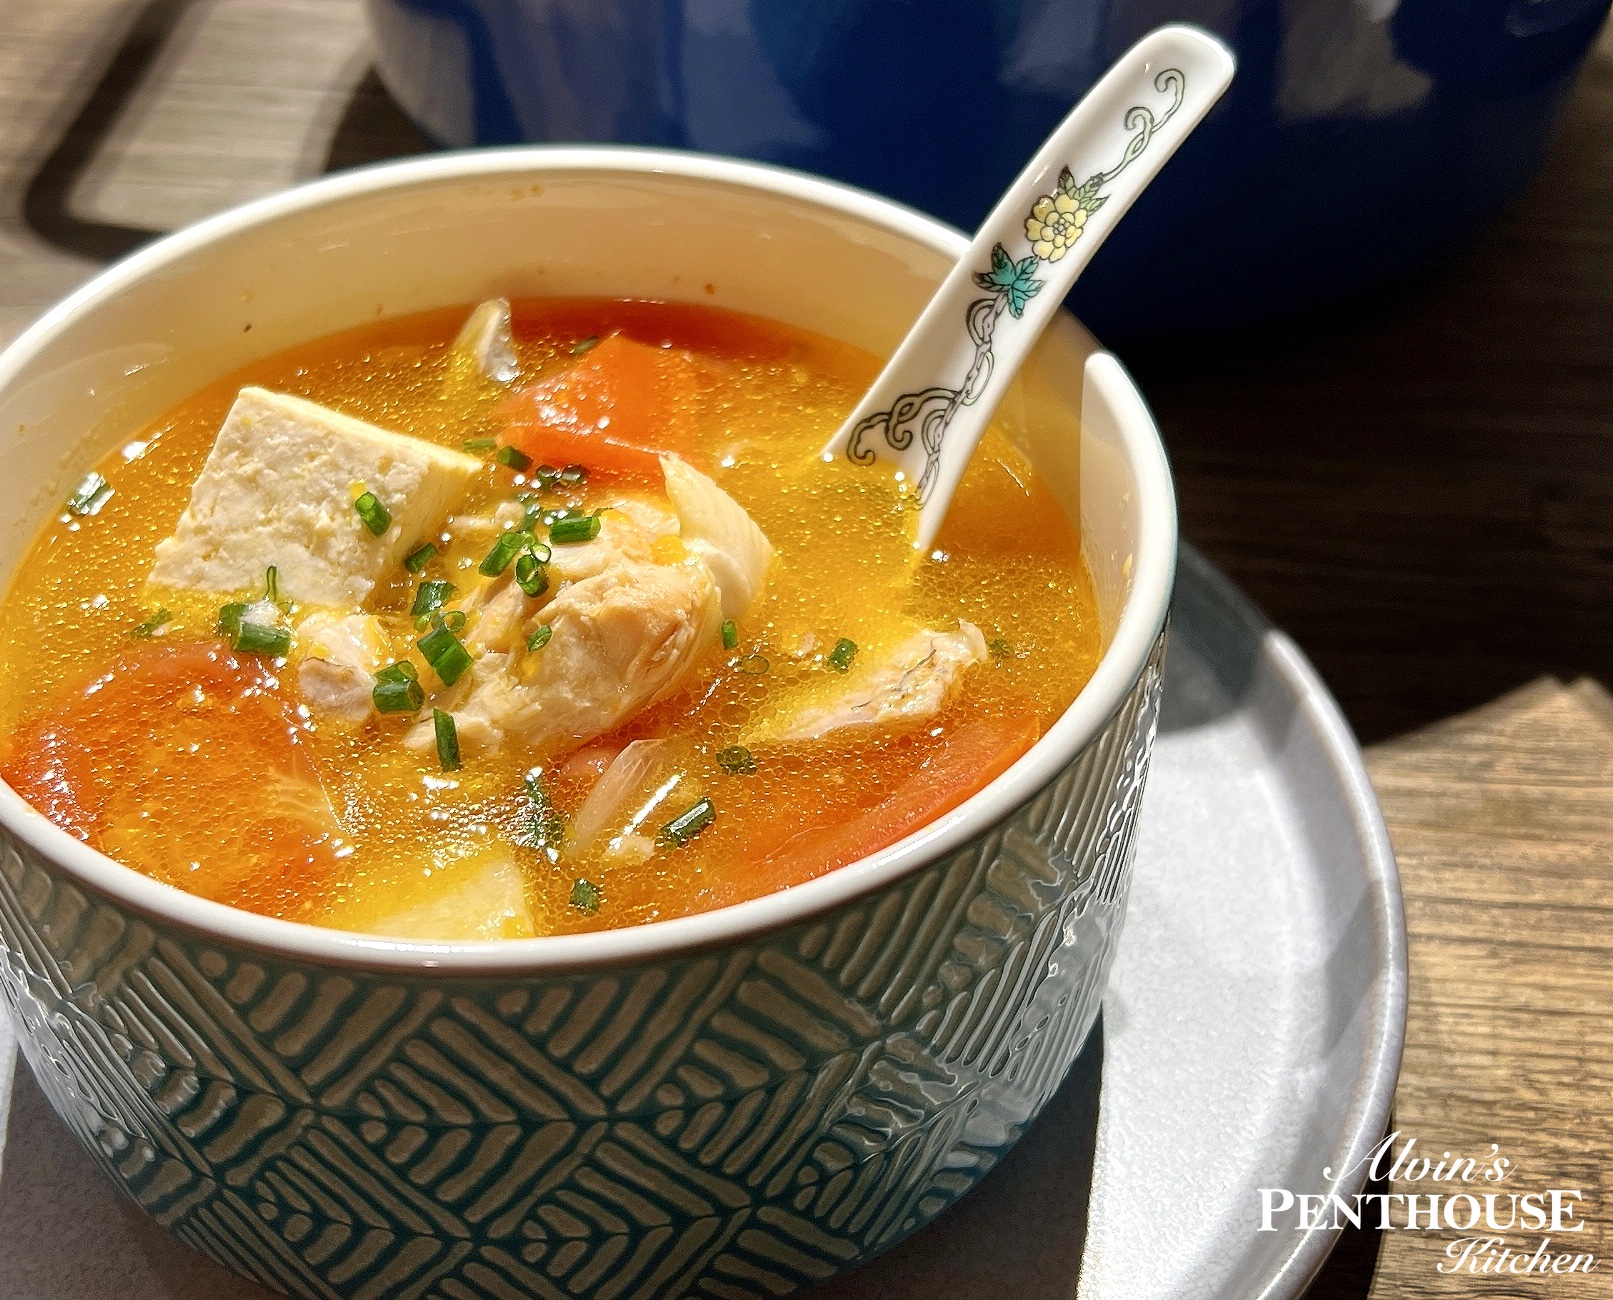
Showing posts with label Easy meal for one. Show all posts

Monday, August 19, 2024

Salmon Fish Head Soup with Tomato, Potato, and Tofu|番茄薯仔豆腐三文魚頭湯

I
t has been four years since my previous post, and during this time, the world, particularly Hong Kong, has experienced unimaginable changes. My own life has also taken drastic turns, a tale that I may save for another day.
 
Even though I may have taken a step back from this blog which I once poured my heart and soul into building, my love for cooking and sharing recipes remains unwavering.
 
With the increasing demands of running two start-ups around the clock, my time in the kitchen has significantly diminished. This has led me to fall into the unhealthy cycle of eating poorly. At times, I find myself going back to my blog to find inspiration for a simple and efficient meal prep idea that can see me through the week.

And this, my friends, is precisely the reason why I launched this blog ten years ago.
 
Given my time constraints, tight budget, and desire for healthy homemade meals, efficient and simple cooking is crucial. Lately, I've fallen in love with making a particular soup that is not only nourishing and comforting, but is also remarkably easy to make. This soup serves as a satisfying and complete meal that ticks all the boxes. I make enough to feed a village (enough to last me for up to 5 meals), portioned into containers that conveniently pop straight into the microwave.

While I may currently not have the luxury to indulge in a full-blown food photography session – a process I absolutely relished but which can span days from preparation to post-production – I still wanted to share this recipe not just for my personal keepsake, but also with every one of you who, like me, yearn for a heartwarming and nutritious meal at home.
 
So now, enough talk. Let's dive straight into this incredible soup! While this wasn't a soup I regularly had growing up, it's certainly one that I am very fond of. The distinct flavor and aroma of salmon; the classic combo of potatoes and tomatoes in a broth which forms the foundation of numerous childhood meals. While one can stick to just these three main ingredients, I like to add onion, carrots, and pumpkin to further boost the natural sweetness and nutritional value of the soup, turning it into a wholesome, all-in-one meal.

Ingredients: Servings for 5
1 salmon fish head, split in the middle, gills removed
1/2 inch ginger, sliced
1 brown onion, coarsely sliced
5 medium tomatoes, cut into wedges
1700 ml hot water
2 potatoes
1 block firm tofu, cubed
10 black peppercorn
1 teaspoon cooking oil

Optional Add-ins:
Carrots
Pumpkin or butternut squash

Directions...
1. Use paper towels to pat the fish head dry. Heat a large, heavy bottomed pot or dutch oven over medium high heat. Add oil and lightly fry ginger slices until fragrant. 

2. Add fish head, flesh side down, and salt generously. Nestle sliced onions around the fish head, gently stir to coat in oil. Let sizzle undisturbed, then carefully flip the fish head, salt, about 2 minutes on each side.
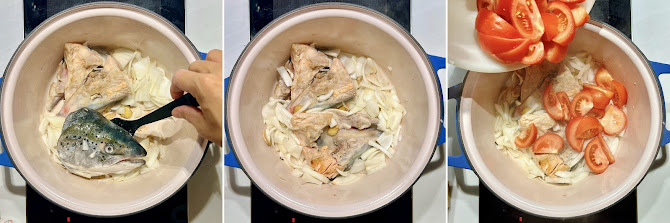
3.  Add tomato wedges and black peppercorn, pour in the hot water, cover with lid and cook over medium heat for 5-8 minutes.

4. Peel and cube the potatoes, carrots, and pumpkin if using. Add to soup and bring to a boil, then reduce the heat to a simmer for 20 minutes or more if you like your potatoes very tender and the pumpkin entirely dissolved. Add tofu and let cook for several more minutes. Enjoy!


This soup is bursting with so much flavor that no additional seasoning is necessary.Savor the tender chunks of salmon, the sweetness from onions, pumpkin, and tomatoes, and the satisfaction of treating yourself well. And, did I mention that there's minimal cleanup required?
Tried this recipe?
Share with me or leave a comment below! Tag #alvinspenthousekitchen.
Find me on Instagram @alvinckl and @alvin.penthousekitchen!

Wednesday, March 25, 2020

Bircher Muesli: Overnight Oats | 什錦果麥早餐

附中文食譜
The first time I've ever tried Bircher muesli was actually on an inflight breakfast tray - the bowl of oats was creamy, delicious, and feels healthy - and after a second helping it also kept my belly happily and reasonably full. Bircher muesli took on the name of a Swiss physician named Maximilian Bircher-Benner, who in around 1900 encouraged his patients to have a diet rich with raw fruit and vegetables to cure their ailments, and developed a breakfast that is till today popular throughout Switzerland and Germany.

In a hurry in the morning? Pack the muesli in a container the night before and take it to go in the AM!
Unlike oatmeal porridge cooked on stove top (a common breakfast even in Hong Kong), Bircher muesli requires no cooking but rather soaking raw oats overnight, allowing the grains to absorb the liquid and soften enough to eat uncooked, hence the name overnight oats. The virtue of overnight oats is really in its ease of preparation - all it takes is just minutes to stir everything together the night before and there you have a nutritious breakfast always on standby for the rest of the week. It is perfect for early mornings or for breakfast on the go. And though Bircher muesli is called overnight oats, all you really need is several hours to let the oats soften sufficiently.

All it takes is just minutes to stir everything together the night before- brekkie is ready in the morning.

Packed with slow-release energy, protein, fruit and seeds, this easy overnight oats recipe is a complete breakfast to get your day started and keep you going until lunchtime. The recipe provides the base for countless variations - customize your Bircher muesli with any seeds and nuts, seasonal fruits, and choice of dairy or plant-based milk. The addition of chia seeds not only gives a major protein boost, it also gives the muesli a rich creaminess. Experiment with mixing in yoghurt, applesauce, or even nut butter. As far as toppings go, you can use just about anything your heart desires for fruit and nuts.

Bircher muesli is typically enjoyed chilled, making it perfect for warmer months
Ingredients
1 cup (100 g) whole rolled oats
1 1/2 tablespoon chia seeds
1 tablespoon pumpkin seeds
Small handful of dried cranberries, raisins, or goji berries
1 apple
1 1/2 cup milk of choice
A dash of pure vanilla extract, optional
A drizzle of maple syrup, optional

Directions
Peel and coarsely grate half the apple, reserving the other half for the morning. Combine all ingredients in a bowl and mix thoroughly. Cover and place in the fridge overnight or at least for 1 hour. When ready to serve, stir through the muesli and top up with a splash of milk if desired. Top with freshly grated apple, berries, nuts and seeds, granola or any toppings as desired or enjoy as it is!

Tried this recipe?
Share with me or leave a comment! #alvinspenthousekitchen 
Find me on Instagram @alvinckl and @alvin.penthousekitchen and follow my Facebook Fan Page!

【 什錦果麥早餐 】  


材料:
燕麥片               100 克
奇亞籽               1 1/2 湯匙
南瓜籽               1 湯匙
各式乾果           適量(蔓越莓、提子乾、杞子)
蘋果                    1 個
牛奶或植物奶  350 毫升
純雲呢拿香精  數滴(可免)
純楓糖漿           隨喜好(可免)

做法:
將半個蘋果去皮,刨成絲,另一半留起備用。把所有材料放入碗內,拌勻。蓋好後放入雪櫃存放一整夜或最少一小時。可存放三天。翌日享用時,拌勻並隨喜好加上新鮮蘋果、香蕉、各式鮮莓和堅果。


Tried this recipe?
Share with me or leave a comment! #alvinspenthousekitchen 
Find me on Instagram @alvinckl and @alvin.penthousekitchen and follow my Facebook Fan Page!

Tuesday, June 25, 2019

Sweet Potato and Bacon Waffles | 蕃薯煙肉窩夫

附中文食譜
Growing up, waffles were hardly part of my breakfast repertoire. We didn't grow up with a waffle maker at home. Although Hong Kong-style waffles were sold everywhere at hawker stands - generously slathered with peanut butter and condensed milk and sold side by side with egg puffs - I never really developed strong memories of waffles since street food was strictly off limits in my family.

Much in the same way as American style pancakes, waffles always felt to me like empty calories heavy with flour and laden with sugar - nothing more than a vehicle for the river of syrup or pat of butter, or the occasional bells and whistles.

Things started evolving for me when fried chicken and waffles became a thing in the U.S., something of a national obsession really. Don't get me wrong - chicken and waffles have been around for ages, with origins purportedly rooted in the South, but the formidable duo has seen a revival of late as brunch grew to become the top trend in American cuisine and beyond. In an instance, the humble waffle has been propelled to the center stage and under the global spotlight as an increasing number of restaurants worldwide are adding the combo to their menu and coming up with their own signature variations, be it savory or sweet. Waffles were no longer just for breakfast; neither are they simply just plain or sweet. My attitude towards waffles shifted. Next thing I know, I developed a craving for fried chicken and waffle and make a beeline for my favorite spot every time I land in New York.

End of last year, I picked up a multi-function sandwich maker at an appliances blowout sale that came with a waffle griddle. The machine hasn't seen daylight since until this past weekend when I decided a lazy "brunch for dinner" was in order for my little get-together with a couple of good friends. And by lazy, I mean it was just going to be waffle and gazpacho, no cooking required. I wanted the waffle to be the main event, something that was at once comforting, healthy, and satisfying. I also did not want flour to be the bulk of the waffle. So I looked to sweet potato - and sure enough - sweet potato waffles is a thing.

"Brunch for Dinner": a cozy, happy, celebratory weekend reunion!
Sweet potatoes are considered low on the glycemic index scale - meaning the carbohydrates are slowly digested, absorbed, and metabolized and do not cause a spike in insulin levels. Not only are these wholesome sweet potato waffles low in carbs and calories (make them even better for you without the bacon - but hey, baaaaacon), they are naturally gluten-free. Most recipes on the internet call for coconut flour to be incorporated into the mixture, but considering that in some parts of the world coconut flour is not readily available or is plain costly, I recommend other nut flours or cornstarch as a gluten-free substitute.


In this savory version of sweet potato waffles, bacon, spring onions and a touch of garlic powder give incredible flavor, while paprika brings subtle heat that plays off the mild sweetness in the sweet potatoes. Top the waffles with more crisp bacon, a gorgeous, runny sunny-side-up and a generous sprinkle of chopped spring onion, and finish with a light drizzle of maple syrup and hot sauce for a delicious sensory experience. Pair the ensemble with a refreshing, appetizing cup of gazpacho (recipe to come soon!) and you have a complete brunch suited for any time of the day!

What you'll need... (for two)
1 medium sweet potato (2 cups grated)
1 bunch spring onion, chopped
3 tablespoons cornstarch*
1 teaspoon paprika
1/2 teaspoon garlic powder
Large pinch of sea salt
1 slice bacon (optional)
2 eggs, beaten

To serve:
Bacon | Fried or poached egg | Avocado | Maple syrup | Hot sauce | Chopped spring onion

Note*: substitute with 2 tablespoons of coconut flour

Directions...
1. Peel and grate the sweet potato. Give the shredded sweet potato a few quick pulses in a food processor if necessary to break down any long strands. Important: lay grated sweet potato out on paper towels. Place another paper towel on top and press down to absorb as much liquid as possible.


2. Preheat waffle maker or waffle iron.

3. In a small frying pan, cook the bacon (if using) until desired crispiness, drain excess fat and crumble the bacon. In a large bowl, mix together all the waffle ingredients including the crumbled bacon until thoroughly combined.


4. Once the waffle maker is hot, grease with bacon fat or spray with nonstick spray. Spread sweet potato batter evenly onto the waffle maker, making sure it's packed down lightly. Close machine and let cook until golden brown and slightly crispy, flipping once if necessary, about 8 - 10 minutes. Remove and repeat with remaining batter.

5. While waffle is cooking, prepare toppings of choice. If making waffles in batches, lay cooked waffles on a rack and keep warm in an oven. Transfer to a plate and top with desired fixings, enjoy!

 【 蕃薯煙肉窩夫 】

一般的格仔餅啊!近年美國掀起炸雞窩夫熱潮、加上週末嘆 Brunch 的文化漸催普及化,窩夫不再只局限於早餐或作甜品~ 早餐當晚餐又何樂而不為呢? 用蕃薯製作的格仔餅鹹中帶甜,低卡高纖零麩質、不會令血糖飆升,配上培根煎蛋蘑菇和蕃茄凍湯,是完整完美的「早餐」啊!

材料(兩人份量):
蕃薯                                200 克
                                   1 小札
粟粉*                             3 湯匙
紅椒粉 (paprika)          1 茶匙
蒜粉                                1/2 茶匙
海鹽                                1/4 茶匙
煙肉                                1 片(可免)
雞蛋                                2 隻

伴碟:煙肉 | 太陽蛋 | 水煮蛋 | 牛油果 | 楓糖漿 | 辣醬 | 蔥花
備註*:粟粉可用 2 湯匙椰子粉代替,更為理想

做法:
1. 蕃薯去皮刨絲,建議用食物處理器把蕃薯絲略為打碎。
2. 蕃薯絲鋪在廚房紙上再放上另一層廚房紙,用力按壓,把多餘水份吸乾。
3. 煙肉煎香,切成碎片 (如使用)。
4. 雞蛋打成蛋液、蔥切成蔥花,保留少許綠色部分作裝飾用。
5. 把所有窩夫材料拌勻備用。
6. 窩夫機預熱,掃上少許油,鋪上適量蕃薯蛋漿,蓋好烘至呈金黃色和帶脆,約 8 - 10 分鐘。伴上自己喜歡的配料,即成!

備註:如分批製作窩夫,建議將弄好的窩夫平放焗爐架上用微溫保暖。

[Follow me on Instagram @alvinckl and @alvin.penthousekitchen and check out my Facebook Fan Page!]

Monday, May 20, 2019

Turkish Eggs | 土耳其式水煮蛋

附中文食譜
The first time I have ever tried Turkish eggs was, strangely, not in Turkey, but in Brisbane, Australia, at a cozy, two-storied cafe overlooking a sunny suburban street lined with boutiques and bakeries. To anyone who has never had Turkish eggs, or Çılbır, pronounced as "chulburr", the idea of laying a poached egg on Greek yogurt may raise an eyebrow or two. Add on top a drizzle of chili-infused melted butter, the concept seems to take "odd" farther up a notch. Creamy, tart, oozy, savory, then spicy, too? The idea of Turkish eggs appears to throw our notion of a familiar brunch into shambles.


But before you resort to the comfort zone with the likes of Eggs Benedict, I urge you to give this dish a try. Because with just one try it had got me hooked. The soft poached egg, with its silky egg whites, melds beautifully into a thick and creamy and slightly tart Greek yoghurt that is laced with garlic and sometimes dill. Butter is then melted and infused with chili then drizzled over the dish, imparting an extraordinary depth of flavor and giving a luxurious, aromatic kick. As you poke into the egg, luscious yolk oozes out like liquid gold, bringing the heavenly sensation to the next level. To scoop and soak up every last smear of yolk and yoghurt, thick, crusty, griddled sourdough or even warm naan would most certainly do the trick.

Word is that Çılbır originated as a breakfast staple in Eastern Turkey. I do not recall seeing this dish on menus around town in the iconic Istanbul (but then it was nearly a decade ago when I visited and I was mostly staying at budget guesthouses), but it is definitely making an increasing appearance at brunch restaurants around the world. A small breakfast cafe in West London easily charges this dish for £9, but you can just as easily prepare this dish at a fraction of the cost at home.

Aleppo (a mild Turkish red pepper flake) is traditionally used in making the chili-infused butter for this dish, but if unavailable, substitute paprika and a pinch of crushed red pepper flakes for no less a bang in flavor. While dill is not required on Turkish eggs, I personally find using some fresh or dried dill adds an uplifting herbaceous note and complexity to the dish.

After all, creamy, tart, oozy, savory, and spicy isn't just incredible; it is - in Nigella Lawson's words - "a revelation and a complete sensation."

What you'll need... (serves 2)
200 g Greek yoghurt
1/2 clove garlic
A few fronds of fresh dill, or a pinch of dried dill
2 tablespoons butter
1 tablespoon olive oil
1 teaspoon paprika
1 pinch crushed red pepper flakes
2 eggs
1 tablespoon white vinegar
Thick sourdough toast, to serve

Directions...
1. Using a fine grater, grate half a garlic clove and whisk into the Greek yoghurt with a small pinch of dried dill, if using. Set aside and allow the yoghurt to come to room temperature.

2. Gently melt butter in a small pan until it begins to turn into an aromatic, nutty brown. Stir in the olive oil, then add paprika and red pepper flakes and leave to infuse over a low heat. Turn heat off and set aside to cool.

3. Bring a pot of water to a simmer. Add the vinegar and make a swirl with a large spoon. Break cold egg into a small dish or saucer. Holding dish just above the simmering water, gently slip egg into the water. Poach for 3 mins until set, transfer egg with a slotted spoon to some kitchen paper to drain. Repeat with the other egg.

4. To serve, divide the yoghurt into two warm bowls, top each with a poached egg, then drizzle over the chili-infused butter. Season and scatter over some dill and crushed red pepper flakes and dig in with thick slices of crusty bread!

Note: I prefer grating the garlic here over finely chopped garlic as the flavor melds more readily into the yoghurt and it also reduces the chances of biting into pieces of raw garlic.

【 土耳其式水煮蛋 】


多年來眾人熟悉的 Eggs Benedict 一直被視為悠閒週末 brunch 之首選,是時候跳出框框了!話說有次在外國試過 Turkish eggs,嫩嫩的 poached egg 配上綿綿的香草乳酪再淋上香辣牛油,跟厚厚的吐司一起吃,味道配搭新奇刺激、口感一流,有別於傳統早餐菜式,可說是一見鍾情啊~ 急不及待回家研製、同大家分享食譜啊!

材料(二人份):
希臘乳酪                 200 克
蒜頭                         半瓣
刁草                         適量
牛油                         2 湯匙
橄欖油                     1 湯匙
紅椒粉 (paprika)    1 茶匙
乾辣椒碎                 適量
雞蛋                          2 隻
白醋                          1 湯匙
厚切酸種麵包        

做法:
1. 把蒜瓣磨成蓉。將乳酪、蒜蓉和少量刁草拌勻備用,待其回到室溫。
2. 牛油用慢火煮溶,期間會起泡。煮至牛油開始呈現咖啡色及聞到焦香後加入橄欖油、紅椒粉和乾辣椒碎。熄火,晾涼備用。
3. 大鍋燒滾水後轉慢火,加入白醋拌勻,用筷子輕輕攪出漩渦。小碗打入一隻雞蛋,小心把蛋倒入漩渦裡,煮約 3 分鐘後把水煮蛋盛起並放到廚房紙上吸乾水份
4. 把乳酪平均分配到兩個碗子裡後各放上一隻水波蛋。淋上辣椒牛油,再撒上刁草和乾辣椒碎,最後拌上厚切酸種麵包吐司即成!

[Follow me on Instagram @alvinckl and @alvin.penthousekitchen and check out my Facebook Fan Page!]


Tuesday, September 11, 2018

Nasu Dengaku: Miso Glazed Eggplant | 日式味噌茄子田楽焼

附中文食譜
Eggplants get a bad reputation for being bland, slimy, bitter sometimes and, worst off, they act like sponges that can soak up copious amount of oil. Well, it's time to shatter this myth! I like to see eggplants as a blank canvas ready to take on strong flavors. When cooked to perfection, these gorgeous purple aubergines are just divine - buttery, creamy, with hints of smokiness. And personally, there is no simpler and better way to cook eggplants than this foolproof recipe.

Use either red "awase" or the sweeter white "shiro" miso, or a mix of both
Nasu dengaku (なす田楽) literally translates to miso glazed eggplant, a classic Japanese dish that is usually skewered and grilled over charcoal. The sensational sweet and savory miso glaze livens just about anything, from fish to tofu to daikon radish. Slathered on eggplants, the result is irresistible. It is said that the name dengaku comes from dengaku bōshi (田楽法師), a stilt dancer that performed for the god of rice fields during rice planting. Since skewered tofu resembles the stilted performer, the name dengaku has taken hold since to describe this dish preparation. Forgetting the hassle of operating and cleaning a grill at home, you can easily pan fry the eggplants (with just a teeny bit of oil!) for a few minutes and finish them under a broiler until the miso glaze bubbles and gets that beautiful caramelization.

Watch as the miso glaze bubbles and caramelizes under the broiler... absolutely tantalizing!
An inexpensive, simple dish that makes use of everyday Japanese seasonings
Needless to say, this recipe has entered my repertoire for quick, easy weekday meal ideas. Simply serve with steamed rice, dressed tofu and a light salad for a healthy, plant-based meal or, to jazz things up a bit, serve together with Mentaiko Pasta for a simple, Japanese-inspired lunch!

What you'll need...
2 small eggplants, or 1 Chinese eggplant
Cooking oil
2 tablespoons water
Chopped scallions, for garnish
Sesame seeds, for garnish

For the miso glaze:
3 tablespoons miso paste
1 tablespoon white, brown, or coconut sugar
1 tablespoon mirin
1 tablespoon sake

Directions...
1. Prepare the miso glaze by whisking together the ingredients.


2. Slice eggplant in half lengthwise and score the flesh with a knife. In a non-stick pan over medium high heat, add oil (I like to use a pastry brush directly on the eggplants for a more even coating) and cook the eggplants flesh-side down. Once browned, flip the eggplants over and cook until begin to soften. Tip in water and cook covered on high heat till the water cooks off, about one minute.

3. Transfer eggplants to a lined baking tray flesh side up, brush evenly with miso glaze, and place in the oven with the broiler function on. Grill for 8-10 minutes, until the miso glaze caramelizes. Remove from oven, garnish with sesame seeds and chopped scallions, and you're done!
 

【 日式茄子味噌田樂燒 】

子,不少人認為它味淡、煮起來軟爬爬、外皮又帶苦澀,最重要它還會像海綿,吸收大量油分,極不健康。不過,由這刻開始,我會把這些負評通通粉碎掉!
茄子,就像一塊空白的畫布,準備着迎接強烈的調味。只要你烹煮得完美,在柔滑軟綿的口感下,會略帶一絲煙熏味,我認為,已沒有比以下的炮製方法更好更簡單方便了。
據說「田樂」這名字來自一位法師。從前在農耕的慶典上,有位穿上白袍披上深色法衣的法師,為歌頌稻田之神而踩上高蹺跳舞。因這身裝束,就像醬烤的豆腐串,於是有人便以法師的名字「田樂」為豆腐串取名。當然,今天的田樂燒已不只是豆腐了,由魚到邏蔔到茄子也有。(文章翻譯:鄒家鳳)

材料
茄子                  2 小隻
味噌                  3 湯匙
砂糖或紅糖     1 湯匙
                  1 湯匙
清酒                  1 湯匙
                      適量
                      2 湯匙
蔥花                 適量
芝麻                 適量

做法
1. 把味噌、糖、味醂和清酒拌勻備用。
2. 茄子對邊切開,用小刀𠝹十字面,讓醬汁更輕易入味。
3. 燒熱易潔鍋,下油並以中高火煎香茄子至輕微焦香。
4. 把茄子反轉,繼續煎數分鐘。
5. 加入 2 湯匙水,蓋上鍋蓋煮至水份完全蒸發,約一分鐘。
6. 把茄子放在鋪好烘培紙的烘盤上,塗上味噌醬汁,再放入焗爐以上層發熱線烤焗 8 - 10 分鐘至茄子軟稔、醬汁輕微烤焦。最後,撒上芝麻和蔥花,完成! 

簡易和風午餐:味噌燒茄子、明太子意大利粉、麻醬冷豆腐和田園沙律!
[Follow me on Instagram @alvinckl and @alvin.penthousekitchen and check out my Facebook Fan Page!]

Sunday, April 15, 2018

Lemon Chicken Piccata with Zoodles | 檸香酸豆煎雞胸配意瓜麵

附中文食譜
When I am strapped for time or looking to throw together a simple and fulfilling dinner with a visiting friend, Chicken Piccata is my go-to recipe. Chicken Piccata is really nothing more than chicken breast cutlets dredged in flour, browned, and served with a lemony sauce interlaced with white wine, capers and enriched with butter. It sits beautifully with any type of pasta, potatoes - or, if you are looking to really whip up the meal even faster while also cutting down on carbs - "zoodles". The entire dish comes together in a flash, just under twenty minutes. And the extra perk? It comes together all in one skillet! I think I need not explain further why there is always a jar of capers standing by in my fridge.

Pair Chicken Piccata with any pasta, potatoes, or "zoodles" for a healthier and even quicker alternative!
Freshly picked Meyer, Lisbon, and regular lemons from Kelley and Ilaria's backyard in San Francisco!

Chicken Piccata isn't a dish you would typically find in many Italian restaurants. My first encounter was at the Cheesecake Factory in San Francisco, a dish whose intense flavors soon grew into a craving that compelled me to try making at home. My adapted version is slightly lighter, however, without the addition of cream to the sauce. For an extra punch, I charred some lemon slices, which not only gives depth to the sauce but also looks gorgeous on the plate. But if you are really strapped for time, you can altogether skip the charred lemons and omit the dredging for the chicken breast. Just don't ever skip pounding the chicken breast though, as this will ensure even cooking and help making this dish ready in a flash. Enjoy!

What you'll need...
Zoodles make for a quick, healthy alternative
2 chicken breast, boneless and skinless
Salt and pepper
Flour for dredging
1 lemon, cut into thin rounds
1 teaspoon white sugar
2 tablespoons butter, divided
1 teaspoon vegetable oil
2 cloves garlic, minced
200 g brown mushrooms, sliced
1 large zucchini*, spiralized
1/3 cup dry white wine
1 heaping tablespoon capers
1 tablespoon fresh lemon juice
Fresh chopped parsley

*Note: Alternatively serve with your favorite type of pasta. Just skip the step of cooking the zoodles.

Directions...
1. Combine lemon slices and sugar in a bowl.

2. Butterfly the chicken breast. With one hand flat on top, slice horizontally into one side of the breast, starting from the thicker end and finishing at the thin point. Open the breast up like a butterfly, and slice into two cutlets. Repeat with the other breast. Place the chicken breast between cling film and pound thin to even thickness with a meat pounder. Season with salt and pepper then dredge in flour.

Haven't got a meat pounder? Make use of anything from rolling pins to pestles!

3. Heat a skillet over medium heat and add oil and one tablespoon of butter. Cook chicken until brown on both sides, remove from pan.

All in one skillet and ready in a flash, with no wiping or washing in between!

4. Add garlic and mushrooms and cook, stirring, until mushrooms are lightly browned and all moisture has evaporated, about 4 minutes. Add zucchini noodles to skillet and saute for a brief minute. Season with salt and pepper and remove from pan.

5. In the same pan, add the sugared lemon slices and let cook, flipping once, until both sides are lightly charred, about one minute. Reserve any liquid the lemon slices give off in the bowl for the next step.

The aroma of wine, tartness of lemons, and sharpness of capers meld beautifully with the richness of butter

6. Deglaze the skillet with white wine, scraping any browned bits off with a wooden spoon. Stir in capers, lemon juice, the lemony liquid, and remaining butter. (For a thicker sauce, mix equal parts flour or cornstarch and cold water and stir until a smooth paste forms. Whisk into sauce and bring to a simmer.) Return chicken and any juices to the pan and turn to coat with sauce. Serve with zoodles and mushrooms. Top chicken with charred lemon and drizzle with sauce and finish with a sprinkle of parsley. Buon appetito!

《檸香酸豆煎雞胸配意瓜麵》

材料:
無骨去皮雞胸      2 件
黑胡椒          適量
麵粉                       適量
檸檬                       1 隻,切片
砂糖                       1 茶匙
牛油                       1 加 1 湯匙
菜油                       1 茶匙
蒜瓣                       2 瓣,剁碎
啡蘑菇                  200 克,切片
意大利翠玉瓜*   1 大條
白酒                       80 毫升
酸豆                       1 湯匙
新鮮檸檬汁          1 湯匙
                       適量,剁碎

做法:
1. 翠玉瓜用螺旋切片器切成絲帶狀備用。檸檬片和砂糖拌勻備用。
2. 雞胸肉開邊: 用一隻手按著雞胸,另一隻手持刀打橫切,開邊。蓋上保鮮紙,用肉槌輕拍至平均厚度。用鹽和黑胡椒調味,再沾上麵粉備用。
3. 燒熱易潔平底鍋,下 1 湯匙牛油和 1 茶匙油,中火將雞胸每邊煎約兩分鐘至金黃色,盛起備用。
4. 原鍋下蒜蓉和蘑菇,炒至收水,約 4 分鐘。加入翠玉瓜絲帶,迅速炒 1 分鐘, 調味,盛起備用。
5. 原鍋下檸檬片,煮至兩邊呈金黃色,約共 1 分鐘。盛起備用。保留碗子裡面的檸檬糖水。
6. 原鍋下白酒、酸豆、新鮮檸檬汁以及保留了的檸檬糖水、和其餘 1 湯匙牛油。(喜歡比較濃稠的汁的話可以打獻)雞胸回鍋,將兩邊沾上醬汁後連同蘑菇、翠玉瓜意粉和檸檬片上碟,淋上醬汁再撒上蕃荽碎即成!

*備註:不用意瓜的話,也可用傳統意大利粉代替啊!

[Follow me on Instagram @alvinckl and @alvin.penthousekitchen and check out my Facebook Fan Page!]

Tuesday, July 25, 2017

Lemongrass and Turmeric Fish en Papillote | 香茅黃薑紙包魚

附中文食譜
One of those nights when you just want to throw a few things together and make a simple, light but well balanced dinner and catch up on Netflix... fish en papillote is the way to go. As flashy as the name sounds, cooking en papillote - or cooking in a packet - is a classic French technique that is fancy enough for a restaurant yet works wonders at home. All you need is parchment paper or foil to create an enclosed pouch that cooks the food in its own juices inside an oven. With little effort, you can have a meal ready in under twenty minutes. What's more, serve the packet straight from the oven and you've got one less plate to wash!

This fish recipe brings in vibrant flavors of Vietnam. Cooking the fish in a pouch ensures moisture while infusing the flavors of lemongrass, ginger, garlic, and turmeric. Any white fish such as halibut, cod, or flounder will work beautifully. For an easy, well balanced meal-in-one, layer some vegetables such as sliced mushrooms, zucchini, carrots, kale, broccoli, onions, or asparagus underneath the protein. Best served with a side of brown rice or quinoa!


For quick step-by-step instructions in Cantonese for making this dish, check out this video! I recently had the opportunity to work with Bosch at their flagship showroom in Central, Hong Kong - making it my second time to ever speak in front of a camera! A great big thank you to Bosch for this precious opportunity.
What you'll need...
140g Hoki fillet (or any other white fish)
2-3 stalks lemongrass
2 garlic cloves, minced
1/2 inch ginger, minced
1 bird's eye chilli, deseeded and minced
1/8 teaspoon ground turmeric
1 small lime, cut into wedges for juice and garnish

Directions...
Prepare the spice mixture: Trim the green ends and the base of the lemongrass stalks and peel away the tough outer layers. Using a pestle or the blunt side of a knife, bruise the stalks to release the flavor then slice into thin rings. In a small bowl, mix together the lemongrass, garlic, ginger, chili, and turmeric. Add a squeeze of lime then, using a pestle, pound the mixture until fragrant and combined.


1. Preheat oven to 180C/350F.
Take a sheet of parchment paper roughly 15 inches in length, scatter vegetables (if using) across its width, season with salt and pepper. Lay the fish fillet on top, leaving enough paper overlapping to seal in the fish.

2. Top the fish with the spice mixture and lightly season with salt and pepper. Fold the parchment paper over and roll the edges in tightly into an air-tight parcel. Bake for 13-15 minutes, depending on the thickness of the fish.

3. Unwrap the parcel and garnish fish with some coriander, mint, and a lime wedge. Enjoy!

《香茅黃薑紙包魚》


今次示範煮充滿越南風味的《香茅黃薑紙包魚》,
這道菜的食材和做法超級簡單,
只需 15 分鐘烹調時間、健康有營、低鹽無油,
容易清潔,洗碗無難度,最適合忙碌但追求健康的您!

材料:
新西蘭鱈魚柳  140 克
香茅  2-3 枝
蒜頭  2 瓣
 半 寸
指天椒  1 隻
黃薑粉  1/8 茶匙
青檸  1 隻(切角)

做法:
1. 首先將香茅青色部分及根部約 1 公分切除,脫除乾硬的外葉。在針板上用研磨棒捶打香茅數下至軟身,然後把香茅剁碎。
2. 蒜瓣和薑剁碎、指天椒去籽剁碎。放到碗中跟香茅拌勻。
3. 加入黃薑粉和少量青檬汁,然後用研磨棒舂至完全混合。
4. 預熱焗爐至 180C。魚柳洗淨,用吸水紙印乾。
5. 準備一張約 15 寸長的牛油紙,對摺後攤開。
6. 把魚柳放在摺痕其中一旁,鋪上香料後撒上少量鹽和胡椒。
7. 把牛油紙對摺,將邊緣捲好,成為一個密封的包裹。
7. 將包裹放入焗爐焗 13-15 分鐘。取出後打開,隨意拌上青檸角、芫茜、薄荷葉等即成!

備註:如慾輕鬆炮製出一個完整的健怡餐,可以在焗魚柳時同時放入各種蔬菜,例如菇類、翠玉瓜、甘筍、羽衣甘藍、西蘭花、洋蔥、蘆筍等等。在牛油紙上先鋪放蔬菜並撒上少量鹽和胡椒調味,再放上魚柳。建議拌上糙米或藜麥。

[Follow me on Instagram @alvinckl and @alvin.penthousekitchen and check out my Facebook Fan Page!]