Showing posts with label Pork. Show all posts

Monday, September 2, 2019

Kor Moo Yang: Thai Grilled Pork Neck | 泰式燒豬頸肉

附中文食譜
My memories of Bangkok often conjure up images of lively, cacophonous markets; of thoroughfares routinely jammed with brightly colored cabs; of fearless motorbike taxis zipping dexterously through the traffic; and of course, images of the myriad street food the city is known for. Char-grilled pork skewers, Isaan sausages, fried chicken, soup noodles of all sorts, banana and egg roti are surely no strange sight to street food aficionados and starving food seekers in Bangkok.

Happy street food crawl in Happy Land Market, Bangkok
Turn this humble and inexpensive cut of pork into a delectable household favorite!
Fringing Happyland Center, a bustling food market frequented by only locals in the Bangkapi district, there is a street lined with fruit vendors, Thai bubble tea makers, a sweets and desserts stall, and countless other street food vendors that spill onto adjacent alleys. In one corner, a faded and slightly worn green metal open pit oven stands, spewing smoke into the already hot and muggy streets. Inside the oven are slabs of marinated pork neck, pork jowl, and juicy chicken legs grilling and glistening over hot charcoal, the meats occasionally turned and flipped and altogether replaced once cooked and ready for sale. There I always stand, about a meter away from the side, taking the sight and smells in, drooling while sweat profusely drips from my temples down my chin. I have been to this market more times than my fingers can count, in search for the most genuine street foods served to locals and priced for locals, but still this green oven captivates me every single time. 

Kor Moo Yang (คอหมูย่าง), or grilled pork neck, is to no surprise a Thai favorite found everywhere from food centers to streets and restaurants. In Hong Kong, this dish is served in just about every Thai restaurant, making up one of the few standard starters that every Hong Konger knows when going out for Thai food.

Pork neck is probably one of my favorite cuts of meat, layered with just the right balance of lean meat, fat, and muscle, giving a crunchy chew that is oh so flavorful even with the simplest marinade. Besides, pork neck is also much more forgiving than the leaner cuts so the chances of overcooking is rare.

Of all the street foods out there in Bangkok, Kor Moo Yang is one that is easy to replicate at home, even without a charcoal grill. Simply prepare the marinade and marinate the pork overnight, then pop the slabs into a hot oven and you will soon be swooning over the heavenly aroma of a Thai barbecue. The addition of palm sugar in the marinade not only adds depth and sweetness, but also increases the caramelization on the surface of the meat (I'll be first to dive shamelessly for the charred, crispy bits). As with most marinades, the following is just a guideline. Feel free to toss in some finely chopped kaffir lime leaf or shallots for variation in flavor! For those of us lucky enough to have a barbecue on a patio, this recipe is also perfect for a quick grill.  Try this marinade on chicken wings and pork chop!


Thinly slice pork neck at a 45° angle across the grain for best results
I swear this grilled pork neck is going to taste better than any you have tried in a restaurant. While the meat is already flavorful enough to enjoy on its own, the dish is not complete without a Nam Jim dipping sauce! Kor Moo Yang can go with just about any variation of Nam Jim. Click below for my recipe.

Nam Jim: Thai Dipping Sauce

What you'll need...
500 g pork neck
2-3 stalks lemongrass, white parts only, finely chopped
2 cloves garlic, finely chopped
2 cilantro roots or 4 cilantro stems, chopped
2 teaspoons palm sugar
1 tablespoon oyster sauce
1 tablespoon fish sauce
Nam Jim

Directions...
1. Trim excess fat off the pork neck.


2. In a mortar and pestle or food processor, pound lemongrass, garlic, and cilantro roots or stems into a paste. Add palm sugar and pound until dissolved. Add oyster sauce and fish sauce and stir to combine. Pour marinade over the pork neck and coat well, refrigerate for at least two hours or overnight for best results.


3. Remove pork neck from the refrigerator about 20 minutes prior to cooking. Preheat oven to 200C/400F. Line a baking tray with baking paper and grill pork neck for 15 minutes. Flip and continue grilling for 10 minutes or until slightly charred on the outside. Cooking time will vary depending on the thickness of the pork neck.

4. Allow pork neck to rest for 5 minutes. To serve, slice the pork neck thinly across the grain, angling the knife at 45 degrees if the pork neck is particularly thin. Serve warm with Nam Jim. Enjoy!

Tried this recipe?
Share with me or leave a comment! #alvinspenthousekitchen 
Find me on Instagram @alvinckl and @alvin.penthousekitchen and follow my Facebook Fan Page!

【 泰式燒豬頸肉 】

老老實實,有邊次去泰國餐廳唔點燒豬頸肉先? 爽口彈牙、香口又惹味,只需預先醃好和焗爐一部,在家都能夠造出曼谷街頭、炭香四溢的正宗泰式燒豬頸肉!再配上自家製泰式酸辣蘸汁,風味絕佳。 這好可能是您食過最好吃的燒豬頸。

材料:
豬頸肉                      500 克
香茅                           2-3 根
蒜頭                           2 瓣
芫荽根部                  2 根(或以適量芫荽莖代替)
棕櫚                      2 茶匙
蠔油                           1 湯匙
魚露                           1 湯匙
泰式秘制酸辣蘸汁 

做法:
1. 把豬頸肉洗淨,將過多的脂肪除去備用。
2. 把香茅白色部份切成小圓圈後剁碎。將蒜瓣和芫荽根或莖剁碎。
3. 用研缽和研棒或攪拌機把香茅、蒜末、芫荽磨成蓉。
4. 加入椰糖,繼續磨至完全溶化。加入蠔油和魚露,拌勻。
5. 豬頸肉加入醃料,放進雪櫃醃 2 小時或過夜則最為理想。
6. 烤肉前先將醃好的豬頸肉拿出來解冷約 20 分鐘。預熱焗爐至 200C/400F。
7. 豬頸肉放在鋪了烘培紙的烤盤上,焗 15 分鐘後把肉翻轉,視乎豬頸肉厚度,再烤約 10 分鐘至肉邊微焦即可取出。
8. 待豬頸肉稍涼,以 45 度角逆紋切成薄片,以蘸汁伴吃,味道絕佳!

Tried this recipe?
Share with me or leave a comment! #alvinspenthousekitchen 
Find me on Instagram @alvinckl and @alvin.penthousekitchen and follow my Facebook Fan Page!     


Monday, October 8, 2018

Bossam: Korean Boiled Pork Belly Wraps | 韓式水煮五花腩生菜包

Most of us would have tried Bossam (보쌈) at a restaurant before, a popular traditional Korean dish consisting of sliced pork belly that is cooked in a seasoned broth and eaten wrapped in leaves along with a variety of condiments. "Ssam" means wrap, and "Bo-ssam" means "wrapped" or "packaged." One theory has it that the word "bossam" evolved from the combination of two letters, 복 bok and 쌈 ssam, where bok means good fortune and together it would mean to wrap good luck in leaves. Now who doesn't like the sound of that?

The centerpiece of Bossam is of course pork belly, a succulent cut of pork that is layered with tender meat, fat, and rind that gives a toothsome chew. The pork is usually simmered for an hour or more in a seasoned broth. Here I am using a Fissler Vitavit® Comfort pressure cooker (2.5L) that not only significantly cuts down on cooking time, but also produces meat that is tantalizingly juicy and infused with remarkable flavor. Although this recipe is specially designed for the pressure cooker, it can also be made without one only with adjustments in cooking duration.


The ingredients used in the seasoned broth are pantry staples in any Korean kitchen: doenjang (Korean fermented soybean paste), onions, garlic, ginger, etc. One rather unusual addition is instant coffee - a secret ingredient used among many Korean households in making bossam that is hardly a secret anymore. The coffee helps eliminate the sometimes undesirable porky odor; at the same time, it magically enhances the flavor of the pork without actually tasting a trace of coffee. My recipe here involves a good amount of ingredients - all of which combines to give an intense flavor enough for the pork belly to stand on its own even without any condiments. The aroma of all the spices and ingredients is absolutely sensational - and smells distinctly Korean - so don't forget to take a moment to take a whiff before putting on the lid!

Now, straight out of the cooking broth the pork belly will look somewhat drab - flavorful to say the least, but looking rather plain and nothing out of the ordinary. Boiled meat is what it is; that is what you'll usually be served in a restaurant. But if you are like me, you're gonna want to take the bossam to the next level by taking just one simple extra step. Give the pork belly a quick sear on the pan, and you will get this magnificent golden brown that not only kicks the flavor up a notch but also makes the pork belly that much sexier.

Bossam is typically accompanied with a whole host of condiments and sides. For the wrap itself, it is common to use different lettuces, aromatic perilla leaves (a.k.a. wild sesame leaves), as well as pickled or brined cabbage. Napa cabbage is soaked in salt water for anywhere between thirty minutes up to several hours to soften the leaves while preserving a sweet, tender crunch. Some typical sides and toppings include spicy oyster radish kimchi, fresh kimchi, saewoojeot-jang (salted shrimp sauce), ssamjang (Korean spicy dip for wraps and meats), sliced chilies, and raw or toasted garlic slivers. Incorporate as much as you wish, or keep it simple!

For my recipe for homemade kimchi, please click:
Traditional Korean Napa Cabbage Kimchi (Bae-Chu Kimchi)
For my recipe for kimchi fried rice, please click:
Kimchi Fried Rice (Kimchi Bokkeumbap)


That said, the ssamjang is indispensable when making any ssam. It is what gives that punch and "pow" to any grilled meats or lettuce wraps. It can be easily be store-bought, yet just as easily homemade with your own seasonings ('coz who needs another thing to take up precious space in my refrigerator?). The recipe is included below! So, are you ready to get cooking? In no time I promise you will find yourself yet another favorite go-to for potluck parties!

What you'll need...
700 g (1.5 lb) fresh pork belly, rinsed and drained
1 medium onion, quartered
1 inch ginger, sliced thinly
7 plump garlic cloves
2 white parts of leeks
2 bay leaves
1 1/2 tablespoons doenjang
2 tablespoon rice wine or sake
1 tablespoon brown sugar
1 teaspoon black peppercorns
1 teaspoon instant coffee
4 cups (1 L) water

Cabbage wraps:
1 small napa cabbage
1/4 cup coarse salt
3 cups warm water

Ssamjang:
1 1/2 tablespoons doenjang
1 tablespoon gochujang
3 garlic cloves, minced
Toasted sesame oil
Spring onion, chopped
Sesame seeds, toasted

Directions
1. Prepare the cabbage: dissolve coarse salt in warm water, quarter the cabbage lengthwise and submerge in the salt water. Let soak, flipping every now and then, ensuring that the leaves are completely submerged, 30 minutes up to 2 hours. Rinse and drain well.


2. Combine all broth ingredients in pressure cooker and bring to a boil over medium high heat. Add pork belly and return to a boil, observing the maximum capacity level and removing excess liquids if necessary. Then, on medium-high heat, fasten the pressure cooker lid and set the cooking display with traffic light function on level II. Reduce heat to low and set timer for 10 minutes once the green ring becomes visible.


3. When time is up, set the cooker aside to cool until fully depressurized. Unfasten the lid and remove pork belly from the broth. For enhanced flavor and color, continue with this step; otherwise, skip to the next step. Let pork belly rest and drain for several minutes. Heat a large skillet over medium high heat and quickly sear the pork belly on both sides until golden brown.

4. Allow to rest for 10 minutes before slicing. Prepare ssamjang by mixing all the ingredients and season to taste. Slice pork belly to desired thickness and arrange on a platter and serve warm with ssamjang, cabbage, various lettuces, perilla leaves, sliced garlic and chilies. Enjoy!!

Note: If using a regular large pot, bring broth ingredients to a boil and add pork belly. Return to a boil then cover pot with a lid and simmer on medium heat for 45 minutes to an hour, depending on size of pork belly.

【 韓式水煮五花腩生菜包 】

材料:
新鮮五花腩                       700 克
洋蔥                                   1 隻,開四
                                       1 寸,切片
蒜                                       7 瓣
大蔥(白色部分)             2 根
月桂葉                                2 片
韓國大醬                            1 1/2 湯匙
清酒                                   2 湯匙
紅糖                                   1 湯匙
黑椒原粒                            1 茶匙
即溶咖啡                            1 茶匙
                                        1 公升

旺菜包
旺菜                                    1 小棵
粗鹽                                    50 克
溫水                                    710 毫升

韓國沾肉醬
韓國大醬                            1 1/2 湯匙
韓國辣醬                            1 湯匙
蒜蓉                                    3 瓣
麻油                                    適量
蔥花                                    適量
芝麻                                    適量

做法:
1. 把粗鹽加入溫水拌勻。旺菜開四,放入鹽水醃最少半小時至兩小時,期間偶然把旺菜翻動。醃好後瀝乾水份備用。醃好的旺菜會軟中帶爽、輕微鹹中帶甜。

2.  把所有燉煮材料放入高速煲,用大火煮滾後放入五花腩。待水滾後蓋上高速鍋蓋,調校至 2 速,用中火煲至見綠環後轉慢火,計時 10 分鐘後熄火。

3. 待指示燈降至原位後小心排放剩餘蒸氣然後開蓋。想更加色香味俱全的話,可以繼續此步驟;否則可跳往下一步。把五花腩拿出來靜置數分鐘。燒熱易潔鍋,用猛火將五花腩兩邊快速煎香至金黃色。

4.  把五花腩靜置 10 分鐘。把沾醬材料拌勻再依個人喜好作調味。將五花腩切片上碟,配以韓國沾肉醬、旺菜、生菜、紫蘇葉、蒜片和辣椒即成!

備註: 不用壓力煲,可依傳統做法 — 只要把所有燉煮材料和五花腩用大火煮滾後收中慢火,蓋上煲子,視乎五花腩大小煮 45 - 60 分鐘。

[Follow me on Instagram @alvinckl and @alvin.penthousekitchen and check out my Facebook Fan Page!]

Thursday, May 5, 2016

Sizzling Pork Fajitas

附中文食譜
I must confess that, in the years following college, I have gone through an awkward phase of obsession with restaurant chains like Chili's and the like. On my occasional return to the Bay Area, my eager friends always spoil me with calling the shots for a dinner venue. I, with tail between my legs, used to sheepishly propose a jolly night at Chevys Fresh Mex.

One time, after a momentary pause, my college buddy Kelley turned around from the steering wheel, shoulders slumped, eyes wide (with a trace of regret for not calling the shot), and whined in her comical exasperated way, "are you serious?"

Exact location now a distant memory, we nevertheless had an absolutely fun night. Maybe it was the signature loud colors, or the convivial family-style dining atmosphere that made these casual dining restaurants so enticing. Or maybe because Tex-Mex cuisine had barely taken root in Hong Kong at the time, and the craving definitely hit a spot. 

Perhaps it is the giant goblets of summery margaritas - and the sizzling platters that leave a trail of smoke and mouthwatering whiff of charred meat and onions in their wake as they parade from the kitchen to the anticipating tables - a sensory spectacle that halts all conversations in their track and arrests all hungry eyes and noses that add to the attraction.


Whatever the reason, chains like Chili's and Chevys serving up hearty Tex-Mex fare would always have a place in my heart. Once a while when my craving for hot sizzling fajita hits, I would pull open my spice cabinet, grab my cast iron pan and get to work. Fajitas are a wonderfully easy and fun dish to prepare for a group of friends as everyone gets to help themselves directly from the hot grill pan. Just marinate the meat overnight, have some warm tortillas ready, prepare some sides, call up a few friends, and it is a party!

Fajitas are traditionally made with skirt steak, try it with pork or chicken for a change!

Happy Cinco de Mayo! Misunderstood as it often is, the unofficial holiday commemorating Mexico's victory over the French in 1862 today has become synonamous to tequila overdose and sombreros in the United States - well in any case, when better than today to make Fajitas - a Tex-Mex "fusion" signature!

Bell peppers of any color works beautifully!
What you'll need...

1 lb pork tenderloin
2 bell peppers, sliced
2 red onions, sliced
Flour or corn tortillas
Lime wedges

Fajita Seasoning:
1 heaping teaspoon ground cumin
1 heaping teaspoon ground chile pequin or cayenne
1 heaping teaspoon oregano
1/2 teaspoon paprika
1 teaspoon garlic salt
Black pepper 
Drizzle of olive oil
Squeeze of lime juice

Suggested accompaniments:
Pico de gallo
Guacamole
Sour cream or Greek yoghurt

Directions...
1. Marinate pork in seasoning either whole or cut into 1/2-inch strips. Cutting pork into strips will allow seasoning to penetrate more thoroughly. Marinade for at least 30 minutes or overnight.

2. On a cast iron pan or skillet, heat oil and cook peppers, onions, and meat, in separate batches if neccessary.

3. Warm tortillas up either on a dry skillet or in the microwave wrapped in barely damp paper towels. Serve fajitas directly on pan with a squeeze of lime and your choice of accompaniments!

《德州墨西哥式烤肉鐵板燒》
材料:
豬柳  1 磅
彩椒  2 隻
洋蔥  2 個
墨西哥薄餅
青檸

烤肉醃料:
小茴香粉  1 大茶匙
墨西哥辣椒粉  1 大茶匙
牛至/奧勒岡  1 大茶匙
西班牙紅椒粉  1/2 茶匙
蒜鹽  1 茶匙
黑椒
橄欖油  少量
新鮮青檸汁  少量

建議配料:
番茄莞茜洋蔥「莎莎」
牛油果醬 
忌廉

做法:
1. 豬肉切條,用醃料醃30分鐘或醃過夜。 
2. 平底鍋(鑄鐵鍋或鐵板燒鍋更為理想)燒熱加油。
3. 放入彩椒、洋蔥,煮至微焦,翻面續煎至微焦。起鍋備用。
4. 放入豬肉,先以大火將兩面快速煎至變色,以鎖住肉汁。再轉中小火煎到肉熟。
5. 墨西哥薄餅可用乾鍋燒熱、或用微濕的紙巾包著,以微波爐加熱。
6. 完成的烤肉、彩椒、洋蔥可於熱鍋中直接上抬,隨意跟配料配搭。慢用!

Friday, April 10, 2015

Thai Spicy Ground Pork Salad | 泰式肉碎沙律 | Larb Moo


Just in time for the Songkran Festival in Thailand - known to many as the water festival stretching the span of three days in welcoming the Thai New Year - I decided to throw a themed dinner party featuring some of the most loved Thai dishes.

At once exotic as it is now familiar to almost every part of the world, Thai cuisine is a profusion of complex flavors and fragrances, guided by the intricate balance of sweet, sour, spicy, and pungent that varies from region to region. I have long had a love affair with Thai food, but it wasn't until I enrolled in my first ever cooking school experience in Chiang Mai have I gained such insight and respect for this truly sensational realm of cooking.

The shimmering golden stupa of a Wat, my solo trip to Chiang Mai | 2012
Having a blast at the Thai Farm Cooking School!
It is hard not to fall in love with Thai food. Fortunately, creating some of the most iconic dishes can be just as easy at home.

Larb (ลาบ) is a classic Isaan dish originating from Northeastern Thailand, and is typically prepared with pork or chicken. Enjoy it with a ball of warm, fresh sticky rice, or wrap it in a luscious lettuce leaf for a delicious starter or a light lunch. Not unlike many Thai dishes, larb takes its flavors and aromas from fish sauce, lime, chili, and sugar, in addition to shallots, abundant herbs, and - most importantly - toasted sticky rice powder, or khao kua (ข้าวคั่ว).

Although hardly visible once mixed into the pork, khao kua imparts a nutty, smoky fragrance and crunch that is characteristic to larb and many Northeastern style dishes and dips. Toasting and grinding rice is SIMPLE, so don't skip it! All the measurements for seasonings below are approximate, as ultimately it is the tongue that knows best (I second Rachel Ray in that I clearly do not swear by precise measuring in the kitchen).

To prepare...
1/4 cup uncooked Thai sticky rice*
1 lb (460 grams) ground pork
1 tablepoon Thai ground chili^
1 tablespoon fish sauce
Pinch of sugar
1 tablespoon fresh lime juice, plus zest of the limes
4 small shallots, chopped
Handful of chopped spring onion
Handful of fresh mint
Handful of fresh cilantro
2 heads of little gem lettuce, rinsed, to serve


*Note: if unavailable, substitute with pearl rice. I used a Korean short-grain variety.
^Note: if unavailable, use crushed red pepper flakes and chili powder like I did!

1. For the khao kua... Heat a dry frying pan on low heat and toss in uncooked rice. Toast the rice until fragrant and nutty, shaking pan occasionally. Turn heat off as soon as the rice turns golden yellow and begins to brown. Set aside to cool slightly. Pound the toasted rice with a mortar and pestle the traditional way or give it a quick blitz in a blender. Be sure not to grind it into fine powder to keep some crunch.


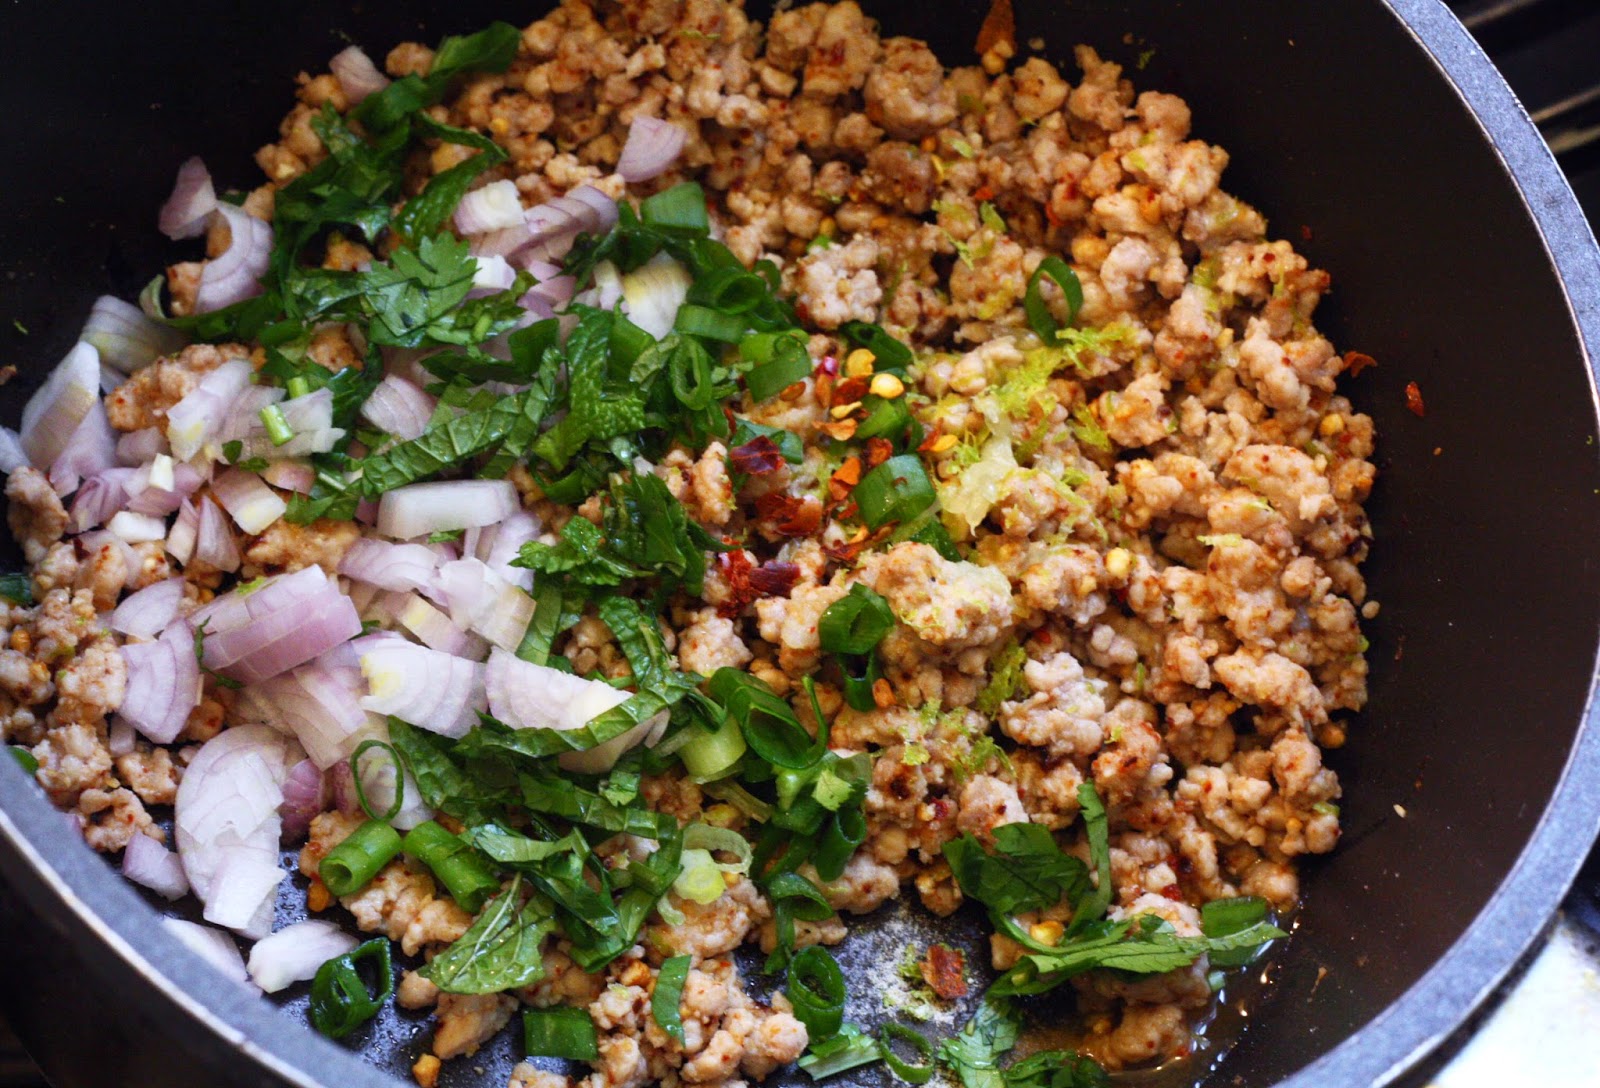
2. For the larb... In a saucepan on medium heat, add ground pork, stirring frequently to break into small pieces until completely cooked. Tip in a heaping tablespoon of toasted rice powder and add chili flakes, sugar, fish sauce, lime juice and zest.

3. In the same pot, mix in chopped spring onion and shallots. Roughly chop some of the mint and cilantro and add to pork mixture. Give the larb a good mix, adding more seasoning and toasted rice until it tastes just right. Be bold!

4. Scatter the remaining mint and cilantro over the larb and dish it out with a fresh bed of gem lettuce leaves. Enjoy!


 【 泰式肉碎沙律 】

泰國新年潑水節將至,唔少遊客都會紛紛快閃泰國濕濕身,當然也不少得豪飲豪食!為響應新年,喺呢度同大家分享最喜愛的泰國東北菜式食譜 — 既辛香惹味又開胃刺激的「肉碎生菜包 ลาบ」! 不過其實生菜包是港式化的享用方式,在泰國多配糯米飯啊~ 如果想炮製出最正宗的東北風味,食譜裡的自製烤米粉 (khao kua) 絕對或不可缺噢!

材料:
泰國糯米          50 克
免治豬肉          460 克 / 1 磅
泰國辣椒粉      1 湯匙
魚露                   1 湯匙
砂糖                   適量
新鮮青檸汁      1 湯匙
乾蔥                   4 顆
                       適量(剁碎)
芫荽                  適量(剁碎)
薄荷葉              適量(剁碎)

烤米粉做法:
用乾鍋烘香糯米,放涼後可用傳統研缽和研杵或攪拌機磨成粉末即成。

肉碎沙律做法:
1. 炒鍋下油預熱,以中火兜炒豬肉至全熟。加入一大湯匙烤米粉、辣椒粉、砂糖、魚露和青檸汁。拌入乾蔥、蔥、芫荽和薄荷葉。拌勻後再依個人口味作調味。
2.  完成後配上各式生菜或糯米飯,風味絕佳!

[Follow me on Instagram @alvinckl and @alvin.penthousekitchen and check out my Facebook Fan Page!]

Thursday, January 22, 2015

Cider Braised Pork Shoulder with Apples and Cranberries

Almost as if making up for the pot roast I never made last year, this pork roast warms every corner of my house with such a jolly holiday scent that you'd think Christmas is here once again.

Pork and apples are a classic pair that are always meant for each other. Featuring in this recipe - second of my winter series highlighting fresh British ingredients - are English Bramley apples, a unique variety ideal for cooking as it retains a stronger, tangier flavor and gives a pleasantly buttery texture.

This recipe uses apple cider as the braising liquid (reminds me of New York's farmers markets in the winter!), imbueing the pork with acidity that tenderizes, and sweetness that balances the savoriness of the meat. Add in tart cranberries and mulling spices along with several idle hours in the oven, and there you have a wonderfully succulent pork roast that not only smells but also tastes like the holidays.

As no prior brining is necessary, this dish is incredibly simple - as well as economical and foolproof. Most affordable cuts like pork shoulder would do as slow braising breaks down the tough fibers in the meat. So if you are looking to do something slightly different from roasting a whole turkey on your next holiday, consider trading the Big Bird in for some juicy, tender Porky Pig... and be sure to serve up some crusty artisan bread to sop up all the essence!

To prepare...
1 kg, or 2 lb. fresh pork shoulder
Olive oil
3 medium onions, cut into 1/2 inch slices
1 cup unfiltered apple cider (I used spiced cider!)
2 bay leaf
1 cinnamon stick
Pinch of cloves
Pinch of whole peppercorns

For the sauce:
2 firm Bramley apples, peeled, cored, and cut into 1/2 inch slices
1 tablespoon butter
1 cup fresh cranberries (thawed if frozen)
3 tablespoons brown sugar (or to taste, optional)
A splash more of apple cider
2-3 strips of orange peel
Fresh thyme leaves, plus extra for garnishing

1. Preheat oven to 170C/325F. Season pork well with salt and pepper. Heat oil in a large, oven-proof* heavy pot over moderately high heat, brown meat on all sides, turning as needed, about 8 minutes. Set pork aside.


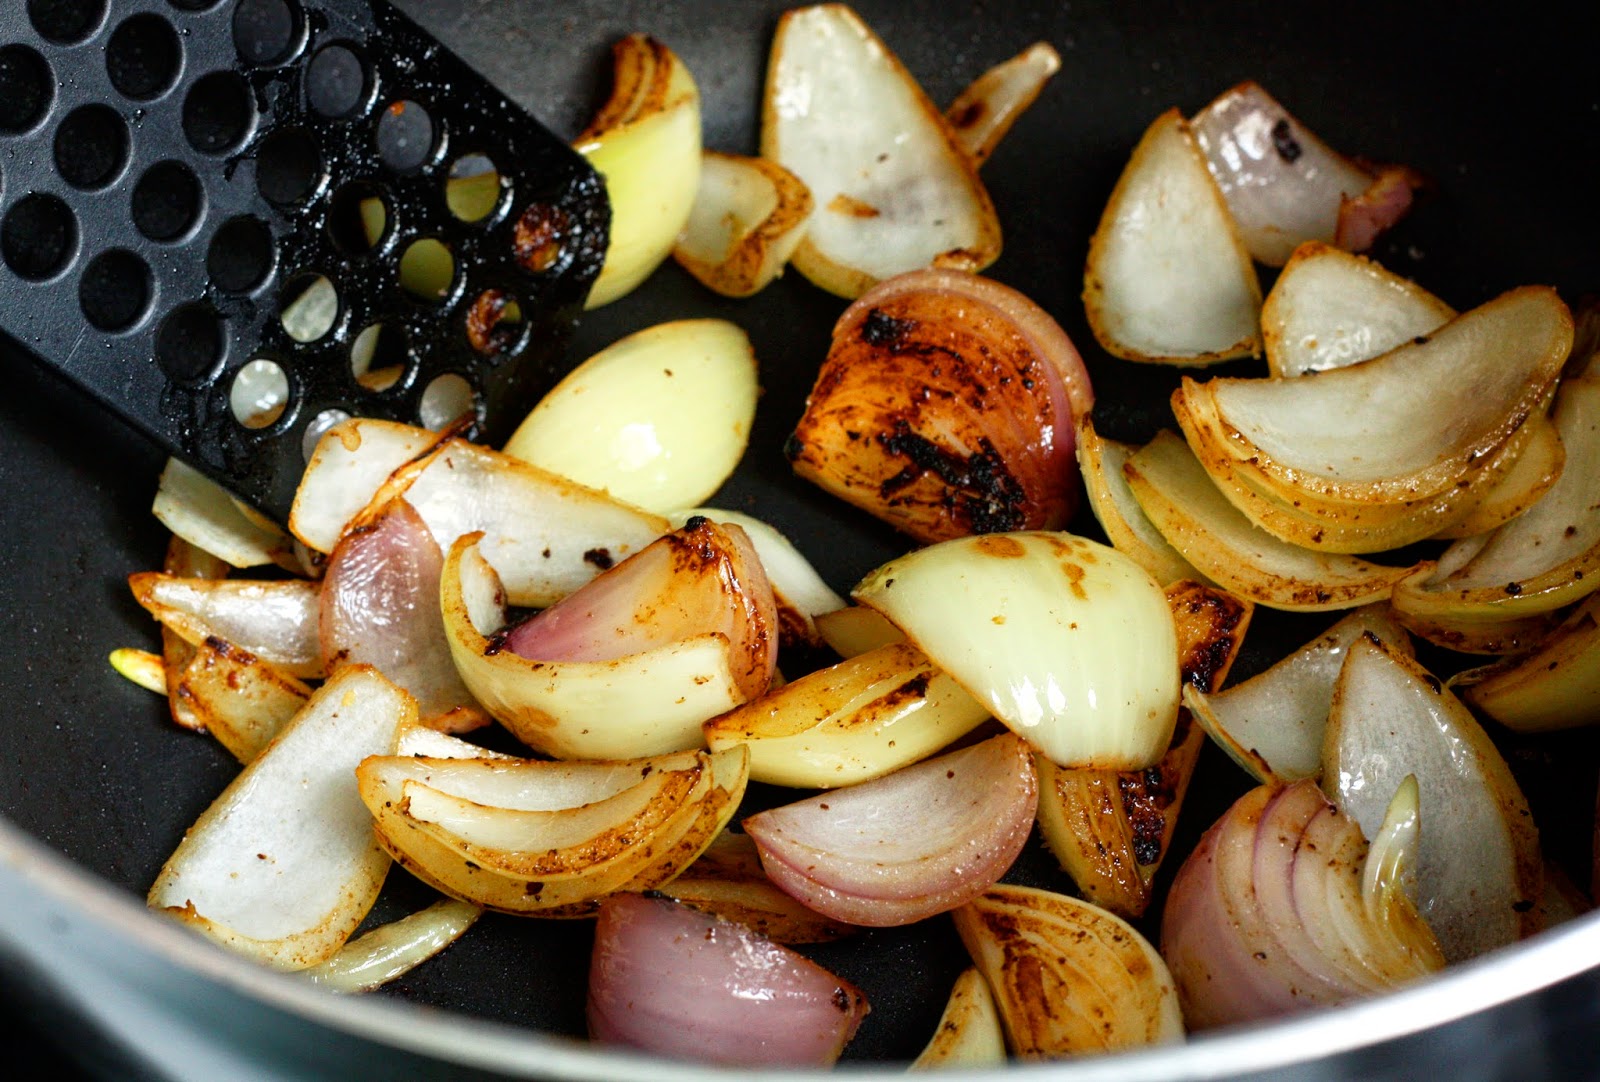
2. Add onions to the same pot and sauté until softened and started to turn golden, about 5 minutes. Add a pinch of salt and cook, stirring occasionally, until golden and caramelized, about 8 minutes more. Stir in cider.

*Now, if you are lucky enough to have a large oven, return pork to pot, cover pot with a tight-fitting lid, and place into the pre-heated oven.


3. Otherwise, place pork into a large casserole, pour in the cider and onions, and cover tightly with foil, pressing down firmly along the rim. Place in the oven to braise until very tender, about 2 1/2 - 3 hours. Turn pork over once halfway through the time of cooking, adding in the cinnamon stick, cloves, bay leaf, and peppercorns. 

To make the sauce...
4. When meat is nearly done in the oven, heat butter over medium heat, cook apple slices until soft and lightly golden. Remove from heat until pork is ready.

5. Remove bay leaf and transfer pork to a plate. Skim fat off the juices, then pour into the apples. Add remaining cider, 3/4 cup of the cranberries, thyme, and the orange peel. Bring to a boil until the cranberries pop and the mixture is reduced and thickened. Taste sauce, adding brown sugar if too tart. Season with more spices as you please.

6. Return pork and add the remaining cranberries to the sauce, stirring to cover meat in sauce to briefly reheat. Transfer to a serving dish or casserole and garnish with fresh thyme. Serve with a side of mash and crusty artisan bread! Bon appétit!

Recommended side: Swede and Parsnip Bake with Buttery Crumbs

[Any thoughts or comments? I want to hear from you! Also check out and LIKE my Facebook Fan Page!]

Friday, December 19, 2014

Fettuccine with Creamy Onion Mushroom Pork Chops

Okay, so you may think that I'll never be caught dead with a can of Campbell's in my hand. That is indeed true to a very large extent. But hey, on a clammy winter day when you are time-pressed and in need of some TLC, cracking open that creamy can of Campbell's that's been sitting quietly and patiently in the rear of the pantry might just do the trick.

Like anything from a can, using canned soup doesn't have to be boring or bland. This is the time when you gourmet things up a little bit with some added basic ingredients and a touch of fresh herbs. 

And so I dashed to the supermarket for some half-lean, fresh bone-in pork chops and cremini mushrooms and ended up with easy breezy creamy pork chops served two ways, two different days. Instead of pan-frying the chops, I deployed my Panini Grill for a speedy way to flash cook my chops before dunking them to a simmer in the creamy sauce, keeping them still tender, moist, juicy, and minimizing the mess and cook time!
Smother your tender chops and pasta with creamy onion and mushroom sauce!

To prepare...
Fettucine, for two servings
4 bone-in pork chops
1 can (305g) condensed cream of onion
1/3 cup water
1/2 lb. (227g) cremini mushroom, cleaned and sliced
1 onion, brown, yellow, or red, roughly chopped
3 cloves of garlic
Butter or cooking oil
Fresh thyme sprigs
Parsley, chopped, for garnish
Salt and fresh ground black pepper

1. Cook fettucine al dente according to package instructions in well-salted water.

2. Sprinkle pork chops with salt and pepper. Grill on preheated Panini Grill lined with baking paper until barely done, flipping once, about 3 minutes. Reserve drippings. Alternatively, pan fry on skillet with vegetable oil over medium-high heat for about 10 minutes or until browned on both sides.
 
3. In a saucepan, melt butter over medium heat. Saute garlic and onion with mushrooms and thyme. Set aside.

4. Stir cream of onion and water in saucepan and bring to a boil. Add pork drippings, mushrooms mixture, and pork chops and simmer until the pork is cooked through. Drain pasta and serve topped with pork chops and creamy onion mushroom sauce. Buon appetito!

[Any thoughts or comments? I want to hear from you! Also check out my Facebook Fan Page]
Serve with sauteed sugar snap peas and baked sweet potato for a lower-carb take

Friday, August 29, 2014

Korean-style Grilled Pork Wraps with Assorted Leaves (Ssam)

My recent short visit to Seoul had gotten me a quick fix on all things barbequed, fiery hot (so sadistically hot I nearly Poughkeepsied in my pants the morning after), coated and deep fried. No visit to Seoul - or anywhere else for that matter - is complete without a detour to the supermarkets, where fresh produce and meats compete in sheer variety with a mind-boggling array of all things preserved and pickled.

My favorite section of all Korean groceries is undoubtedly what I dub the "ssam bar" (sounds familiar, New Yorkers?) - a misty, self-serve cooler where shoppers arm themselves with a pair of tongs and pick away from a dazzling assortment of lettuces and leaves sold by weight. Here you will find stacks upon stacks of the intensely fragrant perilla leaf, distinct with its grassy notes of anise and liquorice, that are larger, rounder, flatter, and with a less serrated edge than its Japanese counterpart, shiso. While some of these greens require cooking, most are destined to be consumed fresh, enveloping a morsel of sizzling hot samgyeopsal (grilled pork belly) and a range of toppings.

My craving for Korean food hardly subsided by the time I returned home to my penthouse kitchen. Stocking up my fridge with fresh groceries from Korea, I began to plan for a power lunch for the following day. I needed something quick and hassle-free, and something to stave off my craving before I head to work. And so I 'cheated' by using a store-bought kalbi marinade, marinated some antibiotic-free pork shoulder overnight, and whipped together an improvised ssamjang the next day.

Below is my recipe for a fast and basic Korean-inspired ssam, or lettuce wrap, that also makes good use of my homemade Pink Pickled Radishes (click for recipe). I have also only recently discovered a way of lining my almighty Panini Grill to eliminate cleanup. So if you've got one just like mine, this delicious meal is practically ready in under 10 minutes with hardly anything to wash. Scrubbing down the beast is a thing of the past!

To Prepare...
Same results, zero mess!
1. Cut pork shoulder or collar into bite-sized morsels. Marinate for at least 30 min or overnight in pork kalbi marinade.

2. Preheat Panini Grill, line with aluminium foil, carefully folding in the edges to contain any runoff while grilling. Place marinated pork on grill, top with another sheet of foil, then press and leave to grill until fully cooked. Alternatively, use a griddle or a heavy skillet.

3. In the meantime, prepare ssamjang, which is a thick, spicy-savoury paste typically used with grilled meats in lettuce wraps in Korean cuisine. Either use a commercially produced ssamjang or make your own. I improvised with mixing miso paste with a dallop of Gochujang and a dash of sesame oil - super shortcut, and close to the real thing!

4. Check that pork has begun to caramelize and is cooked through. Build your wraps with pickled radishes, a sizzling chunk of pork, a tiny clump of ssamjang, and finish off with toppings such as micro sprouts for a cool contrast to the flavorful pork and a boost in phytonutrients!

Note: you can also add rice to make this a ssambap. Simply layer on a clump of rice and you've got a well-rounded meal!

[Any thoughts or comments? I want to hear from you! Also check out my Facebook Fan Page]