Showing posts with label Baked goods. Show all posts

Thursday, May 21, 2020

Classic Banana Bread | 香蕉蛋糕

The first thing I ever baked was a banana bread. That goes to show that making banana bread is about as easy as baking can get - so long as you have bananas that are so ripe and freckled they would have otherwise ended up in the reject pile at the supermarket.
While some people make banana bread only as a way to use up forgotten bananas, others like me routinely stake out at the quick sale corner hunting precisely for these often orphaned, blemished, and (heavily discounted) overripe bananas - for none other than to bake the most impossibly scrumptious and moist homemade banana bread. After all, banana bread is half the reason why bananas exist, right?

Over the years I have carried banana bread to the office at my first desk job; brought a slice or two to my hairdresser and bribed a security guard; shared with my fellow chirpy flight attendants during boot camp training as a new recruit; and on countless occasions served it at housewarmings, game nights, or simply as an afternoon treat. Over time, friends, neighbors, co-workers have fallen in love with this banana bread. Some even declared it a favorite.

Banana bread can be something rather ordinary, a usual suspect at coffee shops everywhere; it is so basic and so ubiquitous yet so universally loved it's almost uncanny. Abundant as they are, however, some banana bread may turn out dry, overly sweet or, worse yet, taste of artificial flavoring. What makes homemade ones extraordinary and sets it apart from commercial ones is its texture, the moist and soft crumb, the incredibly rich color and buttery aroma, and the unmistakable natural sweetness from ripe bananas.

Year after year I swear by this simple recipe, deviating only in experimentation with different combinations of sugars. I tend to gravitate towards using brown or even black sugar to imbue the cake with a rich, caramelly flavor and moisture, but also mixing in white sugar just to provide enough sweetness without overpowering the banana flavor. Using white sugar alone will produce a paler banana bread with a more single-noted flavor. The sugar amount is flexible. Most recipes call for one full cup of sugar, but I find 3/4 cup to be just perfect - or even less if you are using very, very ripe bananas or upping banana count to four.

As far as baking goes, banana bread is by far the most beginner-friendly. It is the simplest and most forgiving, especially for someone like me who detests precise measurements and flinch at the thought of baking an angel food cake. There may be plenty of ways to fancy up a good old banana bread; you can add walnuts, pecans, chocolate chips, dark rum, all of which I've tried - but some of my best bakes are the ones that were kept simple and classic. Sometimes simplicity is best (I am a bit of a purist when it comes to banana bread).

Ordinary as it may be, banana bread is surely well loved by all and oddly so it is also one of my most requested recipes from friends. This is my go-to favorite recipe for banana bread, one that I have written out on a loose piece of junk paper and which I have cherished over the years. Calling this the "best-ever" banana bread may be a bold statement, but I am here to admit it might just be the best banana bread you've ever had. It will surely make you go bananas!


Ingredients
1 1/2 cup (195 g) plain flour
1 teaspoon baking soda
1/2 teaspoon salt
3 large overripe bananas
1/2 cup (115 g) unsalted butter, softened
1/2 cup brown sugar
1/4 cup white sugar
2 eggs
1/2 teaspoon vanilla essence

Directions...


Preheat oven at 350F/180C. Cream together the butter and sugar. Crush bananas with a fork or a masher. Add eggs and vanilla essence and combine well with the butter and sugar mixture.

Sift together flour, baking soda, and salt. Fold into creamed mixture. Pour into greased loaf pan. Bake for 50-60 minutes or until toothpick comes out clean.

Do you like your banana bread plain or with nuts?
Share with me or leave a comment below! Tag #alvinspenthousekitchen.
Find me on Instagram @alvinckl and @alvin.penthousekitchen and follow my Facebook Fan Page!

 【 香蕉蛋糕 】


材料:
中筋麵粉               195 克
蘇打粉                   1 茶匙
幼鹽                        1/2 茶匙
無鹽牛油               115 克
紅糖                        110 克
砂糖                        50 克
熟透香蕉               3 條(大)
雞蛋                        2 隻
雲呢拿香油          1/2 茶匙

做法:
1. 預熱焗爐至 350F/180C。
2. 牛油放於室溫軟化,加入糖用攪拌器攪拌至均勻幼滑。
3. 香蕉放在碗裡用叉子壓成泥狀,可以保留一點顆粒口感。
4. 加入雞蛋和雲尼拿香油拌勻,然後跟牛油和糖拌勻。
5. 加入過篩後的麵粉、鹽和蘇打粉,輕輕攪拌均勻。
6. 把粉漿倒入已掃油的糕盤內,放入焗爐焗約 50-60 分鐘至金黃熟透即可。

Do you like your banana bread plain or with nuts?
Share with me or leave a comment below! Tag #alvinspenthousekitchen.
Find me on Instagram @alvinckl and @alvin.penthousekitchen and follow my Facebook Fan Page!


Tuesday, September 26, 2017

Gluten-free Chicken Pot Pie with Cornbread Crust | 玉米派皮雞肉派 — 不含麩質

As I write, I have just completed my two intensive weeks working at Sweetpea Cafe, Hong Kong's only entirely gluten free patisserie serving up decadent cakes and healthy brunch classics. How it all happened was almost like a dream. Just a month ago my friend and I wandered the quaint backstreets of Central and walked into Sweetpea for an afternoon of cake, coffee, and conversation. I gawked at the cake display, started conversing with the friendly and bubbly owner Angel, took a bite of the delightfully fluffy Tiramisu cake, and it didn't take much else for me to fall in love with this place.

My eyes rested on the "We Are Hiring" sign. With my annual two-week leave just weeks away, the idea of hitching an interim job here at Sweetpea Cafe sprouted. I stayed up all night. The next thing I know, I texted Angel with my proposal in the morning, and she responded: "I'd say yes in a heartbeat!" BAM, the stars aligned. I dropped my original plans of a (rather expensive) cooking holiday in the rustic countryside of Brittany, France and landed a part time job working in a charming little patisserie in my hometown. Call it a working holiday or apprenticeship, it was a dream come true in every sense for me to work in a cafe, to experience the operations behind the scenes and to open my eyes to the harsh reality of running a business in Hong Kong.

The two weeks had gone by in a blink. My experience reminded me of the television show on one of the travel channels where the host ventures around the world to master a new skill in two days' time. My two weeks were no short of challenges, discoveries, failures, stress, laughter, and sense of achievement. To fully delineate my experience in today's entry would be nearly impossible, so I will leave it at that for now and draw our attention back to the yummy dish of the day... Chicken Pot Pie with Cornbread Crust - and it's gluten free!

Thanks to Sweetpea Cafe and my Toronto-based cousin whom I worship for her talents and stamina in everything she does, I have become increasingly interested in gluten-free cooking and diet. I began digging around in books and online and in groceries in the U.S. and decided to experiment a little. I even bribed my flatmate to haul a ton of assorted flours back from Toronto (where they are readily accessible and affordable) in efforts to create my own blend of gluten free flour.

What we have today is my all-time favorite, Chicken Pot Pie, topped with golden cornbread instead of the traditional shortcut pastry. It's like taking a baby step towards making gluten-free choices. The cornbread adds such a delectable crunch and flavor to the creamy filling that I am not so sure I miss the buttery pastry crust so much anymore! The following recipe is based on my Individual Chicken Pot Pie with Puff Pastry Crust post from 2015 but is modified and improved. As for the crust, it's basically a cornbread baked on top of the filling, so it would work perfectly on its own any other time! This recipes produces a cornbread that has a perfect crumb - neither too dry nor too cakey!

What you'll need...
For the pie filling:
3 skinless, boneless chicken thighs
1 bay leaf (optional)
1 tablespoon butter
1 small onion, diced
3 cloves garlic, minced
2 medium carrots, diced
2 - 3 ribs celery, diced
6 cremini mushrooms, stems intact, diced
3 tablespoons gluten-free flour blend (I used Bob's Red Mill)
1/2 cup chicken broth (from cooking the chicken thighs)
1/2 cup warmed milk
Thyme, fresh or dried

For the Cornbread Crust:
1 cup gluten-free cornmeal
1 cup gluten-free flour blend (I used Bob's Red Mill)
1/4 cup granulated sugar
1 tablespoon baking powder
1/2 teaspoon salt
1/4 teaspoon xanthan gum
2 large eggs
1 cup milk
2 tablespoons butter, melted

Preparing the Chicken Pot Pie Filling
1. Bring a pot of water to a boil, add bay leaf (and any unwanted vegetable trimmings) and chicken thighs and cook for 8 minutes. Turn heat off and leave chicken in the pot covered for another 5 minutes. Rinse chicken under the tap and let cool in refrigerator while prepping the other ingredients to allow for easier cubing. Reserve chicken broth.

2. Heat butter in a large cast iron skillet or dutch oven over medium heat. Sauté onions, garlic, carrots, celery, and mushrooms until tender-crisp, about 5 minutes. Add flour and stir to combine with the vegetables, about 1 minute. Stir in 1/2 cup of broth and bring to a boil. On low heat, stir in warmed milk, cubed chicken, and thyme. Season with salt and pepper and stir until mixture thickens.

Making the Cornbread Crust Topping

Preheat oven to 180C/350F.
Whisk together dry ingredients, add milk, eggs and butter, mixing until just combined. Pour batter over pie filling and bake (line with baking tray to catch drips) for 25-30 minutes, or until lightly golden brown and wooden pick inserted in center comes out clean. Serve warm!

《玉米派皮雞肉派 — 不含麩質》


最近對不含麩質飲食的興趣日益增長,
決意把個人最愛的 Chicken Pot Pie 研製出更健康的無麩質版本,
希望更多人能夠愛上這道傳統美式菜!

雞肉派 材料:
去皮去骨雞上髀肉  3 件
月桂葉  1 塊(可免)
牛油  1 湯匙
洋蔥  1 小隻
蒜頭  3 瓣  剁碎
甘筍  2 條  切粒
西芹  2-3 條  切粒
啡蘑菇  6 隻  切粒
不含麩質麵粉  3 湯匙
雞高湯  120 毫升
牛奶  120 毫升 用微波爐叮暖
百里香  適量

做法:
1. 滾水加入月桂葉和雞肉,用中火煮 8 分鐘後熄火加蓋焗 5 分鐘。將雞肉取出洗淨並放進雪櫃片刻,以便稍後切粒。雞湯去油備用。
2. 鑄鐵鍋燒熱後加入牛油,炒香洋蔥、蒜頭、甘筍、西芹及蘑菇,約 5 分鐘。
3. 加入麵粉拌勻,約 1 分鍾。
4. 倒入 120 毫升雞高湯,拌勻並用中火煮至沸騰。
5. 將火收細,加入牛奶、雞肉粒和適量百里香及調味,待材料稍微呈糊狀後熄火備用。(假如沒有鑄鐵鍋的話,可將材料倒進適合焗爐的盤子內備用)

不含麩質玉米派皮 材料:
不含麩質玉米粉  150 克
不含麩質麵粉  120 克
砂糖  50 克
發酵粉  1 湯匙
幼鹽  半 茶匙
黃原膠  1/4 茶匙
雞蛋  2 隻
牛奶  240 毫升
牛油  30 克 溶掉

做法:
1. 焗爐預熱 180 度。
2. 把幹成分拌勻,拌入牛奶、雞蛋和牛油。
3. 拌勻後倒在鍋中的雞肉材料上,放入焗爐焗 25-30 分鐘,或知呈金黃色以及牙簽能夠乾淨拔出。慢用!

[Follow me on Instagram @alvinckl and @alvin.penthousekitchen and check out my Facebook Fan Page!]

Monday, December 19, 2016

Quick Rustic Stout Beer Bread | 特快歐式黑啤麵包

付中文食譜

One of those things I love and miss most about Europe is quality artisan breads - those rustic, crusty, wholesome, hand-crafted breads whose individual imperfections sings perfection.

In Hong Kong, finding an affordable loaf of rustic bread is about as hard as finding an apartment. And, for most people, making their own breads by hand or owning a bread making machine is simply unrealistic. Nonetheless, I'd still rather eat cake than to give in to mass-produced, chemical-ridden, highly processed supermarket breads. So, that pretty much meant crusty artisan breads would always remain a novelty lest I start making them at home.

All of that is about to change with this foolproof recipe. For the longest time, I have been intimidated to bake my own breads so long as kneading and proofing is involved. So when I realized that I can make bread in an hour with just four simple ingredients and nothing more than a bowl, a pan, a spoon and an oven, I was ecstatic. No yeast proofing, no kneading, no getting hands in a gooey, gunky mess, no kidding. Even the most inexperienced baker could do this. Oh, did I mention you get to bake bread with your favorite beverage?

This bread is nicely moist and dense; crusty, craggy and golden on the outside and chewy on the inside - perfect for toast, sandwiches, sopping up chili, and sensational with hearty soups, chowders, moules-frites, and beef stew.

With beer being the key ingredient in this recipe, you've got to start with a great brew. The type of beer you choose will impart distinct characters on your bread. I chose stout for its robust, malty aroma and chocolatey color (and matched that with rich black sugar* to add depth). Or, you can go with a crisp lager for a paler yet complex-tasting bread; or an IPA if you're in for the hops. Experiment with different ingredients to complement your beer - say, using some oat flour and whole oats to match an oatmeal stout, or adding spices to round off a pumpkin-ale-based loaf.

Dunk this bread in Parsnip, Parsley, and Leek Soup and pair up with Cider Braised Pork Shoulder with Apples and Cranberries for the holiday season!

What you'll need...
3 cups self-raising flour
2 tablespoons black sugar*
1 can or bottle (355 ml) stout beer
2 tablespoon butter, melted
Cornmeal, to dust (optional)

*Note: Black sugar is a type of unrefined sugar commonly used in Japan and Taiwan, known for its rich, complex, malty taste and health benefits not found in other more refined sugars. Substitute with dark brown sugar if unavailable.  
 
(My first video!)

Directions...

1. Preheat oven to 180C/375F. Grease a loaf pan or round cake mold and dust the bottom with cornmeal.


2.  In a large bowl, sift flour and sugar together.


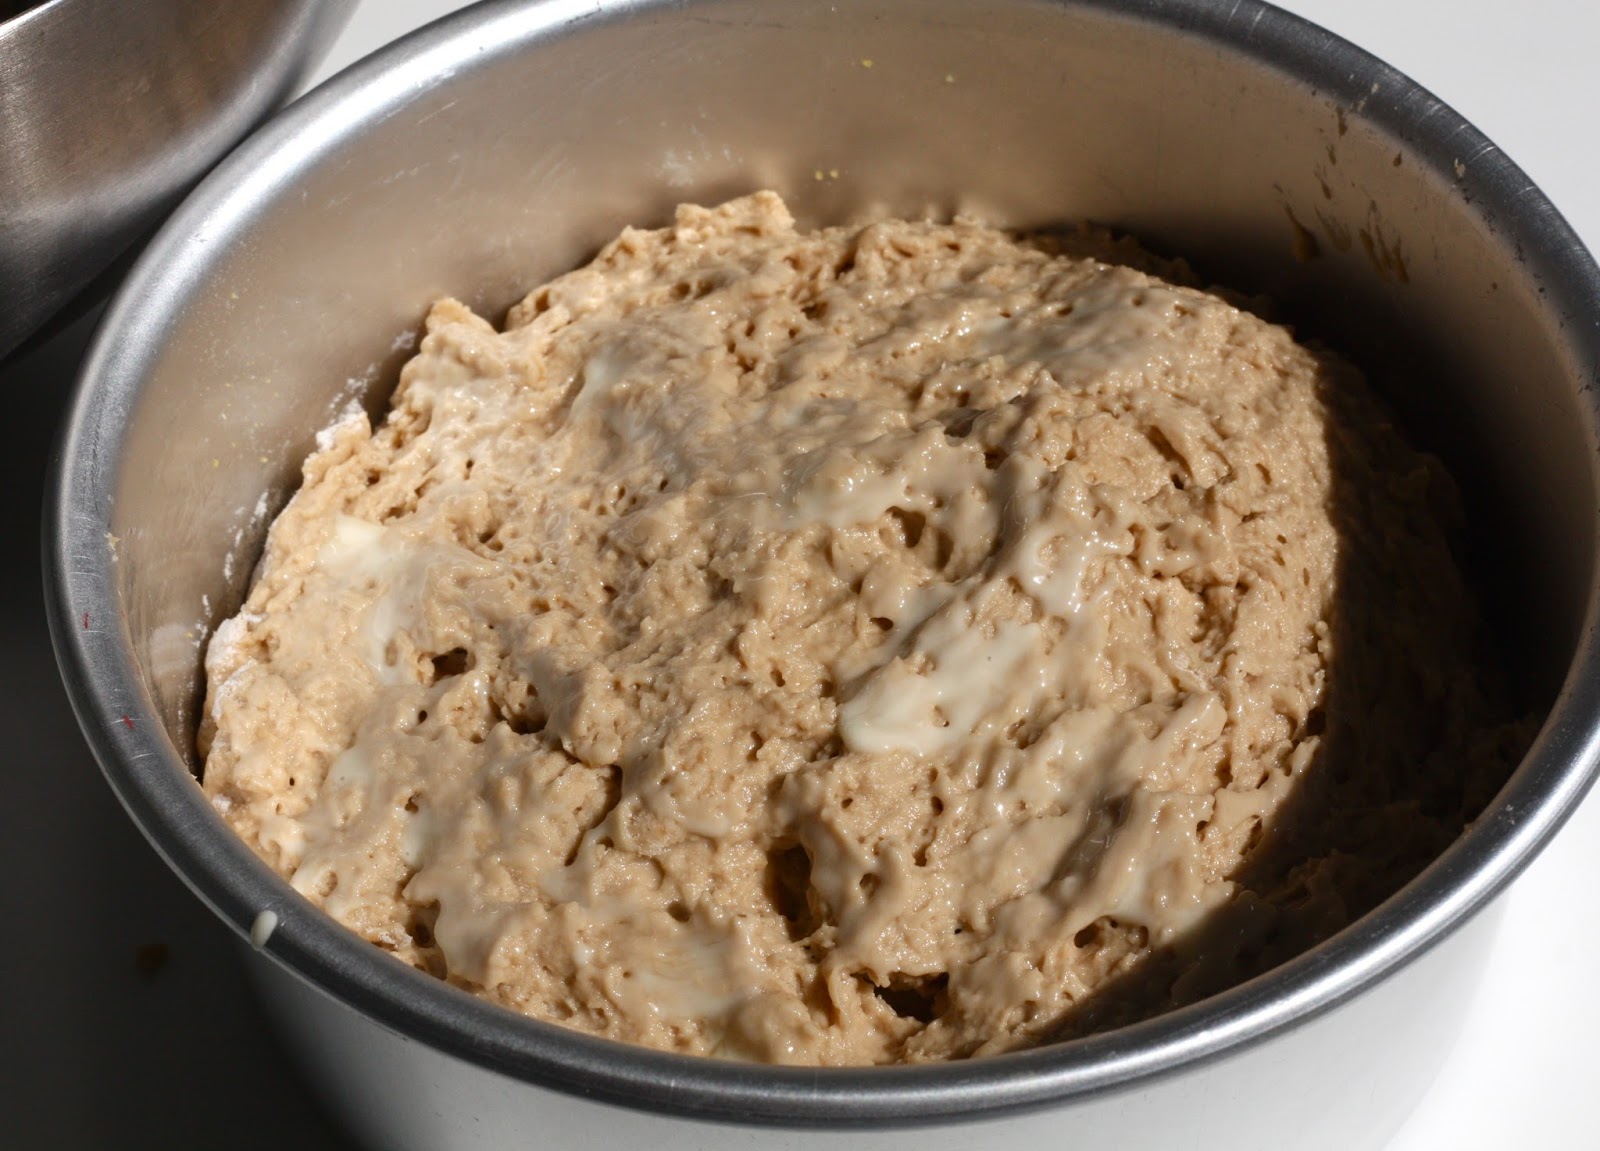
3. Add beer, 1 tablespoon of melted butter, and mix lightly, using a wooden spoon, until most of the flour is incorporated and forms a sticky, lumpy mass. Do NOT overmix!

 4. Scrape and pour mixture into greased loaf pan. Brush the top with remaining butter and lightly dust top with flour for a rustic look.


5. Bake for 50 minutes, or until golden and crisp on top. remove from pan and cool on a wire rack for at least 15 minutes before slicing. Best served warm and crusty. Enjoy!


 《特快歐式黑啤麵包》

毋需麵包機、毋需發酵或手搓 - 零難度!
平時最懷念歐洲的傳統歐式麵包,現在
响屋企都能夠輕易做得到。
材料簡單,口感紮實帶有韌性,有著樸實的外表卻不平凡的內在,伴隨著淡淡的啤酒小麥香氣 - 全都只需要四種材料、一個小時多就搞掂!最適合忙碌人士和臨時請客不已。

材料:
自發麵粉  360 克
黑糖  25 克
黑啤酒  355 毫升
牛油  2 湯匙 (約 28 克)溶掉
粗粒玉米粉 (Cornmeal)  少量(可省略)

做法:
1. 預熱烤箱至 180C/375F。
2. 烤模先薄薄的塗上油,再在底部撒上少量粗粒玉米粉,有助防黏及增添香脆口感。
3. 麵粉和糖過篩。
4. 加入啤酒和一湯匙牛油,輕輕攪拌均勻。麵團黏黏的及不規則的狀態屬正常、避免過度攪拌。
5. 麵團倒入烤模裏。將剩餘的牛油塗在表面,再用篩薄薄的撒上一層麵粉。
6. 放入預熱好的烤箱, 焗 50 分鐘或至表面金黃香脆。出爐後馬上脫模,晾涼最少 15 分鐘後即成!

備註:
1. 除了黑啤之外,更可自由選擇其他種類的手工啤酒,因應不同啤酒的味道和個性隨意作不同的成份配搭, 例如加入麥片、肉桂、香草等調味。不妨實驗一下!
2. 每個焗爐都會有些微分別,所以要熟識自己焗爐的脾性,再作適當的時間溫度調教。
3. 如無黑糖,則可用紅糖 (brown sugar) 代替。
[Follow me on Instagram @alvinckl and @alvin.penthousekitchen and check out my Facebook Fan Page!]

Wednesday, August 31, 2016

Crunchy Chewy Cornflakes Cookies

附中文食譜
Crunchy Chewy Cornflakes Cookies - speaking of alliteration and an oxymoron within the same cookie! As the name implies, this fabulous cookie is full of mouthwatering contrasts. At once sweet and salty, it is soft and chewy on the inside, crisp and crunchy on the outside - what's not to love?

I am not really into cereal with milk in the morning, but dunking this baby in a glass of cold fresh milk is a whole different story. I had my first ever cornflakes cookie earlier this winter in a cafe in Toronto and was hooked on making them ever since. Little did I know that cornflakes cookies have been around since 1970s. In today's world, thanks to our ever growing variety of flours and sugars, every home cook can play with different combinations to suit their dietary preferences and create their desired results. So play around and even get your kids into it!
The below recipe includes coconut flour and cornstarch to produce incredibly crumbly and tender cookies, so if you are after a more crunchy bite, feel free to substitute coconut flour with a half cup of plain flour or bread flour and leave out the cornstarch. Longer baking time will also produce a crunchier cookie. Additionally, you can sub brown sugar for white sugar for a more blond, less chewy version of the same cookie. Add a pinch of coarse sea salt for that extra crunch and contrasting savoriness. You can even experiment with mixing several kinds of cereals like rice cereals!

Now, get baking, and get ready to curl up with a glass of milk and a book!
What you'll need... (makes 24 3-inch cookies, minus all the dough I nibbled) 
Dry ingredients:
1 cup plain flour
3/4 cup coconut flour
1 cup + 1 cup cornflakes, lightly crushed by hand
2 teaspoons cornstarch
1/2 teaspoon baking soda
3/4 teaspoon salt
Pinch of coarse sea salt

Wet ingredients:
7/8 cup (200g) butter, softened
1 cup brown sugar
1/4 cup white sugar
1 teaspoon vanilla extract
2 eggs

Directions...
1. Preheat oven to 190C/375F. Line a baking sheet with parchment paper and set aside.

2. In a mixing bowl sieve together the flours, cornstarch and baking soda. Mix in salts and 1 cup of cornflakes.

3. In a separate bowl, use electric beaters to beat the butter and sugars until creamy. Beat in the eggs and vanilla. Pour this wet mixture into the flour mixture and fold to combine.

4. Place the remaining cornflakes in a bowl. Spoon slightly heaped tablespoonfuls of the cookie dough into the cornflakes. Toss gently in the cornflakes to coat and form balls.

5. Drop the dough balls onto the parchment lined baking sheet, spacing at least 2 inches apart. Bake for 12-15 minutes or until golden. For best results let the cookies cool for 10 minutes before attacking. Repeat this step until you are out of dough.

Note: Just like cereal in milk, once mixed into the dough the cornflakes can quickly go soggy. If you enjoy working slow in the kitchen (like me), or have a small oven that can only handle a half dozen of cookies at a time (like me), reserve more cornflakes to be used as sprinkles instead of mixing into the dough in step 2.


《咽韌奇脆玉米片曲奇》
玉米片、曲奇均與牛奶為天生好拍檔,何不將兩者合壁成為玉米片曲奇同牛奶一起享受?
材料(約 24 個 3 吋 曲奇):
乾成份:
低筋麵粉  125 克
純椰子粉  85 克 (可用 60 克 低筋麵粉取替)
玉米片  60 克(分半,並用手輕輕壓碎)
粟粉  2 茶匙
蘇打粉  1/2 茶匙
幼鹽  3/4 茶匙
海鹽  少量

濕成份:
牛油  200 克 (室溫)
紅糖  220 克
砂糖  50 克
香草精  1 茶匙
雞蛋  2 隻

做法:
1. 預熱焗爐至 190C / 375F。
2. 麵粉、粟粉、蘇打粉過篩,拌入幼鹽、海鹽和一半玉米片備用。
3. 牛油、砂糖、紅糖用攪拌機打至綿滑,拌入雞蛋及香草精。
4. 將以上濕和乾成份混合均勻。注意別過分攪拌。
5. 將剩餘的玉米碎片置於碗子內。
6. 把麵團揉成圓球狀,再沾上玉米碎片,然後排放在鋪了烘培紙的焗盤上。注意每球分隔約 2 吋讓其有充足空間擴大。
7. 放入焗爐焗約 12-15 分鐘至金黃色。略涼約 10 分鐘後可馬上享用!

[Write to me under comments! Follow me on Instagram @alvinckl and check out my Facebook Fan Page!]

Wednesday, March 23, 2016

March Birthdays, Boardgames, and a Meat-Free Vegetarian Party!

March is a month with much to celebrate: the return of Spring, the arrival of asparagus, Japanese strawberries, as well as cherry blossoms. It is the month of birthdays when many close friends and myself grow yet another year younger and wiser; it is also when "Alvin's Penthouse Kitchen: the Blog" officially turns three. Yipee!

"How about we throw a barbecue down at the clubhouse?" I blankly suggest as my friends and I brainstorm for activities for the Saturday set aside to celebrate our belated birthdays.

"...Barbecue is cool," Eugene stammers, reluctance escaping his tone, "though I'm only concerned that Kenko and I are both vegetarian, and we might not have much to eat. You know."

Always photogenic, anytime, anywhere
March babies: born on the same day, just years apart!

I can't seem to come up with a good caption for this
Indeed, a typical barbecue can be so meat-centric that it is no more a party to herbivores as a boat trip is to someone who stays away from the sun and sea.

And that is when it all suddenly strikes me. "I will throw an all-vegetarian party at home!" The timing could not have been more perfect. It was as if a fire ignited in me. I was determined to pull together my first ever entirely meat-free feast, fueled by my ever-growing interest and fascination in the world of vegetarian and vegan cooking.

Eugene was thrilled. Rarely ever has he been to home gatherings other than those where vegetarians were no more than an afterthought - an inconvenience even, sometimes - where a cold salad and other usual suspects may be the only option.

Curried Sweet Potato & Pumpkin Lentil Stew: a delicious and inexpensive way to get some fiber-rich lentils into your diet!
I finally cracked the code of latticework with this Wild Mushroom & Gruyère Pie!
Two vegetarians, three March babies, six new and old friends and six happy, full stomachs

Black bean dip is great as finger food at a party!
The thought of a veggie-centric party (complete with boardgames and Pictionary) got us fired up. Kenko insisted on bringing his lunchbox for leftovers, that is if we had any.

I tasked myself to put together a diverse, balanced menu that:
- is simple enough to pull off in a few hours, unless you work turbo speed;
- is fun and fulfilling, potluck style;
- makes use of my existing pantry ingredients;
- is equally appealing to both vegetarians and non-vegetarians

In my moments of brain fart I called up my cousin Kathleen in Toronto, an avid vegan cook herself, for some inspiration. In no time, the menu was set. 

Apple and Cabbage Mint Slaw
Black Bean Dip with Blue Chips
Sweet Corn Cake
Curried Sweet Potato and Pumpkin Lentil Stew with Coconut Milk
Wild Mushroom, Rosemary, Gruyere Lattice Pie

The theme of the day was 100% meat-free, but all the more it was about celebrating friendship, and honoring a well-balanced, healthy, and tasty diet. To that we toast!
Stay tuned for recipes to come!

[Write to me under comments! Follow me on Instagram @alvinckl and check out my Facebook Fan Page!]

Friday, March 11, 2016

Coconut Cashew Maple Granola

附中文食譜
Breadcrumbs. Croutons. Granola. Just a few fine examples of kitchen staples that one should never bother purchasing from the grocers. That is not to say that I never bought them. In fact, for years I have too many a time stood on a supermarket aisle gawking at unintelligible ingredient lists and nutrition labels, baffled by choice and dubious health claims. And then one day I thought, why not make them myself?

The catch is... once you've made granola yourself, you can never turn back. It is so easy, lower in sugar, infinitely cheaper than commercial brands, and allows freedom in tailoring to your own taste. Try it and you will be hooked for good.

Putting together a large batch of granola takes merely under 10 minutes of active time
Nothing beats homemade granola: customize it with you favorite nuts, seeds, and dried fruits!

A strong craving for crunchy granola recently got me. Seeing that I have heaps of cashews and coconut flakes from Wholefoods sitting in my pantry, I set off to make my first batch of homemade granola for brunch.

In no time, the warm aroma of maple roasted cashews wafting through my kitchen transports me back to the streets of Manhattan, where pushcart vendors seduce passerby with all sorts of roasted nuts.

Imagine the formidable crunch, the subtle saltiness and sweetness of cashews enveloped in golden clusters of wholesome rolled oats; imagine the scent of toasted coconut and caramelized brown sugar, the soft chew of raisins - these are what make this granola dangerously addictive... so addictive that my visiting friend and I could hardly keep our paws off the baking pan despite being already stuffed.

Warning: this granola is highly addictive...!
Sprinkled over yoghurt and fruit, served with milk, or simply straight from jar to mouth, this homemade granola makes a delicious, nutritious breakfast or snack any time of the day. I use maple syrup and coconut oil for the added flavor and benefits, but feel free to substitute with honey and any mild tasting vegetable oil.

For more simple brunch ideas, check out my recent post!

To prepare...
2 cups old-fashioned rolled oats
3/4 cup cashews*
1/4 cup slivered almonds
1/2 cup flaked coconut
3 tablespoons dark brown sugar
1/4 cup pure maple syrup
2 tablespoons melted coconut oil
1/2 teaspoon salt*
1/4 cup raisins 
*Note: omit salt if using salted cashews.

Spread the granola out evenly on the baking sheet
1. Preheat oven to 150C/300F.
In a large bowl, combine oats, nuts, coconut, brown sugar, and salt (if using). In a separate bowl, combine oil and maple syrup. Drizzle the mixture over the dry ingredients and stir until well coated.

2. Spread granola in an even layer on a rimmed baking sheet and bake for 40 minutes until golden brown. Remove from oven and allow to cool for 10 minutes without stirring. This will allow the granola to crisp up.

3. Carefully turn the mixture over with a cooking spatula and continue to bake till golden brown, approximately 10 minutes more.

4. Remove from oven and allow to cool for about 15 minutes without disturbing. Break granola into clumps and scatter in raisins. Store in an airtight container for up to four weeks (I assure you you'd be making a new batch by then). Enjoy!

Top Greek yoghurt with some homemade granola and berries for a scrumptious breakfast!


《 腰果楓糖格蘭諾拉烤燕麥 》 
材料:
燕麥片  180 克
腰果  115 克*
杏仁切片  30 克
椰子片  40 克
紅糖  3 湯匙
純楓糖漿  85 克
椰子油  2 湯匙
鹽  1/2 茶匙*
提子乾  40 克
*備註:如使用已添加鹽的腰果,則可省放鹽。

做法:
1. 預熱焗爐至 150C / 300F。
2. 燕麥,腰果,杏仁,椰子,紅糖和鹽拌勻備用。
3. 椰子油和楓糖漿拌勻,倒入以上乾料,用膠刮拌勻。
4. 把已拌勻的材料平均地鋪放在鋪了烘培紙的焗盤上,放入焗爐焗40分鐘至金黃。
5. 取出晾涼約10分鐘,待其脆化。
6. 用鑊鏟輕輕地把烤燕麥翻轉,再放進焗爐焗約10分鐘至金黃。
7. 烘好後取出晾涼15分鐘左右,期間別多手觸碰啊!
8. 用手指輕輕把格蘭諾拉分開成小塊並撒上提子乾。

置密封的盒內可於室溫存放四星期。

I am officially in love with this granola. It will become a regular!
[Write to me under comments! Follow me on Instagram @alvinckl and check out my Facebook Fan Page!]

Friday, October 16, 2015

One more night to go... See you all tomorrow!

Desserts & Sweets Charity Food Fair @ CXC | 11-2pm | Oct 16

It has been a very busy two months at the Penthouse Kitchen (excuse my absence from posting much) prepping and planning for the Desserts & Sweets Charity Food Fair event that is to take place tomorrow at work. All proceeds will go to Sunnyside Club that supports mentally and physically disabled children in Hong Kong.

I have recruited dear friend Kylie who kept me sane and became a very deft kitchen "dance partner" as we flitted about the cramped and narrow kitchen space. All our efforts culminated these two days with the oven running round the clock, churning out batch after batch of scones that filled my entire penthouse with heavenly, buttery, exotic aromas.
My biggest thank you to Kylie, my unconditionally cheerful partner in crime that kept both us going!

Find out the FIVE FLAVORS featured tomorrow and bag some home!
Cheddar Apple Rosemary is apparently Kylie's favorite
Hundreds... and another hundred more to go

Miss the event? Want some scones? Place an order! Simply send me a message on my Facebook Fan Page!!

[Write to me under comments! Follow me on Instagram @alvinckl and check out my Facebook Fan Page!]