Thursday, November 21, 2019

Pressure Cooker Braised Chinese Mushrooms with Noodles | 珍菌香菇素煨麵

附中文食譜
Earlier this summer I stumbled into a cozy local health-food cafe in the heart of the Mongkok Flower Market looking to fill my midday hunger pang. Nutritious soups, tonics and healthy desserts aside, the menu features a one and only savory and more substantial signature dish - noodles with braised assorted Chinese mushrooms - with a brief description of its health-giving properties. The bowl of noodles was simple, tasty and comforting, and perfect for a light lunch or dinner; I thought I could easily make a similar version at home with my own mix of mushrooms I have in the pantry.

Each type of precious fungi contributes to creating a complex blend of intense flavors, aroma and rich textures

Every now and then, our generally meat-heavy diet at the workplace or in dining out gets me feeling in need of a break - a desperate longing for staying in and cooking something light, satisfying, and completely meat-free, something as basic as braised mushrooms. Dried mushrooms come to the rescue on days when I am just too lazy to go all out on market visits and meal prep. Thanks to their superb meatiness, Chinese dried shiitake and monkey head mushrooms can easily be the star of any vegetarian or vegan main event. As long as they are stored in a cool place and away from direct sunlight (sometimes even in the freezer), dried mushrooms keep well and make a good pantry staple.

Cut cooking time down with a pressure cooker like this Vitavit® by Fissler
Chinese braised mushrooms is familiar to many, as they frequently make appearance at banquets and especially during Chinese New Year celebrations, where special, festive occasions will often call for the most premium grade of mushrooms braised in oyster sauce and served on a bed of greens. As Chinese mushrooms already pack a heady punch of aroma on their own, they do not require heavy seasoning, although a touch of sweet and extra umami does bring out the best of them (in comes the ever indispensable oyster sauce, whose vegetarian version is now widely available in supermarkets).

At home, braised mushrooms can be just as simply prepared, with the cooking time significantly reduced with an instant pot or pressure cooker. You can opt for the most purist of all and use only Chinese dried shiitake, or use a medley of precious fungi to create a complex blend of aroma and texture unique to each type of mushroom.

The soaking liquid, rich with intense mushroom flavor, provides the "stock" - do not discard after soaking!
Monkey head mushrooms - so named for its resemblance - are like sponges that plump up in water and add incredible depth of flavor, aroma, and a juicy, spongey bite. Porcini (I recently picked up a bag on my travels to Yunnan, China) adds richness and earthiness; while the brightly orange Cordyceps militaris brings crunch and a mild bitterness along with its purported potential to improve heart health and fight inflammation, cancer, diabetes and aging. As always, experiment your own blend and use what you have on hand!

To complete the simple dish, add a side of Asian greens and ladle the braised mushrooms over your favorite noodles, be it udon, somen, buckwheat soba, or thin egg noodles. Perhaps the most enlightening light bulb moment I had at the health-food cafe was their use of chopped Chinese celery as a garnish, which adds an uncanny layer of pleasant, medicinal flavor and crunch to the braised mushrooms. Spoon the intensely flavored mushroom "gravy" over and lunch is served!


Ingredients
50 g small Chinese dried shiitake mushroom
2 heads dried monkey head mushroom
12 g dried porcini (or other mushroom of choice)
15 g Cordyceps militaris
2 teaspoons sesame oil
1 inch ginger, sliced
1 tablespoon Shaoxing wine
3 tablespoons oyster sauce, regular or vegetarian
1 tablespoon soy sauce
20 g rock sugar
1 star anise
3 cups (700 ml) water
1 tablespoon cornstarch (mixed with 1 tablespoon water)

Serve with:
Chinese celery, chopped | noodles of choice | greens of choice

Directions
1. Give the Chinese mushroom, monkey head mushroom, and porcini a quick rinse, then place in a large bowl and submerge in 3 cups of water for 30 mins. Trim any hard stems if necessary. Tear the monkey head mushrooms apart into smaller chunks. Squeeze excess water out of the mushrooms, reserving the soaking water. Give the Cordyceps militaris mushrooms a good rinse and set aside.

2. In instant pot, add sesame oil on medium heat. Add sliced ginger and mushrooms and stir fry for 10 seconds. Stir in the Shaoxing wine.

3. Carefully pour in the mushroom soaking water, making sure that you do not pour in any sediment or dirt from the water.

4. When the liquid comes to a simmer, stir in the oyster sauce, soy sauce, rock sugar, and star anise. Then, on medium-high heat, fasten the pressure cooker lid and set the cooking display with traffic light function on level II. Once the green ring becomes visible, reduce heat to low and set timer for 8 minutes.

5. When time is up, set the cooker aside to cool and release pressure after several minutes. Next, mix the cornstarch slurry, unfasten lid, and slowly pour in slurry while stirring constantly. Bring the contents to a boil again then turn heat off.  Remove ginger slices and star anise.

6. Arrange cooked noodles of choice and greens in a bowl, then ladle over a generous scoop of braised mushrooms and sauce. Sprinkle over chopped Chinese celery and enjoy! 

Note: to cook without using an instant pot, simply extend cooking time to 30 - 45 mins or until mushrooms are cooked and tender.

Tried this recipe?
Share with me or leave a comment! #alvinspenthousekitchen 
Find me on Instagram @alvinckl and @alvin.penthousekitchen and follow my Facebook Fan Page!

【 珍菌香菇素煨麵 】


材料:
珍珠冬菇                      50 克
猴頭菇                           2 枚
牛肝菌                           12 克
蟲草花                           15 克
麻油                                2 茶匙
                                   1 寸,切片
紹興酒                           1 湯匙
蠔油或素蠔油              3 湯匙
生抽                                1 湯匙
冰糖                                20 克
八角                                1 顆
                                    700 毫升
粟粉                                1 湯匙,打芡用

拌菜:
芹菜,切粒 | 麵條 | 青菜

做法:
1. 冬菇、猴頭菇、牛肝菌過水略為洗淨後以清水浸軟。猴頭菇去蒂並用手撕成小件。把多餘水份擠出,保留浸菇水備用。蟲草花洗淨備用。
2. 高速煲燒熱後下麻油,爆香薑片及雜菇。
3. 加入紹興酒後調大火加入浸菇水,注意把水中雜質隔開。
4. 加入蠔油、生抽、冰糖及八角。待水滾後蓋上高速鍋蓋,調校至 2 速,用中火煲至見綠環後轉慢火,計時 8 分鐘後熄火。
5. 粟粉加入一湯匙室溫水拌勻將高速煲裡剩餘蒸氣排放後開蓋,倒入芡汁並以大火收汁,約一分鐘。把火熄掉,去除薑片和八角。
6.  把煮好的麵條、青菜放在碗裡,鋪上珍菌香菇和醬汁,最後撒上芹菜粒即成!

備註:不用高速煲,可依傳統做法 — 只要把所有燉煮材料用大火煮滾後收中慢火,蓋上煲子,煮 30 至 45 分鐘後打

Tried this recipe?
Share with me or leave a comment! #alvinspenthousekitchen 
Find me on Instagram @alvinckl and @alvin.penthousekitchen and follow my Facebook Fan Page!

Wednesday, September 25, 2019

Peanut Butter, Date and Oat Bliss Balls | 椰棗燕麥能量球

If a granola bar and a chocolate peanut butter cookie dough had a love child, it would be this Peanut Butter, Date and Oat Bliss Ball. They are brown, shaped like meatballs, flecked with seeds, nuts, and specks of dried fruit, and are known interchangeably as energy balls. Typically found only behind display cases in those scarce health food-conscious cafes charging a whopping HKD30 a piece, these rather unadorned, ordinary-looking balls of joy may not immediately draw attention from Instagram-crazed foodies, much less do they receive the recognition they deserve. For those who have yet to be initiated into the world of energy balls, time to get onboard!

Bliss balls are not called "bliss" without a reason. Jam-packed with whole foods and super foods, bliss balls are chock full of nutrients with a satiating combination of proteins, good carbs, healthy fats, fiber - and flavor. They are a breeze to make, requiring no baking or cooking, can be made ahead in batches, and are fully portable - making them the perfect quick pre- or post-workout fuel, midday pick-me-up snack, or that perfect grab-and-go breakfast on those rushed mornings.

Two to three of these energy bites in the morning typically keep me full till lunch time so, in short, these babies are essentially the (almost entirely) guilt-free snack that can help keep hunger pangs at bay and conquer those sudden cravings for junk food which always, inevitably end with regret. Especially at 1am watching Will & Grace on Netflix.

This recipe takes advantage of dates as the natural sweetener and binder for the bliss balls and contains no added sugar or oil. And while dates, dried cranberries and raisins bring sweetness and tartness, dark chocolate and peanut butter rounds off every bite with an irresistible savoriness and familiar oompf. I like to use chunky peanut butter for added texture, but a smooth one will do as well. Bliss balls are fully customizable, so feel free to follow your heart's desire and experiment with your favorite ingredients! Switch peanut butter out for almond or other nut butters; toss in chopped nuts or chia seeds and hemp seeds for an extra boost of protein and essential fatty acids.

Need a quick snack on the go? These flavor-packed bliss balls are the perfect little boosts of energy!

What you'll need...
1 cup (200 g) pitted Medjool dates*
1 1/2 cup instant oats
1/3 cup peanut butter
2 teaspoon pure vanilla extract
1/4 cup warm water
1/3 cup sunflower seeds
2 tablespoons pumpkin seeds
1/4 cup dried cranberries
2 tablespoons raisins
2 tablespoons shredded coconut
35 g dark chocolate, chopped

Note: If the dates are dry, soak in warm water for 10 mins then drain well.

Directions...
1. In a food processor, pulse sunflower seeds and pumpkin seeds to break into smaller pieces. This is an important step to avoid whole seeds from jutting out or causing the energy bites to crumble. Set aside. Place the Medjool dates into the food processor and chop until small pieces remain or until a sticky mass forms.

2. In a small bowl, combine peanut butter, vanilla extract, and warm water until it reaches the consistency of honey. In a large mixing bowl, mix together all ingredients until well combined. Roll mixture into 1-inch balls and refrigerate for 1-2 hours or until firm. Store in an airtight container in the fridge for 3-4 days or freeze the balls. Enjoy on the go!

Tried this recipe?
Share with me or leave a comment! #alvinspenthousekitchen 
Find me on Instagram @alvinckl and @alvin.penthousekitchen and follow my Facebook Fan Page!

【 椰棗燕麥能量球 】


材料:
無核椰棗                200 克
即溶燕麥片            150 克
花生醬                    85 克
純雲尼拿香油         2 茶匙
溫水                        60 毫升
葵花籽                     5 湯匙
南瓜籽                     2 湯匙
蔓越莓乾                 4 湯匙
提子乾                     2 湯匙
椰絲                         2 湯匙
70% 巧克力             35 克

做法:
1. 葵花籽和南瓜籽用攪拌器輕輕打碎備用,有助減少能量球鬆散的機會。
2. 把椰棗放在攪拌器裡打碎至形成黏黏的一團。
3. 花生醬注入溫水和雲尼拿香油,拌勻。
4. 把所有材料拌勻,用手揉成球狀後冷藏 1-2 小時即可享用!

備註:若果椰棗感覺太乾,可先以溫水泡浸片刻。待軟化後瀝乾備用。

Tried this recipe?
Share with me or leave a comment! #alvinspenthousekitchen 
Find me on Instagram @alvinckl and @alvin.penthousekitchen and follow my Facebook Fan Page!

Monday, September 2, 2019

Kor Moo Yang: Thai Grilled Pork Neck | 泰式燒豬頸肉

附中文食譜
My memories of Bangkok often conjure up images of lively, cacophonous markets; of thoroughfares routinely jammed with brightly colored cabs; of fearless motorbike taxis zipping dexterously through the traffic; and of course, images of the myriad street food the city is known for. Char-grilled pork skewers, Isaan sausages, fried chicken, soup noodles of all sorts, banana and egg roti are surely no strange sight to street food aficionados and starving food seekers in Bangkok.

Happy street food crawl in Happy Land Market, Bangkok
Turn this humble and inexpensive cut of pork into a delectable household favorite!
Fringing Happyland Center, a bustling food market frequented by only locals in the Bangkapi district, there is a street lined with fruit vendors, Thai bubble tea makers, a sweets and desserts stall, and countless other street food vendors that spill onto adjacent alleys. In one corner, a faded and slightly worn green metal open pit oven stands, spewing smoke into the already hot and muggy streets. Inside the oven are slabs of marinated pork neck, pork jowl, and juicy chicken legs grilling and glistening over hot charcoal, the meats occasionally turned and flipped and altogether replaced once cooked and ready for sale. There I always stand, about a meter away from the side, taking the sight and smells in, drooling while sweat profusely drips from my temples down my chin. I have been to this market more times than my fingers can count, in search for the most genuine street foods served to locals and priced for locals, but still this green oven captivates me every single time. 

Kor Moo Yang (คอหมูย่าง), or grilled pork neck, is to no surprise a Thai favorite found everywhere from food centers to streets and restaurants. In Hong Kong, this dish is served in just about every Thai restaurant, making up one of the few standard starters that every Hong Konger knows when going out for Thai food.

Pork neck is probably one of my favorite cuts of meat, layered with just the right balance of lean meat, fat, and muscle, giving a crunchy chew that is oh so flavorful even with the simplest marinade. Besides, pork neck is also much more forgiving than the leaner cuts so the chances of overcooking is rare.

Of all the street foods out there in Bangkok, Kor Moo Yang is one that is easy to replicate at home, even without a charcoal grill. Simply prepare the marinade and marinate the pork overnight, then pop the slabs into a hot oven and you will soon be swooning over the heavenly aroma of a Thai barbecue. The addition of palm sugar in the marinade not only adds depth and sweetness, but also increases the caramelization on the surface of the meat (I'll be first to dive shamelessly for the charred, crispy bits). As with most marinades, the following is just a guideline. Feel free to toss in some finely chopped kaffir lime leaf or shallots for variation in flavor! For those of us lucky enough to have a barbecue on a patio, this recipe is also perfect for a quick grill.  Try this marinade on chicken wings and pork chop!


Thinly slice pork neck at a 45° angle across the grain for best results
I swear this grilled pork neck is going to taste better than any you have tried in a restaurant. While the meat is already flavorful enough to enjoy on its own, the dish is not complete without a Nam Jim dipping sauce! Kor Moo Yang can go with just about any variation of Nam Jim. Click below for my recipe.

Nam Jim: Thai Dipping Sauce

What you'll need...
500 g pork neck
2-3 stalks lemongrass, white parts only, finely chopped
2 cloves garlic, finely chopped
2 cilantro roots or 4 cilantro stems, chopped
2 teaspoons palm sugar
1 tablespoon oyster sauce
1 tablespoon fish sauce
Nam Jim

Directions...
1. Trim excess fat off the pork neck.


2. In a mortar and pestle or food processor, pound lemongrass, garlic, and cilantro roots or stems into a paste. Add palm sugar and pound until dissolved. Add oyster sauce and fish sauce and stir to combine. Pour marinade over the pork neck and coat well, refrigerate for at least two hours or overnight for best results.


3. Remove pork neck from the refrigerator about 20 minutes prior to cooking. Preheat oven to 200C/400F. Line a baking tray with baking paper and grill pork neck for 15 minutes. Flip and continue grilling for 10 minutes or until slightly charred on the outside. Cooking time will vary depending on the thickness of the pork neck.

4. Allow pork neck to rest for 5 minutes. To serve, slice the pork neck thinly across the grain, angling the knife at 45 degrees if the pork neck is particularly thin. Serve warm with Nam Jim. Enjoy!

Tried this recipe?
Share with me or leave a comment! #alvinspenthousekitchen 
Find me on Instagram @alvinckl and @alvin.penthousekitchen and follow my Facebook Fan Page!

【 泰式燒豬頸肉 】

老老實實,有邊次去泰國餐廳唔點燒豬頸肉先? 爽口彈牙、香口又惹味,只需預先醃好和焗爐一部,在家都能夠造出曼谷街頭、炭香四溢的正宗泰式燒豬頸肉!再配上自家製泰式酸辣蘸汁,風味絕佳。 這好可能是您食過最好吃的燒豬頸。

材料:
豬頸肉                      500 克
香茅                           2-3 根
蒜頭                           2 瓣
芫荽根部                  2 根(或以適量芫荽莖代替)
棕櫚                      2 茶匙
蠔油                           1 湯匙
魚露                           1 湯匙
泰式秘制酸辣蘸汁 

做法:
1. 把豬頸肉洗淨,將過多的脂肪除去備用。
2. 把香茅白色部份切成小圓圈後剁碎。將蒜瓣和芫荽根或莖剁碎。
3. 用研缽和研棒或攪拌機把香茅、蒜末、芫荽磨成蓉。
4. 加入椰糖,繼續磨至完全溶化。加入蠔油和魚露,拌勻。
5. 豬頸肉加入醃料,放進雪櫃醃 2 小時或過夜則最為理想。
6. 烤肉前先將醃好的豬頸肉拿出來解冷約 20 分鐘。預熱焗爐至 200C/400F。
7. 豬頸肉放在鋪了烘培紙的烤盤上,焗 15 分鐘後把肉翻轉,視乎豬頸肉厚度,再烤約 10 分鐘至肉邊微焦即可取出。
8. 待豬頸肉稍涼,以 45 度角逆紋切成薄片,以蘸汁伴吃,味道絕佳!

Tried this recipe?
Share with me or leave a comment! #alvinspenthousekitchen 
Find me on Instagram @alvinckl and @alvin.penthousekitchen and follow my Facebook Fan Page!     


Thursday, July 4, 2019

Summer Gazpacho | 夏日西班牙番茄凍湯

As the height of summer draws upon us, nothing quite beats a midday iced lemonade or a cooling cup of gazpacho. Forget about hours slaving away in a steamy kitchen stirring soup over a hot stove - keep things simple and fresh with gazpacho! Gazpacho is a quintessential Andalusian summer soup bursting with ripe-from-the-garden flavors. Chilled and raw, this soup is truly a breeze to make, requiring only to be made hours in advance for flavors to mingle and develop - making gazpacho an ideal starter for brunch, summer entertaining, weeknight dinners, or even picnics. A refreshing gazpacho effectively opens up the appetite; it is also the most effortless way to get fresh vegetables into your diet!

An idyllic summer picnic at the beach with Jayla; cooling off with chilled gazpacho and jámon ibérico for a touch of Spain! [Gold Coast Beach, Hong Kong, Jun 2019]


Not unlike the other world revered Spanish classic - paella -, gazpacho generates heated debates over what constitutes the most authentic recipe. Nevertheless, I believe we would all agree that the gazpacho as we all know it would typically involve tomatoes, cukes, some type of pepper, good olive oil, bread, and seasoning. Regional variations in taste and produce as well as culinary creativity have brought other interpretations of gazpacho into mainstream, with melon-based, green, or even white-hued gazpacho being some of the most recognized.

In my book, there is no one way to do a smashing gazpacho. There are infinite ways to tailor this hot-weather soup to your liking. Some like it chunky, others velvety smooth. You may prefer it spicy; and some prefer to go without bread. There are, however, ways where gazpacho can go really wrong. At its worst, I've made gazpacho that tasted like watered down salsa, or worst yet - a gazpacho that tasted more of bell peppers than anything (eww). You also want to make sure your gazpacho does not leave you with an invincible garlic-onion breath unless Dracula's in town.

Personally, I prefer to leave out the bread as I find it diluting the amazing flavors. Furthermore, the addition of olive oil to the vegetables produces a creamy emulsion and gives enough of a body to the soup, hence it could do without the extra boost. Besides, leaving out the bread keeps the gazpacho gluten-free and suitable for most special diets!

While peeling cucumbers help yield a more vibrant gazpacho, keeping the peel on maximizes nutrients
The recipe I share here is but one way that I love my gazpacho. I once swapped bell peppers out for a mildly hot, long red pepper - and could not turn back since. I tend to eyeball my ingredients, tasting and adjusting along the way, so use the measurements loosely as a reference and always start with smaller quantities of garlic and onion and add more as desired.

No cooking required: blitz everything with a blender or immersion blender
Pair this gazpacho with waffles for a complete and easy weekend brunch!
Sweet Potato and Bacon Waffles (click for recipe)

What you'll need... (for two)
3 - 4 medium tomatoes
1 long red pepper*
1 Persian or baby cucumber
1 clove garlic
1/4 of an onion
1 1/2 tablespoons extra-virgin olive oil
2 teaspoons sherry vinegar or red wine vinegar
Fine sea salt
Freshly ground black pepper

*Note: substitute with red bell pepper for a non-spicy version
To serve: sliced or diced cucumber and tomato | chives | croutons  

Directions...
1. Core and cut tomatoes into large chunks. Peel and de-seed cucumber. De-seed pepper and remove pith.

Tip: gloves are recommended to protect your fingers when de-seeding hot peppers - the heat will sting!

2. For a smooth consistency, add tomatoes, pepper, cucumber, olive oil, salt and pepper, and part of the garlic and onion to a blender and blend until smooth. Taste and adjust seasoning, adding more garlic and onion as needed. For a coarser texture, reserve some of the ingredients and pulse briefly and mix in with the soup.

Tip: for best result, blitz the olive oil together with other ingredients rather than whisking it in afterwards

3. Chill the soup for at least two hours or overnight. To serve, divide soup into small bowls and garnish with cucumber and tomato, chives, a crack of sea salt and black pepper, and enjoy with croutons if desired. ¡Buen provecho!

Do you have your own favorite gazpacho recipe? 
Share with me or leave a comment! #alvinspenthousekitchen 
Find me on Instagram @alvinckl and @alvin.penthousekitchen and follow my Facebook Fan Page!
夏日西班牙番茄凍湯


炎夏日 最適合整碗清新醒胃嘅 Gazpacho! 毋需開火烹調,不入廚房嘅朋友仔都能輕易炮製。冷湯的做法變化多端,以下是我的 指定食譜 — 醒神健康之餘帶點辛辣,保證另你喝不停口!不妨整定用便攜壺帶去沙灘野餐啊~!

材料:
蕃茄                           3 - 4 個
紅尖椒*                      1 隻
青瓜仔                       1 隻
蒜瓣                           1 瓣
洋蔥                           1/4 個
初榨橄欖油               1 1/2 湯匙
雪莉醋或紅酒醋       2 茶匙
海鹽黑胡椒           適量

* 喜歡不辛辣的朋友,可改用紅燈籠椒
裝飾:蕃茄、青瓜薄片| 蔥花 | 麵包脆粒

做法:
1. 蕃茄切件。青瓜去皮、去籽、切段。紅椒去籽、切片。
2. 將上述材料放入攪拌機內或用手持攪拌捧打至幼滑再作適當調味。如想增加口感,不妨預留一些蔬菜粒。
3. 放入雪櫃冷凍 2 小時或過夜,風味更佳。隨喜好加上裝飾,即成!

Did you make this recipe? 
Share with me or leave a comment! #alvinspenthousekitchen 
Find me on Instagram @alvinckl and @alvin.penthousekitchen and follow my Facebook Fan Page!

Tuesday, June 25, 2019

Sweet Potato and Bacon Waffles | 蕃薯煙肉窩夫

附中文食譜
Growing up, waffles were hardly part of my breakfast repertoire. We didn't grow up with a waffle maker at home. Although Hong Kong-style waffles were sold everywhere at hawker stands - generously slathered with peanut butter and condensed milk and sold side by side with egg puffs - I never really developed strong memories of waffles since street food was strictly off limits in my family.

Much in the same way as American style pancakes, waffles always felt to me like empty calories heavy with flour and laden with sugar - nothing more than a vehicle for the river of syrup or pat of butter, or the occasional bells and whistles.

Things started evolving for me when fried chicken and waffles became a thing in the U.S., something of a national obsession really. Don't get me wrong - chicken and waffles have been around for ages, with origins purportedly rooted in the South, but the formidable duo has seen a revival of late as brunch grew to become the top trend in American cuisine and beyond. In an instance, the humble waffle has been propelled to the center stage and under the global spotlight as an increasing number of restaurants worldwide are adding the combo to their menu and coming up with their own signature variations, be it savory or sweet. Waffles were no longer just for breakfast; neither are they simply just plain or sweet. My attitude towards waffles shifted. Next thing I know, I developed a craving for fried chicken and waffle and make a beeline for my favorite spot every time I land in New York.

End of last year, I picked up a multi-function sandwich maker at an appliances blowout sale that came with a waffle griddle. The machine hasn't seen daylight since until this past weekend when I decided a lazy "brunch for dinner" was in order for my little get-together with a couple of good friends. And by lazy, I mean it was just going to be waffle and gazpacho, no cooking required. I wanted the waffle to be the main event, something that was at once comforting, healthy, and satisfying. I also did not want flour to be the bulk of the waffle. So I looked to sweet potato - and sure enough - sweet potato waffles is a thing.

"Brunch for Dinner": a cozy, happy, celebratory weekend reunion!
Sweet potatoes are considered low on the glycemic index scale - meaning the carbohydrates are slowly digested, absorbed, and metabolized and do not cause a spike in insulin levels. Not only are these wholesome sweet potato waffles low in carbs and calories (make them even better for you without the bacon - but hey, baaaaacon), they are naturally gluten-free. Most recipes on the internet call for coconut flour to be incorporated into the mixture, but considering that in some parts of the world coconut flour is not readily available or is plain costly, I recommend other nut flours or cornstarch as a gluten-free substitute.


In this savory version of sweet potato waffles, bacon, spring onions and a touch of garlic powder give incredible flavor, while paprika brings subtle heat that plays off the mild sweetness in the sweet potatoes. Top the waffles with more crisp bacon, a gorgeous, runny sunny-side-up and a generous sprinkle of chopped spring onion, and finish with a light drizzle of maple syrup and hot sauce for a delicious sensory experience. Pair the ensemble with a refreshing, appetizing cup of gazpacho (recipe to come soon!) and you have a complete brunch suited for any time of the day!

What you'll need... (for two)
1 medium sweet potato (2 cups grated)
1 bunch spring onion, chopped
3 tablespoons cornstarch*
1 teaspoon paprika
1/2 teaspoon garlic powder
Large pinch of sea salt
1 slice bacon (optional)
2 eggs, beaten

To serve:
Bacon | Fried or poached egg | Avocado | Maple syrup | Hot sauce | Chopped spring onion

Note*: substitute with 2 tablespoons of coconut flour

Directions...
1. Peel and grate the sweet potato. Give the shredded sweet potato a few quick pulses in a food processor if necessary to break down any long strands. Important: lay grated sweet potato out on paper towels. Place another paper towel on top and press down to absorb as much liquid as possible.


2. Preheat waffle maker or waffle iron.

3. In a small frying pan, cook the bacon (if using) until desired crispiness, drain excess fat and crumble the bacon. In a large bowl, mix together all the waffle ingredients including the crumbled bacon until thoroughly combined.


4. Once the waffle maker is hot, grease with bacon fat or spray with nonstick spray. Spread sweet potato batter evenly onto the waffle maker, making sure it's packed down lightly. Close machine and let cook until golden brown and slightly crispy, flipping once if necessary, about 8 - 10 minutes. Remove and repeat with remaining batter.

5. While waffle is cooking, prepare toppings of choice. If making waffles in batches, lay cooked waffles on a rack and keep warm in an oven. Transfer to a plate and top with desired fixings, enjoy!

 【 蕃薯煙肉窩夫 】

一般的格仔餅啊!近年美國掀起炸雞窩夫熱潮、加上週末嘆 Brunch 的文化漸催普及化,窩夫不再只局限於早餐或作甜品~ 早餐當晚餐又何樂而不為呢? 用蕃薯製作的格仔餅鹹中帶甜,低卡高纖零麩質、不會令血糖飆升,配上培根煎蛋蘑菇和蕃茄凍湯,是完整完美的「早餐」啊!

材料(兩人份量):
蕃薯                                200 克
                                   1 小札
粟粉*                             3 湯匙
紅椒粉 (paprika)          1 茶匙
蒜粉                                1/2 茶匙
海鹽                                1/4 茶匙
煙肉                                1 片(可免)
雞蛋                                2 隻

伴碟:煙肉 | 太陽蛋 | 水煮蛋 | 牛油果 | 楓糖漿 | 辣醬 | 蔥花
備註*:粟粉可用 2 湯匙椰子粉代替,更為理想

做法:
1. 蕃薯去皮刨絲,建議用食物處理器把蕃薯絲略為打碎。
2. 蕃薯絲鋪在廚房紙上再放上另一層廚房紙,用力按壓,把多餘水份吸乾。
3. 煙肉煎香,切成碎片 (如使用)。
4. 雞蛋打成蛋液、蔥切成蔥花,保留少許綠色部分作裝飾用。
5. 把所有窩夫材料拌勻備用。
6. 窩夫機預熱,掃上少許油,鋪上適量蕃薯蛋漿,蓋好烘至呈金黃色和帶脆,約 8 - 10 分鐘。伴上自己喜歡的配料,即成!

備註:如分批製作窩夫,建議將弄好的窩夫平放焗爐架上用微溫保暖。

[Follow me on Instagram @alvinckl and @alvin.penthousekitchen and check out my Facebook Fan Page!]

Monday, May 20, 2019

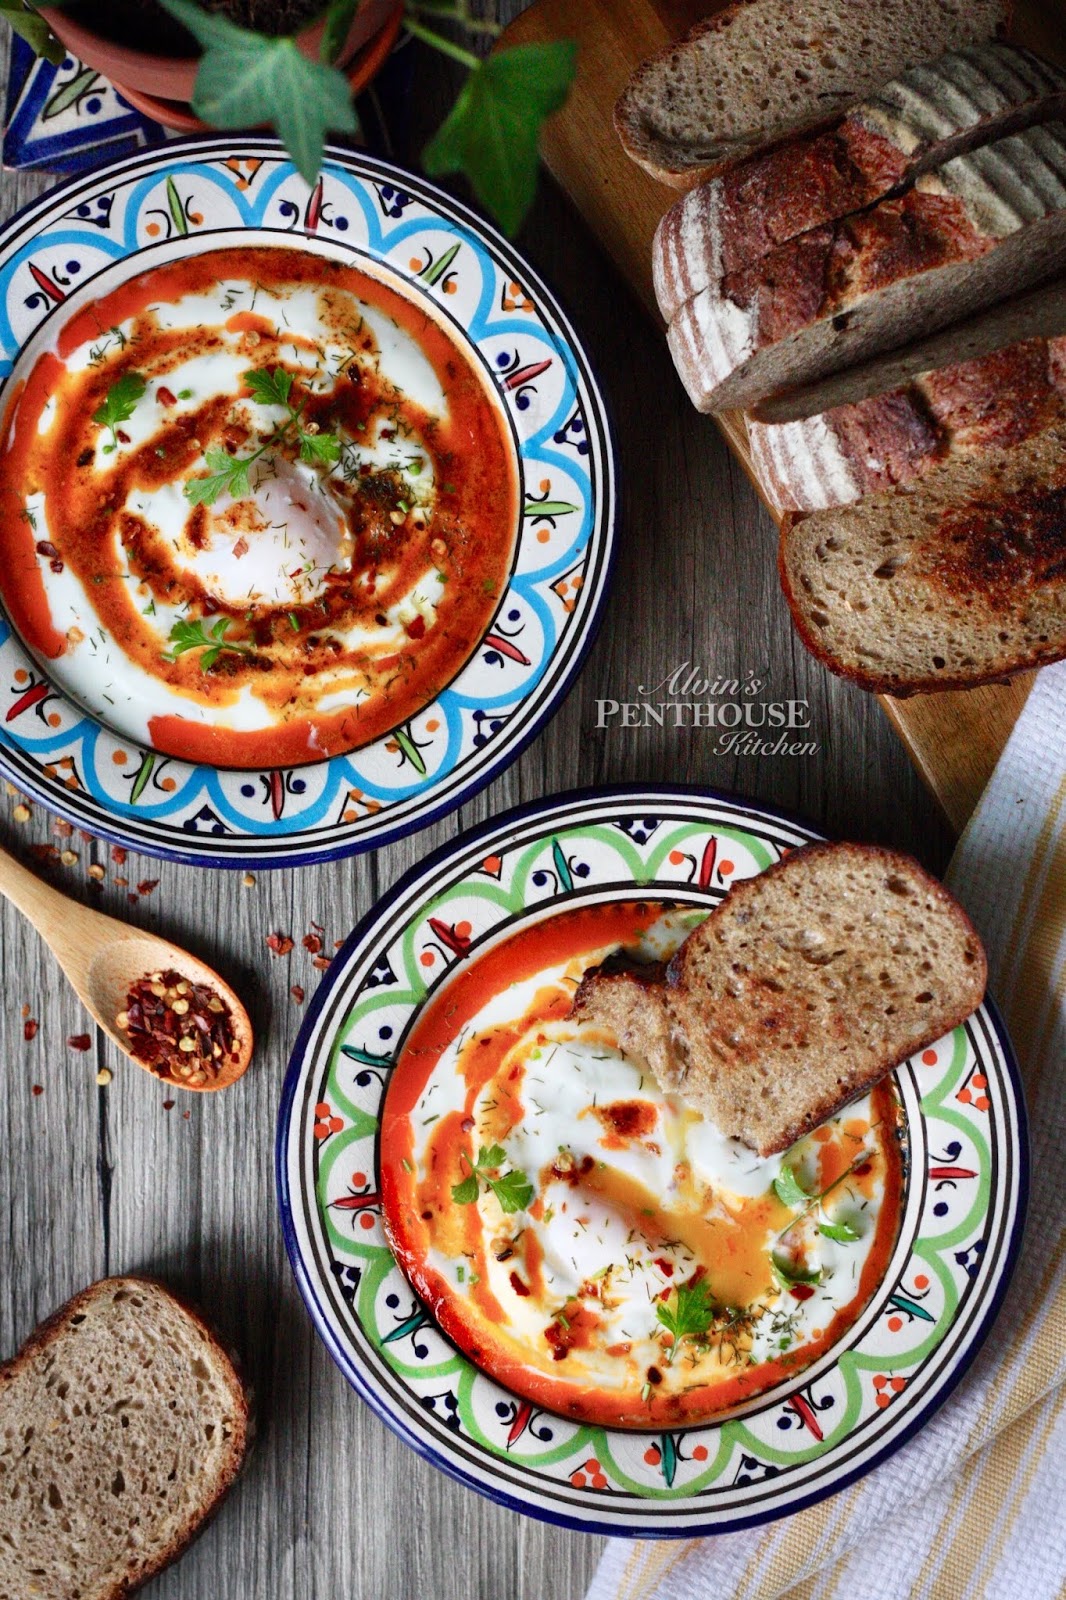
Turkish Eggs | 土耳其式水煮蛋

附中文食譜
The first time I have ever tried Turkish eggs was, strangely, not in Turkey, but in Brisbane, Australia, at a cozy, two-storied cafe overlooking a sunny suburban street lined with boutiques and bakeries. To anyone who has never had Turkish eggs, or Çılbır, pronounced as "chulburr", the idea of laying a poached egg on Greek yogurt may raise an eyebrow or two. Add on top a drizzle of chili-infused melted butter, the concept seems to take "odd" farther up a notch. Creamy, tart, oozy, savory, then spicy, too? The idea of Turkish eggs appears to throw our notion of a familiar brunch into shambles.


But before you resort to the comfort zone with the likes of Eggs Benedict, I urge you to give this dish a try. Because with just one try it had got me hooked. The soft poached egg, with its silky egg whites, melds beautifully into a thick and creamy and slightly tart Greek yoghurt that is laced with garlic and sometimes dill. Butter is then melted and infused with chili then drizzled over the dish, imparting an extraordinary depth of flavor and giving a luxurious, aromatic kick. As you poke into the egg, luscious yolk oozes out like liquid gold, bringing the heavenly sensation to the next level. To scoop and soak up every last smear of yolk and yoghurt, thick, crusty, griddled sourdough or even warm naan would most certainly do the trick.

Word is that Çılbır originated as a breakfast staple in Eastern Turkey. I do not recall seeing this dish on menus around town in the iconic Istanbul (but then it was nearly a decade ago when I visited and I was mostly staying at budget guesthouses), but it is definitely making an increasing appearance at brunch restaurants around the world. A small breakfast cafe in West London easily charges this dish for £9, but you can just as easily prepare this dish at a fraction of the cost at home.

Aleppo (a mild Turkish red pepper flake) is traditionally used in making the chili-infused butter for this dish, but if unavailable, substitute paprika and a pinch of crushed red pepper flakes for no less a bang in flavor. While dill is not required on Turkish eggs, I personally find using some fresh or dried dill adds an uplifting herbaceous note and complexity to the dish.

After all, creamy, tart, oozy, savory, and spicy isn't just incredible; it is - in Nigella Lawson's words - "a revelation and a complete sensation."

What you'll need... (serves 2)
200 g Greek yoghurt
1/2 clove garlic
A few fronds of fresh dill, or a pinch of dried dill
2 tablespoons butter
1 tablespoon olive oil
1 teaspoon paprika
1 pinch crushed red pepper flakes
2 eggs
1 tablespoon white vinegar
Thick sourdough toast, to serve

Directions...
1. Using a fine grater, grate half a garlic clove and whisk into the Greek yoghurt with a small pinch of dried dill, if using. Set aside and allow the yoghurt to come to room temperature.

2. Gently melt butter in a small pan until it begins to turn into an aromatic, nutty brown. Stir in the olive oil, then add paprika and red pepper flakes and leave to infuse over a low heat. Turn heat off and set aside to cool.

3. Bring a pot of water to a simmer. Add the vinegar and make a swirl with a large spoon. Break cold egg into a small dish or saucer. Holding dish just above the simmering water, gently slip egg into the water. Poach for 3 mins until set, transfer egg with a slotted spoon to some kitchen paper to drain. Repeat with the other egg.

4. To serve, divide the yoghurt into two warm bowls, top each with a poached egg, then drizzle over the chili-infused butter. Season and scatter over some dill and crushed red pepper flakes and dig in with thick slices of crusty bread!

Note: I prefer grating the garlic here over finely chopped garlic as the flavor melds more readily into the yoghurt and it also reduces the chances of biting into pieces of raw garlic.

【 土耳其式水煮蛋 】


多年來眾人熟悉的 Eggs Benedict 一直被視為悠閒週末 brunch 之首選,是時候跳出框框了!話說有次在外國試過 Turkish eggs,嫩嫩的 poached egg 配上綿綿的香草乳酪再淋上香辣牛油,跟厚厚的吐司一起吃,味道配搭新奇刺激、口感一流,有別於傳統早餐菜式,可說是一見鍾情啊~ 急不及待回家研製、同大家分享食譜啊!

材料(二人份):
希臘乳酪                 200 克
蒜頭                         半瓣
刁草                         適量
牛油                         2 湯匙
橄欖油                     1 湯匙
紅椒粉 (paprika)    1 茶匙
乾辣椒碎                 適量
雞蛋                          2 隻
白醋                          1 湯匙
厚切酸種麵包        

做法:
1. 把蒜瓣磨成蓉。將乳酪、蒜蓉和少量刁草拌勻備用,待其回到室溫。
2. 牛油用慢火煮溶,期間會起泡。煮至牛油開始呈現咖啡色及聞到焦香後加入橄欖油、紅椒粉和乾辣椒碎。熄火,晾涼備用。
3. 大鍋燒滾水後轉慢火,加入白醋拌勻,用筷子輕輕攪出漩渦。小碗打入一隻雞蛋,小心把蛋倒入漩渦裡,煮約 3 分鐘後把水煮蛋盛起並放到廚房紙上吸乾水份
4. 把乳酪平均分配到兩個碗子裡後各放上一隻水波蛋。淋上辣椒牛油,再撒上刁草和乾辣椒碎,最後拌上厚切酸種麵包吐司即成!

[Follow me on Instagram @alvinckl and @alvin.penthousekitchen and check out my Facebook Fan Page!]