Thursday, March 31, 2016

Miso Glazed Cod with Fiddlehead Ferns and Miso Sesame Soba

附中文食譜

Sometimes, all you want is a quick and easy dinner, using simple ingredients and steps and ending up with a healthy, complete meal that not only looks expensive but also tastes wonderful. This Japanese-inspired fish recipe fits the bill. With minimum advance preparation, you can practically have your meal ready in under twenty minutes of active cooking time. And half of those "active" twenty minutes is standing idly watching your fish cook inside the oven.


I was grocery shopping in Tokyo recently and picked up some fresh cod (ぎんだら, Gindara), a buttery white fish that is well-suited for this dish for its high fat content and melt-in-the-mouth silkiness. I then came along some precious fiddlehead ferns that seemingly just popped out of the Avatar film. Harvested early in the season, these crunchy, furly fronds are mild in flavor and take well to boiling, sautéing and a pinch of salt and pepper.

As for the miso, white (shiro) miso are most often used as it is milder with a hint of sweetness; however, I have tried red miso with similarly great results.

Any fatty fish works well for this dish. Try salmon or black cod!
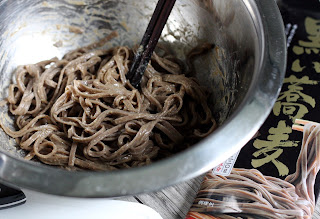
Serve the dish alongside multigrain rice, or get impulsive and toss some buckwheat noodles in a creamy, savory dressing of miso and sesame oil to complement the fish.

I have been making this humble dish at home long before I heard about celebrity chef Nobu Matsuhisa, whose renowned signature creation at Nobu has been replicated far and wide. Here is my simplified version of the recipe. いただきます!

What you'll need...
2 cod fillets, about 1/2 lb or 200g each
100g soba noodles (per person)
Fiddlehead ferns (or other greens of choice)
Black and white sesame seeds, toasted, for garnish
Sliced scallions, for garnish (optional)

For the miso marinade:
1 heaping tablespoon miso paste
1 tablespoon sake
1 tablespoon mirin
1 teaspoon shoyu
1 teaspoon sugar

For the soba noodles miso sesame dressing:
1/2 tablespoon miso paste
1 teaspoon sesame oil
Some warm water to thin the mixture

Directions...
For the Miso Glazed Cod: 

1. Prepare the marinade: whisk miso paste, sake, mirin, soy sauce, and sugar together. Adjust proportions to taste.

2. Pat fish dry with paper towel. In a container, coat the fillets with marinade and keep refrigerated for one hour up to overnight.

2. Preheat oven to 200C/400F.
Place fish skin-side up on a parchment paper-lined baking sheet, gently brush off excess marinade to prevent burning. Bake or broil for 8-12 minutes depending on the thickness of the fillets. Garnish with toasted sesame and scallions.


For the Soba and the Miso Sesame Dressing: 

1. Bring a pot of water to boil, submerge the noodles and cook through, about 5 minutes. Meanwhile, mix miso paste and sesame oil and dilute the mixture with some warm water. 

2. When soba is cooked, drain and toss in the dressing while still hot until the strands are well coated.


For the Fiddlehead Ferns:

If boiling: Bring a pot of salted water to boil, boil the greens until barely tender, about 6 minutes. 
Prepare a cold water bath. When the ferns are cooked, dunk the ferns in cold water to stop the cooking.

If sautéing: boil the ferns, drain, and sauté briefly with olive oil. Season to taste with salt and pepper.

Enjoy this quick, easy, and tasty meal!


《味噌醬燒鱈魚柳》/《麻香味噌蕎麥麵》

鱈魚柳 2 件 (各約200克) 
蕎麥麵 100 克 (一人份量計)
蕨菜  (菜類可隨喜好)
黑白芝麻  少量
蔥花  少量

鱈魚醃料
白味  1 大湯匙
清酒  1 湯匙
味醂  1 湯匙
日本豉油  1 茶匙
白糖  1 茶匙 

麻香噌拌麵醬:
噌  1/2 湯匙
麻油  1 茶匙
溫水 適量,稀釋用

《味噌醬燒鱈魚柳》
1. 先將醃料拌勻。鱈魚柳洗淨抹乾後加入醃料放在雪櫃醃一小時或以上。
2. 預熱焗爐至 200C / 400F。
3. 醃好的魚柳放在鋪了烘培紙的焗盤上。
4. 輕輕拭去多餘的醃料,然後放入已預熱焗爐中,視乎魚柳厚度焗約 8-12 分鐘。
5. 烤好了上碟再撒上芝麻及蔥花即成。

《麻香味噌蕎麥麵》
1. 噌和麻油拌勻加入少量溫水稀釋。
2. 滾水煮蕎麥麵約 5 分鐘至軟硬適中,瀝水後同醬汁拌勻即成。

清炒蕨菜》
1. 蕨菜可用加了鹽的沸水浸燙後過凉上碟,或瀝乾後再落油清炒。 

[Write to me under comments! Follow me on Instagram @alvinckl and check out my Facebook Fan Page!]
Wednesday, March 23, 2016

March Birthdays, Boardgames, and a Meat-Free Vegetarian Party!

March is a month with much to celebrate: the return of Spring, the arrival of asparagus, Japanese strawberries, as well as cherry blossoms. It is the month of birthdays when many close friends and myself grow yet another year younger and wiser; it is also when "Alvin's Penthouse Kitchen: the Blog" officially turns three. Yipee!

"How about we throw a barbecue down at the clubhouse?" I blankly suggest as my friends and I brainstorm for activities for the Saturday set aside to celebrate our belated birthdays.

"...Barbecue is cool," Eugene stammers, reluctance escaping his tone, "though I'm only concerned that Kenko and I are both vegetarian, and we might not have much to eat. You know."

Always photogenic, anytime, anywhere
March babies: born on the same day, just years apart!

I can't seem to come up with a good caption for this
Indeed, a typical barbecue can be so meat-centric that it is no more a party to herbivores as a boat trip is to someone who stays away from the sun and sea.

And that is when it all suddenly strikes me. "I will throw an all-vegetarian party at home!" The timing could not have been more perfect. It was as if a fire ignited in me. I was determined to pull together my first ever entirely meat-free feast, fueled by my ever-growing interest and fascination in the world of vegetarian and vegan cooking.

Eugene was thrilled. Rarely ever has he been to home gatherings other than those where vegetarians were no more than an afterthought - an inconvenience even, sometimes - where a cold salad and other usual suspects may be the only option.

Curried Sweet Potato & Pumpkin Lentil Stew: a delicious and inexpensive way to get some fiber-rich lentils into your diet!
I finally cracked the code of latticework with this Wild Mushroom & Gruyère Pie!
Two vegetarians, three March babies, six new and old friends and six happy, full stomachs

Black bean dip is great as finger food at a party!
The thought of a veggie-centric party (complete with boardgames and Pictionary) got us fired up. Kenko insisted on bringing his lunchbox for leftovers, that is if we had any.

I tasked myself to put together a diverse, balanced menu that:
- is simple enough to pull off in a few hours, unless you work turbo speed;
- is fun and fulfilling, potluck style;
- makes use of my existing pantry ingredients;
- is equally appealing to both vegetarians and non-vegetarians

In my moments of brain fart I called up my cousin Kathleen in Toronto, an avid vegan cook herself, for some inspiration. In no time, the menu was set. 

Apple and Cabbage Mint Slaw
Black Bean Dip with Blue Chips
Sweet Corn Cake
Curried Sweet Potato and Pumpkin Lentil Stew with Coconut Milk
Wild Mushroom, Rosemary, Gruyere Lattice Pie

The theme of the day was 100% meat-free, but all the more it was about celebrating friendship, and honoring a well-balanced, healthy, and tasty diet. To that we toast!
Stay tuned for recipes to come!

[Write to me under comments! Follow me on Instagram @alvinckl and check out my Facebook Fan Page!]

Friday, March 18, 2016

Brown Butter Roasted Brussels Sprouts with Pancetta, Sage, and Almonds

附中文食譜
My love affair with brussels sprouts was a relatively recent one - not more than seven years - when I first encountered these bittersweet, bite-sized buds in America. I used to sauté them till al dente then dip them in mayonnaise - a perfect contrast for their tinge of bitterness. If you asked me, I never quite understood why kids have such profound abhorrence towards brussels sprouts, or any vegetables for that matter - but then again, growing up I did not have a choice of what to eat. I ate everything... seriously, for the love of food. I wasn't the slimmest boy next door, either.

It was really back in early 2013 when my love affair with brussels sprouts reached new heights after pigging out at Manhattan Beach Post, LA, just minutes away from the miles-stretch of Southern Californian beach. It was my first time meeting my high school buddy Pablo's better half, Brooke. Pablo and Brooke were mad in love with each other (and still are), and I, was mad in love with the Roasted brussels sprouts, emmental, hazelnuts, sage - a creation by chef and co-owner David LeFevre - a dish that hit me like a tsunami of intense flavors and textures.

This tasty dish will convert any remaining brussels sprouts skeptics

Brooke & Pablo at MB Post, LA [Feb 2013]
Roasted brussels sprouts caramelized with brown butter, are you kidding me? Ever since then, this seems to be the only way to cook and do justice to brussels sprouts. Brown butter is essentially butter that has been browned, adding a rich, nutty and toasty aroma to all that it graces, be it sweet or savory. If butter makes anything good, as the controversial Paula Deen swears by, then brown butter makes anything phenomenal. Just do it with moderation, as with everything.

It took me years to finally post this tweaked recipe that I have been too selfish longing to share all along. I tend to use whatever nuts, cheese and herbs I have on hand and in my garden. I have once tossed in sweet, garlicky Taiwanese sausages with astounding results, and another time dumped the brussels sprouts onto a bed of rocket and added a swig more of balsamic glaze and made an incredible warm salad. If you are concerned about the caloric intake from butter, use less, toss the brussels sprouts in olive oil, season, roast in oven, and finish off by pouring the brown butter over the top.

Cast iron will get you the unbeatable charred results fast and can go straight into the oven!


What you'll need...
1 lb brussels sprouts, trimmed and halved
4 tablespoons butter, sliced
Pancetta, diced (optional)
Small handful of almonds, roughly chopped and toasted
6-8 leaves fresh sage, chopped
Grated Emmental, Gruyère, or mature cheddar
A dash of balsamic glaze or balsamic vinegar

Directions...

1. Preheat oven to 160C/320F.

2. In a small saucepan, heat butter on low heat. Once melted the butter will foam up then subside. Stir occasionally with a spatula and, watching closely, remove butter from heat and transfer to a heat proof bowl shortly after golden brown specks (browned milk solids) begin to appear and you smell a nutty, toasty aroma.

3. On a cast iron or non-stick skillet, pour in most of the brown butter, reserving some for later. Add pancetta (if using) and brussels sprouts, cut side down, and cook on medium heat until the cut sides are charred.
4. Lightly season with salt and pepper, pour remaining brown butter over and roast for 7-8 mins until just cooked through.

5. When done, remove from oven and top with grated cheese, toasted almonds, and sage. Finish off with a dash of balsamic glaze. Enjoy!!


 《焦香牛油烤球芽甘藍》

材料:
球芽甘藍  1 磅(洗好切半)
牛油   50 克
義大利培根切粒  少量(素食可免)
杏仁切片  15 克 
鼠尾草  6-8片
芝士磨碎(如 瑞士艾曼托,格律耶爾,或 成熟車打)少量
義大利巴薩米可醋  少量

做法:
1. 預熱焗爐至 160C / 320F。
2. 杏仁放入焗爐烘香。
3. 牛油用慢火煮溶,期間會起泡。
4. 偶然用膠刮攪拌,煮至牛油開始呈現咖啡色小塊及聞到焦香後可以熄火。
5. 將焦香牛油倒入耐熱容器內,以防燒焦。
6. 焦香牛油預留少量備用,其餘的倒在鑄鐵鍋或易潔上。
7. 將球芽甘藍切面向下連同培根平鋪在鍋上,用中火慢煎至切面呈深啡色。
8. 用鹽及鮮磨黑椒輕輕調味,淋上剩餘焦香牛油,再放入焗爐烤至熟透,約7-8分鐘。
9. 烘好後取出並撒上芝士,杏仁,鼠尾草,最後加上少量巴薩米可醋即成。慢用!

[Write to me under comments! Follow me on Instagram @alvinckl and check out my Facebook Fan Page!]
Friday, March 11, 2016

Coconut Cashew Maple Granola

附中文食譜
Breadcrumbs. Croutons. Granola. Just a few fine examples of kitchen staples that one should never bother purchasing from the grocers. That is not to say that I never bought them. In fact, for years I have too many a time stood on a supermarket aisle gawking at unintelligible ingredient lists and nutrition labels, baffled by choice and dubious health claims. And then one day I thought, why not make them myself?

The catch is... once you've made granola yourself, you can never turn back. It is so easy, lower in sugar, infinitely cheaper than commercial brands, and allows freedom in tailoring to your own taste. Try it and you will be hooked for good.

Putting together a large batch of granola takes merely under 10 minutes of active time
Nothing beats homemade granola: customize it with you favorite nuts, seeds, and dried fruits!

A strong craving for crunchy granola recently got me. Seeing that I have heaps of cashews and coconut flakes from Wholefoods sitting in my pantry, I set off to make my first batch of homemade granola for brunch.

In no time, the warm aroma of maple roasted cashews wafting through my kitchen transports me back to the streets of Manhattan, where pushcart vendors seduce passerby with all sorts of roasted nuts.

Imagine the formidable crunch, the subtle saltiness and sweetness of cashews enveloped in golden clusters of wholesome rolled oats; imagine the scent of toasted coconut and caramelized brown sugar, the soft chew of raisins - these are what make this granola dangerously addictive... so addictive that my visiting friend and I could hardly keep our paws off the baking pan despite being already stuffed.

Warning: this granola is highly addictive...!
Sprinkled over yoghurt and fruit, served with milk, or simply straight from jar to mouth, this homemade granola makes a delicious, nutritious breakfast or snack any time of the day. I use maple syrup and coconut oil for the added flavor and benefits, but feel free to substitute with honey and any mild tasting vegetable oil.

For more simple brunch ideas, check out my recent post!

To prepare...
2 cups old-fashioned rolled oats
3/4 cup cashews*
1/4 cup slivered almonds
1/2 cup flaked coconut
3 tablespoons dark brown sugar
1/4 cup pure maple syrup
2 tablespoons melted coconut oil
1/2 teaspoon salt*
1/4 cup raisins 
*Note: omit salt if using salted cashews.

Spread the granola out evenly on the baking sheet
1. Preheat oven to 150C/300F.
In a large bowl, combine oats, nuts, coconut, brown sugar, and salt (if using). In a separate bowl, combine oil and maple syrup. Drizzle the mixture over the dry ingredients and stir until well coated.

2. Spread granola in an even layer on a rimmed baking sheet and bake for 40 minutes until golden brown. Remove from oven and allow to cool for 10 minutes without stirring. This will allow the granola to crisp up.

3. Carefully turn the mixture over with a cooking spatula and continue to bake till golden brown, approximately 10 minutes more.

4. Remove from oven and allow to cool for about 15 minutes without disturbing. Break granola into clumps and scatter in raisins. Store in an airtight container for up to four weeks (I assure you you'd be making a new batch by then). Enjoy!

Top Greek yoghurt with some homemade granola and berries for a scrumptious breakfast!


《 腰果楓糖格蘭諾拉烤燕麥 》 
材料:
燕麥片  180 克
腰果  115 克*
杏仁切片  30 克
椰子片  40 克
紅糖  3 湯匙
純楓糖漿  85 克
椰子油  2 湯匙
  1/2 茶匙*
提子乾  40 克
*備註:如使用已添加鹽的腰果,則可省放鹽。

做法:
1. 預熱焗爐至 150C / 300F。
2. 燕麥,腰果,杏仁,椰子,紅糖和鹽拌勻備用。
3. 椰子油和楓糖漿拌勻,倒入以上乾料,用膠刮拌勻。
4. 把已拌勻的材料平均地鋪放在鋪了烘培紙的焗盤上,放入焗爐焗40分鐘至金黃。
5. 取出晾涼約10分鐘,待其脆化。
6. 用鑊鏟輕輕地把烤燕麥翻轉,再放進焗爐焗約10分鐘至金黃。
7. 烘好後取出晾涼15分鐘左右,期間別多手觸碰啊!
8. 用手指輕輕把格蘭諾拉分開成小塊並撒上提子乾。

置密封的盒內可於室溫存放四星期。

I am officially in love with this granola. It will become a regular!
[Write to me under comments! Follow me on Instagram @alvinckl and check out my Facebook Fan Page!]