Monday, December 19, 2016

Quick Rustic Stout Beer Bread | 特快歐式黑啤麵包

付中文食譜

One of those things I love and miss most about Europe is quality artisan breads - those rustic, crusty, wholesome, hand-crafted breads whose individual imperfections sings perfection.

In Hong Kong, finding an affordable loaf of rustic bread is about as hard as finding an apartment. And, for most people, making their own breads by hand or owning a bread making machine is simply unrealistic. Nonetheless, I'd still rather eat cake than to give in to mass-produced, chemical-ridden, highly processed supermarket breads. So, that pretty much meant crusty artisan breads would always remain a novelty lest I start making them at home.

All of that is about to change with this foolproof recipe. For the longest time, I have been intimidated to bake my own breads so long as kneading and proofing is involved. So when I realized that I can make bread in an hour with just four simple ingredients and nothing more than a bowl, a pan, a spoon and an oven, I was ecstatic. No yeast proofing, no kneading, no getting hands in a gooey, gunky mess, no kidding. Even the most inexperienced baker could do this. Oh, did I mention you get to bake bread with your favorite beverage?

This bread is nicely moist and dense; crusty, craggy and golden on the outside and chewy on the inside - perfect for toast, sandwiches, sopping up chili, and sensational with hearty soups, chowders, moules-frites, and beef stew.

With beer being the key ingredient in this recipe, you've got to start with a great brew. The type of beer you choose will impart distinct characters on your bread. I chose stout for its robust, malty aroma and chocolatey color (and matched that with rich black sugar* to add depth). Or, you can go with a crisp lager for a paler yet complex-tasting bread; or an IPA if you're in for the hops. Experiment with different ingredients to complement your beer - say, using some oat flour and whole oats to match an oatmeal stout, or adding spices to round off a pumpkin-ale-based loaf.

Dunk this bread in Parsnip, Parsley, and Leek Soup and pair up with Cider Braised Pork Shoulder with Apples and Cranberries for the holiday season!

What you'll need...
3 cups self-raising flour
2 tablespoons black sugar*
1 can or bottle (355 ml) stout beer
2 tablespoon butter, melted
Cornmeal, to dust (optional)

*Note: Black sugar is a type of unrefined sugar commonly used in Japan and Taiwan, known for its rich, complex, malty taste and health benefits not found in other more refined sugars. Substitute with dark brown sugar if unavailable.  
 
(My first video!)

Directions...

1. Preheat oven to 180C/375F. Grease a loaf pan or round cake mold and dust the bottom with cornmeal.


2.  In a large bowl, sift flour and sugar together.


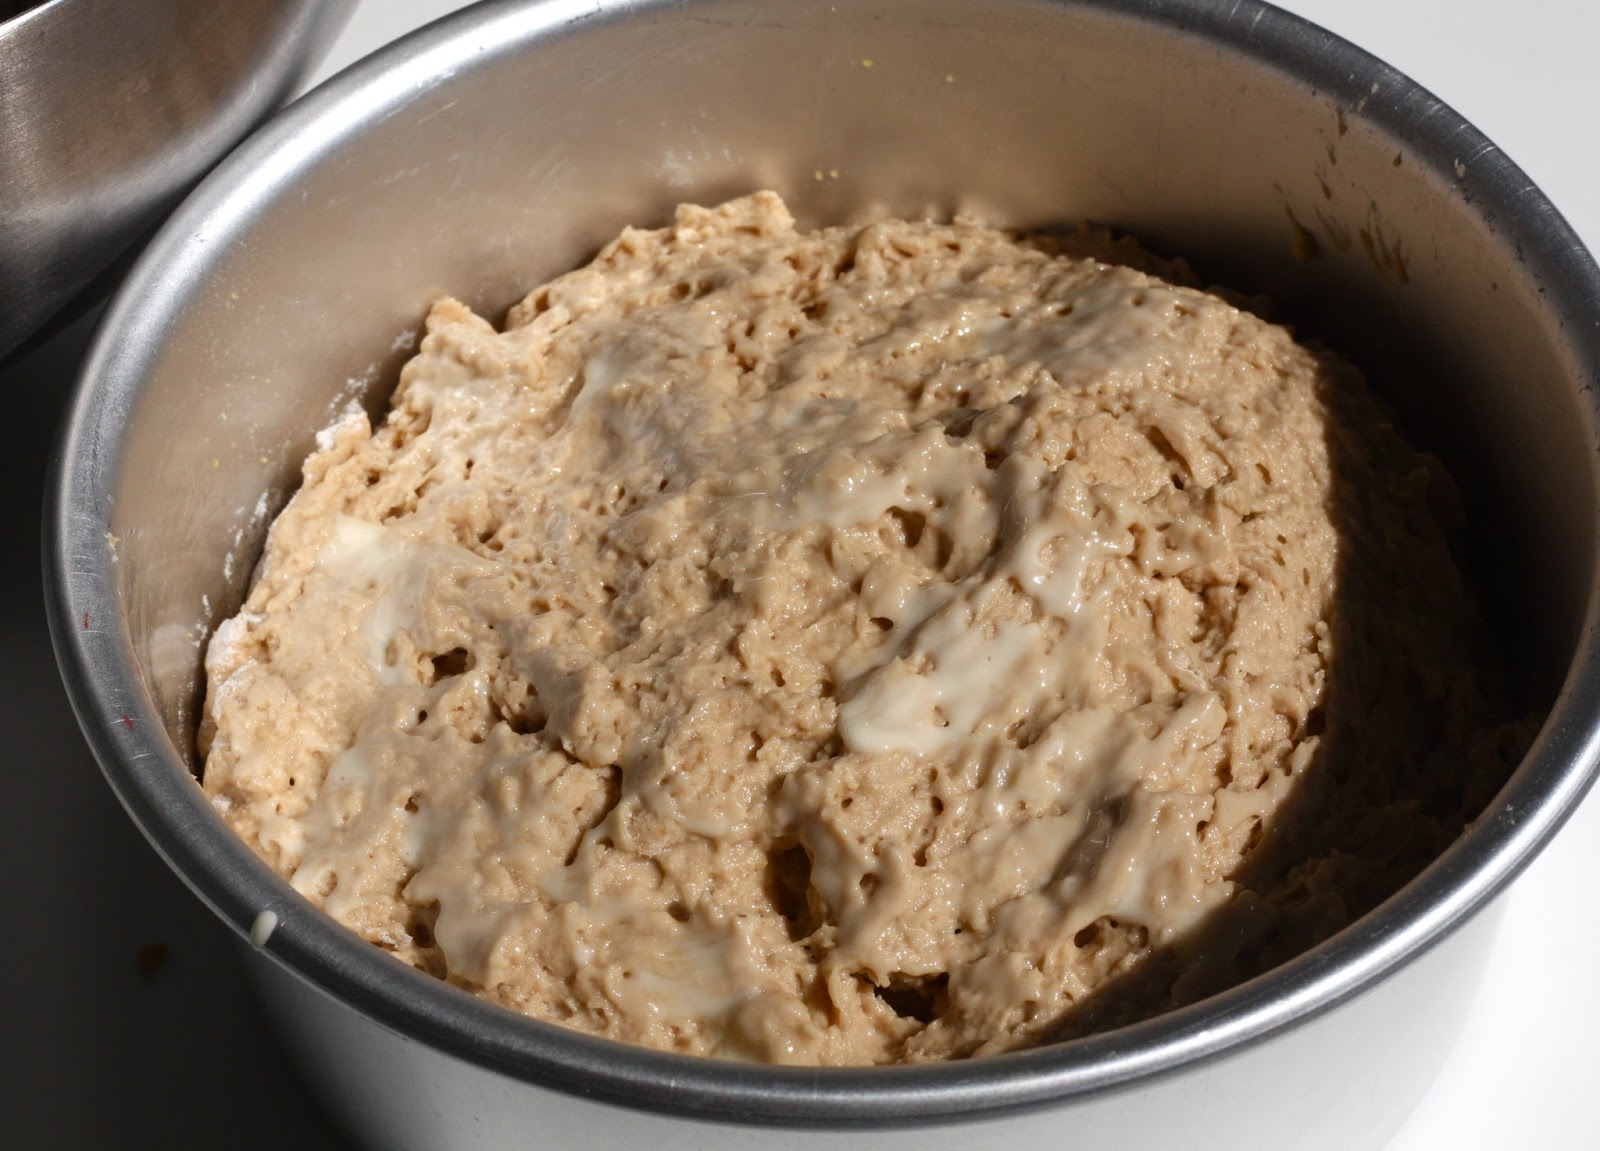
3. Add beer, 1 tablespoon of melted butter, and mix lightly, using a wooden spoon, until most of the flour is incorporated and forms a sticky, lumpy mass. Do NOT overmix!

 4. Scrape and pour mixture into greased loaf pan. Brush the top with remaining butter and lightly dust top with flour for a rustic look.


5. Bake for 50 minutes, or until golden and crisp on top. remove from pan and cool on a wire rack for at least 15 minutes before slicing. Best served warm and crusty. Enjoy!


 《特快歐式黑啤麵包》

毋需麵包機、毋需發酵或手搓 - 零難度!
平時最懷念歐洲的傳統歐式麵包,現在
屋企都能夠輕易做得到。
材料簡單,口感紮實帶有韌性,有著樸實的外表卻不平凡的內在,伴隨著淡淡的啤酒小麥香氣 - 全都只需要四種材料、一個小時多就搞掂!最適合忙碌人士和臨時請客不已。

材料:
自發麵粉  360 克
黑糖  25 克
黑啤酒  355 毫升
牛油  2 湯匙 (約 28 克)溶掉
粗粒玉米粉 (Cornmeal)  少量(可省略)

做法:
1. 預熱烤箱至 180C/375F。
2. 烤模先薄薄的塗上油,再在底部撒上少量粗粒玉米粉,有助防黏及增添香脆口感。
3. 麵粉和糖過篩。
4. 加入啤酒和一湯匙牛油,輕輕攪拌均勻。麵團黏黏的及不規則的狀態屬正常、避免過度攪拌。
5. 麵團倒入烤模裏。將剩餘的牛油塗在表面,再用篩薄薄的撒上一層麵粉。
6. 放入預熱好的烤箱, 焗 50 分鐘或至表面金黃香脆。出爐後馬上脫模,晾涼最少 15 分鐘後即成!

備註:
1. 除了黑啤之外,更可自由選擇其他種類的手工啤酒,因應不同啤酒的味道和個性隨意作不同的成份配搭, 例如加入麥片、肉桂、香草等調味。不妨實驗一下!
2. 每個焗爐都會有些微分別,所以要熟識自己焗爐的脾性,再作適當的時間溫度調教。
3. 如無黑糖,則可用紅糖 (brown sugar) 代替。
[Follow me on Instagram @alvinckl and @alvin.penthousekitchen and check out my Facebook Fan Page!]

Thursday, October 27, 2016

Bae-Chu Kimchi: Traditional Korean Napa Cabbage Kimchi | 傳統自家製韓國泡菜

附中文食譜
Kimchi - the national dish of Korea and staple side dish on every Korean table - needs no formal introduction. Recognized long for its range of health benefits, this fiery, fermented vegetable side dish is rooted in tradition. Among the hundreds of kimchi varieties in Korea, the Napa cabbage variety, also known as pogi kimchi or tongbaechu kimchi, is the most iconic and common and is generally referred to by the catch-all name, kimchi.

Nowadays, one can easily skip the seemingly labor intensive process of making kimchi and purchase kimchi sold in jars or vacuum packs in supermarkets, but there is something irreplaceable in old-fashioned, authentic homemade kimchi.

Great kimchi starts with good, fresh Napa cabbage!
As with almost anything homemade, you get to tweak and customize.
And it's not just how spicy or mild you want your kimchi to be. Various salted seafood is used in kimchi to add a depth of flavor and to aid in the fermentation process. Whether it is salted shrimp, squid, or dried fish, the complex pungency of seafood is truly irreplaceable in kimchi. But if you are like me who is allergic to crustaceans, omit the shrimps and go with dried pollack and even anchovy paste for the unmistakable essence of the sea.

Eat it straight, as a banchan, or get creative: a batch of kimchi opens up infinite culinary possibilities

Making kimchi is like a mini science project.
Admit it, you were religiously watering and watching your beansprouts grow as an elementary school kid. Making kimchi from scratch is so much more fun than that. You get to get in and dirty, watch it ferment, and reap the benefits of all that effort in as short as a few days as it ripens!

You are participating in an age old tradition. 
Aside from adding a human touch to what you eat, making homemade kimchi allows you to experience hands-on the wisdom, knowledge, and tradition passed down from grandmother to mother, mother to daughter, generation after generation for centuries in Korea. As I made my own kimchi in my kitchen, I could almost hear the stories and laughter shared among women who gather for gimjang, where enormous quantities of kimchi is prepared communally to last through the harsh winter. Try it, you'll know what I mean.

A major bucket list item gets checked off.
Making kimchi, nevertheless, is not a once-in-a-lifetime event. It only gets better with practice!

Don't attempt to leave the gloves out!
After much research and trial, my recipe is based loosely on Korean American Chef Esther Choi's recipe which has been passed down from her grandmother. I have modified certain steps in preparation to make it simpler for home cooks. Apple or pear puree is added for a nice tinge of sweetness, whereas Korean dried pollack adds immense depth of flavor to the kimchi.
It's fall... kimchi making season! So get them gloves on and let's make some!
What you'll need...
1 head of Korean Napa cabbage, cut lengthwise, quartered
5 tablespoons rock salt
70g of Korean dried pollack (bugeochae), shredded
1 medium daikon radish (1lb), cut into 2-inch matchsticks
1 small carrot, cut into 2-inch matchsticks (optional)
1 bunch of scallions, cut into 2-inch pieces

Seasoning:
1 small apple or nashi pear, peeled and cored
2 inches fresh ginger
1 head of garlic
1 small onion
1/4 cup mirin
1/4 cup anchovy sauce (I used the filipino Bagoong Balayan)
1/4 cup lance fish sauce, or Thai fish sauce
3 tablespoons salted shrimp (saeujeot)*, chopped
2 tablespoons glutinous rice flour
1 cup Korean red chili pepper flakes (gochugaru), or more to taste
*Note: for a crustacean-free version, substitute salted shrimp with anchovy fillets or paste.

Prepping and salting the Napa Cabbage
To split a Napa cabbage in half, cut a slit in the base of the cabbage up to a third of the total length of the cabbage, gently pull the two halves apart. Repeat for each half to quarter the cabbage.


Add 1 1/2 cup of water inside a basin, dissolve 2 tablespoons of rock salt, wet the quartered Napa cabbage inside the basin and sprinkle salt between each layer of leaf. Let rest for at least two hours, turning them over every 30 minutes.

Rinse each quarter well under running water to remove the salt. Squeeze out excess water and let drain in a colander.

Making the rice gruel
In a small saucepan, add the rice flour and 2 cups of water over medium heat. Whisk constantly. Cook for 10 minutes or until the mixture thickens. Set aside to cool.

Making the seasoning paste
1. In a blender, blend together the apple, onion, garlic, and ginger with the mirin.
2. Soften the dried pollack with some lukewarm water. Drain.
3. In a big bowl, combine the rice gruel, apple mixture, daikon radish, carrot, scallion, dried fish, and the rest of the seasoning ingredients and massage everything well to become a paste.

Bringing everything together
Bring the drained cabbage quarters into the mixture and spread the paste onto every single leaf. Tightly pack the kimchi into jars or containers with fitted lids or cover tightly with plastic. 

Allow the kimchi to sit in room temperature for at least two days, or longer for a stronger flavor. The warmer and more humid the environment is, the faster the kimchi will ferment. Store in refrigerator once the kimchi begins to ferment and use as needed. Refrigerating slows down the fermentation process, which makes the kimchi more and more sour as time goes on.

【 傳統自家製韓國泡菜 】

材料:
韓國旺菜  1 棵
粗鹽  5 湯匙
韓國鱈魚乾  70 克
韓國大根蘿蔔  1 磅
甘筍  1  枝
大蔥  數棵

泡菜醃料材料:
蘋果或梨  1 個
  2 吋
蒜瓣  6 個
洋蔥  1 小個
60 毫
鯷魚露  60 毫升
魚露  60 毫升
韓國蝦醬  3 湯匙*
粘米粉  2 湯匙
韓國辣椒粉  100 - 120 克
*備註:如有對貝殼類海產敏感,可以罐頭鯷魚或鯷魚醬代替蝦醬。

旺菜出水做法:
1. 於旺菜底部切一刀,用手把旺菜輕輕撕開兩半,再分為共四份。
2. 於大盤裏加入一碗半清水及 2 湯匙粗鹽,沾濕旺菜,再於每片葉之間灑上剩下的粗鹽,硬的部份多灑一點。
3. 完成後待其軟化出水,每半小時翻轉一次,共約 2 小時。
4. 徹底洗去鹽份,輕輕擠去多餘水份,晾乾備用。

米漿做法:
於小鍋裏加入粘米粉和兩碗清水用中火煮至糊狀,期間不停攪拌。熄火晾涼。

泡菜醃料做法:
1. 大根、甘筍切絲,大蔥切段。
2. 韓國鱈魚乾搣成絲,加入少量清水待其軟化。
3. 蘋果/梨去皮去芯切粒,加入薑、蒜、洋蔥和味打成蓉。
4. 於大盤子裏加入大根、甘筍、大蔥、蘋果/梨蒜蓉、鱈魚乾絲、蝦醬/鯷魚、鯷魚露、魚露、米漿和韓國辣椒粉,用手拌勻所有醃料再作調味(謹記帶手套啊!)
5. 加入旺菜,並於每片葉之間塗滿醃料至完全覆蓋。
6. 完成後把泡菜放在玻璃盒或陶瓷煲內,加蓋封好。
7. 放在室溫發酵 2 天後放入雪櫃,泡菜會繼續慢慢發酵。隨時享用!

備註:
- 泡的時間越長味道越酸,泡菜汁中培養出來的各種益生菌也更多。
- 較成熟的泡菜最適合煮食泡製出其他菜式。
- 調味很隨意,亦視乎材料原來的質素及味道。調味可加亦可減。

[Follow me on Instagram @alvinckl and check out my Facebook Fan Page!]
Chef Esther Choi: http://www.foodparadisetv.com/food/vlogs-clips/the-best-korean-kimchi-recipe/

Wednesday, September 14, 2016

Zoodles with Shredded Chicken and Sesame Sauce | 涼拌雞絲意瓜偽粉皮

附中文食譜
Zoodles! Besides being a fun word to say, zoodles (zucchini noodles) are an incredibly fresh, healthy, nutritious, gluten-free, and low carb alternative to pasta or noodles. Zucchini takes on flavors easily, thus making zoodles a remarkably versatile base for a wide range of dishes.

I picked up a bag of zucchini at the Heart of the City Farmers Market in San Francisco last weekend. Back at my penthouse kitchen, just as I was craning over these dark green summer gourds, sweat dripping down my forehead under the unrelenting summer heat, a sudden craving for 涼拌雞絲粉皮 hit me.

A gorgeous zucchini, also known as courgette
A familiar and massively popular appetizer in Northeastern Chinese cuisine, 涼拌雞絲粉皮 traditionally consists of translucent mung bean sheet noodles (粉皮), hand shredded chicken (雞絲), crisp cucumber julienne (青瓜) and a lip-smacking sesame dressing (麻醬) that always tickles my taste buds.

Now, who says zoodles only works as pasta? With zucchini in my hands, I decided to swap out the mung bean noodles and cukes and swap in zoodles for a twisted, "greened up" version of this classic Manchurian starter. No fancy spiralizer, no mandolin needed; just your good old fashioned vegetable peeler and a knife!

晶瑩通透 又滑又爽口!

When cut to the right width, those thin, slightly opaque ribbons of zucchini frankly does a marvelous job mimicking mung bean noodles. As for the main ingredient of the dressing, sesame paste is hardly the only choice either. Peanut butter is also commonly used in restaurants and will similarly knock the ball out of the park. Heck, I even made once with sunflower seed butter. Delish!

So here is a fun, light, and super easy twist on this popular Northeastern Chinese cold dish using zoodles. It is about time that you, too, jump on the zoodle bandwagon!

What you'll need...
Zoodles and Chicken:
2 zucchini
Choice of 4 chicken tenders, 1 chicken breast, or 1 chicken thigh

Dressing:
2 tablespoons sesame paste
3 tablespoons warm water
2 teaspoons Chinese black vinegar
2 teaspoons white sugar
1 teaspoon roasted sesame oil
1 heaping teaspoon minced garlic
1/2 inch of fresh ginger, grated (optional)
Dash of soy sauce

Choice of garnish:
Toasted sesame seeds or peanuts
Small bunch of cilantro
Cucumber matchsticks 

For the dressing...
Firstly thin out the sesame paste by stirring in warm water. Add all other ingredients and stir until the dressing reaches a smooth, heavy cream-like consistency. Make ahead to allow the flavors to mingle.

For the zoodles... 
1. Start by cutting off the ends of the zucchini. Using a vegetable peeler, peel zucchini into long ribbons. The more pressure you apply, the thicker your zucchini noodles will be. Peel all four "sides" of the zucchini until you reach the core with seeds (reserve the cores for other uses such as ratatouille, casseroles, or stir-fries - don't let it go to waste!).


2. Stack the strips on top of each other. Cut the strips to 1/2 inch strips or as desired.

3. Bring a pot of water to a boil, blanch zoodles very briefly - no more than 60 seconds! Immediately drain and dunk into an ice bath to cool and stop the cooking process. Once cooled, drain and set zoodles on paper towel or a clean kitchen towel to absorb excessive moisture.

For the chicken...
Steam or boil your choice of chicken. Once cooked and cooled, shred chicken into thin strips using your fingers.

Now, all that is left to do is to put everything together.
Layer the zoodles on your serving platter. Top with shredded chicken, sesame dressing, and your choice of garnish. Enjoy!!

《涼拌雞絲意瓜偽粉皮》 

由意大利翠玉瓜(zucchini, 簡稱意瓜)刨成絲
製成的低熱量「偽意粉」Zoodles 在外國已流行多時,
更是健康有營人士的最潮食品!
因成品肖似意粉,故會被當作替代意粉食用。
Zoodles 其實用法甚多,現時天氣轉冷,更可作為熱食沙律,
更可 fusion 做成「涼拌雞絲偽粉皮」!


意瓜偽粉皮/雞絲材料:
意大利翠玉瓜  2 隻
雞肉  可選用雞柳、雞胸、或雞腿肉

1. 首先將意瓜兩端切除。
2. 用削皮刨,下點力於意瓜的四面刨出寬條狀,直至到達瓜中見籽的地方為止。
3. 把一條條的寬條叠好,用利刀切成一條條約半吋闊的「 偽粉皮」。
4. 煮沸熱水,把偽粉皮快速地灼一灼,撈起並立即浸冰水,以保其爽嫩。
5. 瀝乾後放一旁備用。
6. 隔水蒸熟雞肉。略涼後以手搣成雞絲。

麻醬材料:
芝麻醬  2 湯匙
溫開水  3 湯匙
鎮江醋  2 茶匙
砂糖  2 茶匙
麻油  1 茶匙
蒜末  1 大茶匙
薑蓉  約半吋薑
老抽  適量

1. 芝麻醬先用溫水稀釋,加入其他調味料拌勻再作調味。

 
 自選裝飾配料:
芝麻 / 花生
芫茜
青瓜絲

1. 接下來最後一個步驟,先把意瓜偽粉皮置碟,在粉皮上放上適量手撕雞肉和自選配料,之後再淋上拌勻的麻醬即成。


[Write to me under comments! Follow me on Instagram @alvinckl and check out my Facebook Fan Page!]

Wednesday, August 31, 2016

Crunchy Chewy Cornflakes Cookies

附中文食譜
Crunchy Chewy Cornflakes Cookies - speaking of alliteration and an oxymoron within the same cookie! As the name implies, this fabulous cookie is full of mouthwatering contrasts. At once sweet and salty, it is soft and chewy on the inside, crisp and crunchy on the outside - what's not to love?

I am not really into cereal with milk in the morning, but dunking this baby in a glass of cold fresh milk is a whole different story. I had my first ever cornflakes cookie earlier this winter in a cafe in Toronto and was hooked on making them ever since. Little did I know that cornflakes cookies have been around since 1970s. In today's world, thanks to our ever growing variety of flours and sugars, every home cook can play with different combinations to suit their dietary preferences and create their desired results. So play around and even get your kids into it!
The below recipe includes coconut flour and cornstarch to produce incredibly crumbly and tender cookies, so if you are after a more crunchy bite, feel free to substitute coconut flour with a half cup of plain flour or bread flour and leave out the cornstarch. Longer baking time will also produce a crunchier cookie. Additionally, you can sub brown sugar for white sugar for a more blond, less chewy version of the same cookie. Add a pinch of coarse sea salt for that extra crunch and contrasting savoriness. You can even experiment with mixing several kinds of cereals like rice cereals!

Now, get baking, and get ready to curl up with a glass of milk and a book!
What you'll need... (makes 24 3-inch cookies, minus all the dough I nibbled) 
Dry ingredients:
1 cup plain flour
3/4 cup coconut flour
1 cup + 1 cup cornflakes, lightly crushed by hand
2 teaspoons cornstarch
1/2 teaspoon baking soda
3/4 teaspoon salt
Pinch of coarse sea salt

Wet ingredients:
7/8 cup (200g) butter, softened
1 cup brown sugar
1/4 cup white sugar
1 teaspoon vanilla extract
2 eggs

Directions...
1. Preheat oven to 190C/375F. Line a baking sheet with parchment paper and set aside.

2. In a mixing bowl sieve together the flours, cornstarch and baking soda. Mix in salts and 1 cup of cornflakes.

3. In a separate bowl, use electric beaters to beat the butter and sugars until creamy. Beat in the eggs and vanilla. Pour this wet mixture into the flour mixture and fold to combine.

4. Place the remaining cornflakes in a bowl. Spoon slightly heaped tablespoonfuls of the cookie dough into the cornflakes. Toss gently in the cornflakes to coat and form balls.

5. Drop the dough balls onto the parchment lined baking sheet, spacing at least 2 inches apart. Bake for 12-15 minutes or until golden. For best results let the cookies cool for 10 minutes before attacking. Repeat this step until you are out of dough.

Note: Just like cereal in milk, once mixed into the dough the cornflakes can quickly go soggy. If you enjoy working slow in the kitchen (like me), or have a small oven that can only handle a half dozen of cookies at a time (like me), reserve more cornflakes to be used as sprinkles instead of mixing into the dough in step 2.


《咽韌奇脆玉米片曲奇》
玉米片、曲奇均與牛奶為天生好拍檔,何不將兩者合壁成為玉米片曲奇同牛奶一起享受?
材料(約 24 個 3 吋 曲奇):
乾成份:
低筋麵粉  125 克
純椰子粉  85 克 (可用 60 克 低筋麵粉取替)
玉米片  60 克(分半,並用手輕輕壓碎)
粟粉  2 茶匙
蘇打粉  1/2 茶匙
幼鹽  3/4 茶匙
海鹽  少量

濕成份:
牛油  200 克 (室溫)
紅糖  220 克
砂糖  50 克
香草精  1 茶匙
雞蛋  2 隻

做法:
1. 預熱焗爐至 190C / 375F。
2. 麵粉、粟粉、蘇打粉過篩,拌入幼鹽、海鹽和一半玉米片備用。
3. 牛油、砂糖、紅糖用攪拌機打至綿滑,拌入雞蛋及香草精。
4. 將以上濕和乾成份混合均勻。注意別過分攪拌。
5. 將剩餘的玉米碎片置於碗子內。
6. 把麵團揉成圓球狀,再沾上玉米碎片,然後排放在鋪了烘培紙的焗盤上。注意每球分隔約 2 吋讓其有充足空間擴大。
7. 放入焗爐焗約 12-15 分鐘至金黃色。略涼約 10 分鐘後可馬上享用!

[Write to me under comments! Follow me on Instagram @alvinckl and check out my Facebook Fan Page!]

Sunday, August 7, 2016

Orecchiette with Eggplant and Italian Sausage | 意式肉腸茄子貓耳朵麵

附中文食譜
Summer in Rome conjures up images of red-checkered tables and chairs spilling onto the sidewalk, of food lovers dining and drinking well into the evening, of lively farmers markets carrying the bounty of Italy's growing season - all alongside imposing ruins of Ancient Rome.

A stroll through the compact yet complete Circus Maximus Farmers Market will take you on a culinary journey through the sights and smells of an Italian summer. Emerald green zucchini, deep purple aubergines and bursting red, candy-sweet tomatoes of all shapes and sizes meet the pungent aroma of cured meats and fresh made stracciatella di bufala. Ristorantes and trattorias around town offer up seasonal specials, showcasing the freshest of local, in-season ingredients.

Interestingly, I have not always had the same appreciation for Italian cuisine. In my early years of travel I have had my fair share of dismal Italian food, falling victim for obvious tourist traps that were more concerned about turning over tables than food. I was confounded, disappointed, my experience once so marred by droopy, soggy, skimpy pizza that I left questioning what Italian food was.

Falling in love with Trastevere, Rome [Summer 2016]

It wasn't until recently as my passion and curiosity for cooking grew that I started understanding and truly appreciating the essence of great italian food: simplicity, highlighted by the freshest, seasonal ingredients.

Over the years I trailed off the beaten path, exploring the nooks and crannies of Rome and beyond, tasting local treats and regional dishes along the way. My discoveries are as ground-breaking as they are elemental. Whether it is tagliatelle amatriciana, a classic pizza margherita, or a simple antipasto of burratina affumicata, the connection is clear: all you need is a few good ingredients to make an amazing dish.

Call me crazy - never had it occurred to me before just how much tomatoes themselves contribute to the actual flavor of a tomato sauce until my last pizza in Rome - it was a transcendental moment. I was positively enlightened. Perhaps possessed. You get the idea.

Below is my take on a simple pasta dish I had as I explored Italy: Orecchiette con Melanzane e Salsiccia. Little bite-sized orecchiette (literally "small ears" in Italian) makes a wonderful vehicle to hold the chunky sauce, although any kind of pasta will do. The tomato sauce can be made in large batches ahead of time and frozen for later use; recipe as follows:

Classic Homemade Tomato Sauce | Sugo al Pomodoro


What you'll need...
200g orecchiette
2 sweet Italian sausage with fennel, casing removed
1 small eggplant, diced into bite-sized cubes
8 cherry tomatoes, halved
1 tablespoon extra virgin olive oil
Classic Homemade Tomato Sauce
Grated pecorino or Parmesan cheese, for garnish

Directions...
1. Toss eggplant with one teaspoon of salt and drain for a few minutes on paper towel. Bring a salted pot of water to boil, cook pasta till al dente. Drain, reserving a small amount of pasta water.

2. Heat oil in a skillet over medium low heat, add sausage. Crumble the sausage and cook until beginning to brown. Pat the moisture off the eggplant and add to the sausage. Cook to soften, partially covered, about 6 minutes.

3. Add homemade tomato sauce and cherry tomatoes, stir to combine and cook till heated through. Add some pasta water if necessary.

4. Stir in cooked orecchiette and season to taste with salt and pepper. Plate and top with grated cheese. Buon appetito!


《意式肉腸茄子貓耳朵麵》
材料:
貓耳朵麵  200 克
意式肉腸  2 條 除去腸衣
茄子  1 小個
車厘茄  8 個 切半
初榨橄欖油   1 湯匙
自家製意式番茄醬
芝士  隨個人喜好

做法:
1. 茄子切成小丁,撒上 1 茶匙鹽拌勻出水。
2. 滾水裡加鹽及意粉,煮至彈牙撈起備用。可保留少量意粉水備用。
3. 橄欖油用中慢火燒熱,加入意式肉腸,用鏟剁碎並煎至呈金黃色。
4. 茄子用吸水紙印乾,加入平鍋跟肉腸一起煮至軟身,約 6 分鐘。
5. 加入自家製意式番茄醬和車厘茄拌勻,有需要的話可加少量意粉水。
6. 番茄醬滾後拌入貓耳朵麵,拌勻再作調味關火即成。
7. 上碟後隨意撒上芝士,再配上一杯白酒,好好品嚐!

[Write to me under comments! Follow me on Instagram @alvinckl and check out my Facebook Fan Page!]

Tuesday, August 2, 2016

Classic Homemade Tomato Sauce | 自家製意式番茄醬

附中文食譜
Supermarkets these days stock an aisle full of pasta sauces, and tomato sauces alone - with the myriad of brands and permutations - make up the bulk of these often overpriced commercial products. Tomato sauces are infinitely useful in Italian home cooking, but before you head down to your grocers to grab a jar of that stuff next time, consider making your own!

In Italy most home cooks would swear by using fresh, summer tomatoes for their sauce, but if you live in a place where tomatoes are consistently bland and overpriced like I do, go for a tin of whole plum tomatoes or chopped tomatoes for a money- and time-saving short cut.

Me frolicking in every home cook's wonderland: Borough Market, London

Heirloom tomato galore at Borough Market, London
A great tomato sauce should be able to stand on its own without much adornment and excessive seasoning, as some purists may say. No herbs, no onions, no vinegar, no wine; just sugar, salt, olive oil, and tomatoes. Pure tomatoey goodness. But if you are like me who loves full-on flavor, experiment with different seasonings and create your own flavor profile!  

Homemade tomato sauce is simple and quick, and it freezes well. So make a big batch ahead of time and you will always have some ready when you need some. Here is my own go-to recipe. I sometimes throw in a squirt of  ketchup for a sweeter, more Japanese-style tomato sauce (ready for a Purist onslaught). Try it out and it might just surprise you. I often finish my sauce with some fresh cherry tomatoes for some extra chunkiness.

Create other dishes using this tomato sauce:
Grilled Eggplant Parmesan
Orecchiette with Eggplant and Italian Sausage

Make homemade tomato sauce from fresh whole tomatoes or the canned variety for ease

What you'll need...
1 tin (800 g / 28 oz) chopped tomatoes
1 1/2 tablespoons extra virgin olive oil
4 garlic cloves, minced
1 small yellow onion, finely chopped
Pinch of red pepper flakes
2 bay leaves 
Fresh or dried herbs to taste (eg. sage, rosemary, thyme, oregano)
2 stems of fresh basil, thyme, or rosemary
Salt and pepper, to taste
Sugar, to taste
6-8 cherry tomatoes, halved (optional)
2 teaspoons tomato paste (optional)
1. Heat oil in a large saucepan on medium-low heat, add chopped onions and cook until translucent and tender. Stir in garlic, red pepper flakes, and any dried herbs and cook for another two minutes until fragrant.

2. Tip in the tomatoes, bay leaves, salt and pepper, bring to a slow boil then reduce heat and let simmer, uncovered, for 20 min, stirring occasionally, until sauce is reduced.

3. Stir in cherry tomatoes (if using) and add stem of basil or other fresh herbs and submerge in sauce for another 10 minutes. Test the sauce and add sugar to cut the acidity. Season to taste with tomato paste if desired.

4. When finished, discard bay leaves and stem of basil. Enjoy the sauce as is with your favorite pasta or use it in a variety of dishes!

Note: Use a immersion blender to puree the sauce for a smoother sauce; otherwise, leave it chunky! Keep refrigerated for up to one week, or keep separate batches in freezer for later use.

Flavor and texture is derived from reducing the sauce

《自家製意式番茄醬》

材料:
番茄  1 罐 (800 克)
初榨橄欖油  1 1/2 湯匙
蒜頭  4 瓣  (切碎)
洋蔥  1 小個  (切碎)
乾辣椒碎  適量
各種香草  隨意  (乾或新鮮)
月桂葉  2 片
新鮮羅勒葉 、百里香、或迷迭香  2  枝
黑胡椒  適量
砂糖  適量
車厘  6-8 個  切半(可免)
番茄膏  2 茶匙(可免)

做法:
1. 橄欖油用中慢火燒熱,下洋蔥煮至軟身。
2. 加入蒜、乾辣椒碎、及任何乾香草,多煮約兩分鐘。
3. 加入罐裝番茄、月桂葉、鹽和黑胡椒並拌勻,待滾後轉慢火煮約 20 分鐘。
4. 加入已切好的小番茄和整枝羅勒葉,繼續煮約 10 分鐘至完全收水。
5. 試味。如番茄醬偏酸,可加糖調整。
6. 可隨個人喜好加入番茄膏調味。
7. 把羅勒和月桂葉拔掉並扔掉即成!可隨意炮製各式各樣的意大利菜式!

備註:番茄醬可冷藏一星期,或分批雪藏。

[Write to me under comments! Follow me on Instagram @alvinckl and check out my Facebook Fan Page!]