Showing posts with label Comfort food. Show all posts

Monday, August 19, 2024

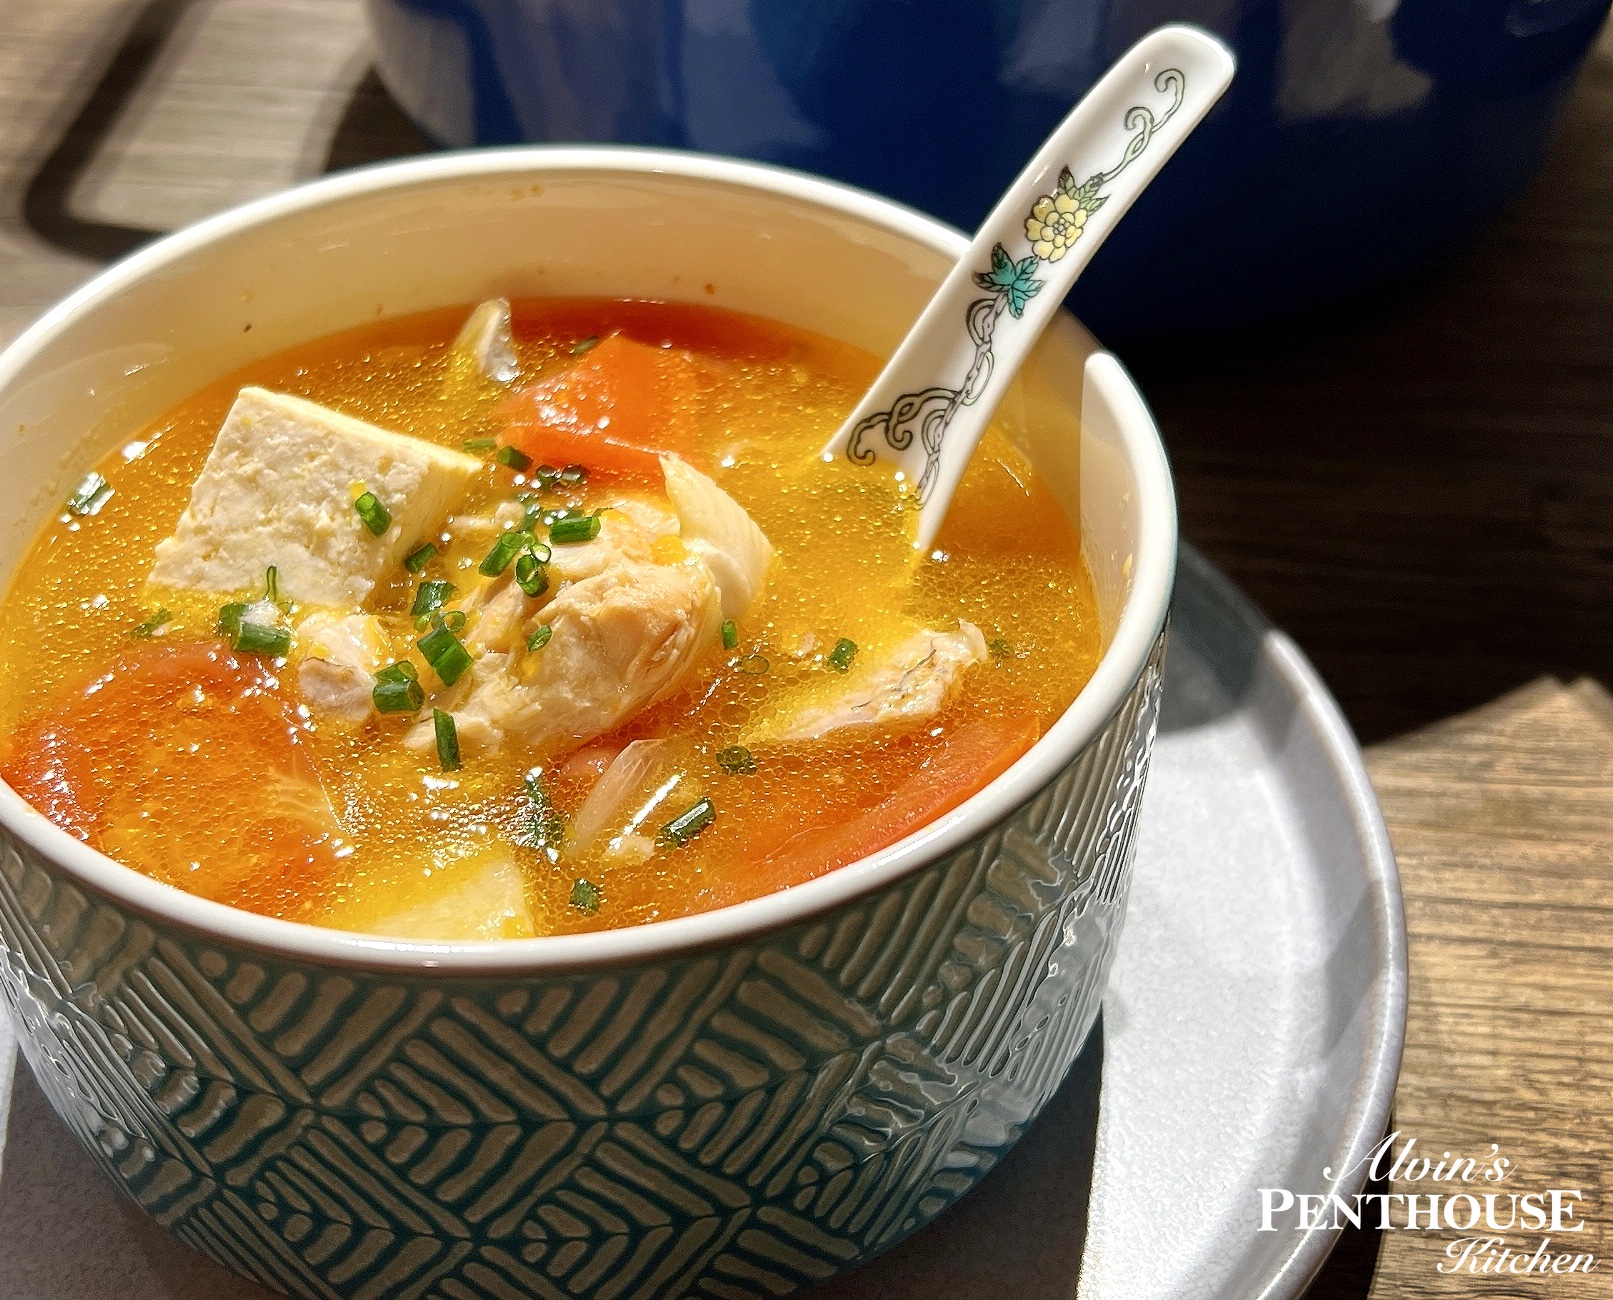
Salmon Fish Head Soup with Tomato, Potato, and Tofu|番茄薯仔豆腐三文魚頭湯

I
t has been four years since my previous post, and during this time, the world, particularly Hong Kong, has experienced unimaginable changes. My own life has also taken drastic turns, a tale that I may save for another day.
 
Even though I may have taken a step back from this blog which I once poured my heart and soul into building, my love for cooking and sharing recipes remains unwavering.
 
With the increasing demands of running two start-ups around the clock, my time in the kitchen has significantly diminished. This has led me to fall into the unhealthy cycle of eating poorly. At times, I find myself going back to my blog to find inspiration for a simple and efficient meal prep idea that can see me through the week.

And this, my friends, is precisely the reason why I launched this blog ten years ago.
 
Given my time constraints, tight budget, and desire for healthy homemade meals, efficient and simple cooking is crucial. Lately, I've fallen in love with making a particular soup that is not only nourishing and comforting, but is also remarkably easy to make. This soup serves as a satisfying and complete meal that ticks all the boxes. I make enough to feed a village (enough to last me for up to 5 meals), portioned into containers that conveniently pop straight into the microwave.

While I may currently not have the luxury to indulge in a full-blown food photography session – a process I absolutely relished but which can span days from preparation to post-production – I still wanted to share this recipe not just for my personal keepsake, but also with every one of you who, like me, yearn for a heartwarming and nutritious meal at home.
 
So now, enough talk. Let's dive straight into this incredible soup! While this wasn't a soup I regularly had growing up, it's certainly one that I am very fond of. The distinct flavor and aroma of salmon; the classic combo of potatoes and tomatoes in a broth which forms the foundation of numerous childhood meals. While one can stick to just these three main ingredients, I like to add onion, carrots, and pumpkin to further boost the natural sweetness and nutritional value of the soup, turning it into a wholesome, all-in-one meal.

Ingredients: Servings for 5
1 salmon fish head, split in the middle, gills removed
1/2 inch ginger, sliced
1 brown onion, coarsely sliced
5 medium tomatoes, cut into wedges
1700 ml hot water
2 potatoes
1 block firm tofu, cubed
10 black peppercorn
1 teaspoon cooking oil

Optional Add-ins:
Carrots
Pumpkin or butternut squash

Directions...
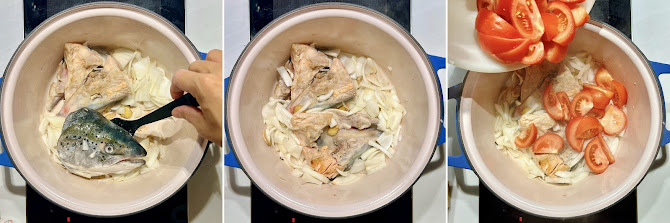
1. Use paper towels to pat the fish head dry. Heat a large, heavy bottomed pot or dutch oven over medium high heat. Add oil and lightly fry ginger slices until fragrant. 

2. Add fish head, flesh side down, and salt generously. Nestle sliced onions around the fish head, gently stir to coat in oil. Let sizzle undisturbed, then carefully flip the fish head, salt, about 2 minutes on each side.
3.  Add tomato wedges and black peppercorn, pour in the hot water, cover with lid and cook over medium heat for 5-8 minutes.

4. Peel and cube the potatoes, carrots, and pumpkin if using. Add to soup and bring to a boil, then reduce the heat to a simmer for 20 minutes or more if you like your potatoes very tender and the pumpkin entirely dissolved. Add tofu and let cook for several more minutes. Enjoy!


This soup is bursting with so much flavor that no additional seasoning is necessary.Savor the tender chunks of salmon, the sweetness from onions, pumpkin, and tomatoes, and the satisfaction of treating yourself well. And, did I mention that there's minimal cleanup required?
Tried this recipe?
Share with me or leave a comment below! Tag #alvinspenthousekitchen.
Find me on Instagram @alvinckl and @alvin.penthousekitchen!

Thursday, May 21, 2020

Classic Banana Bread | 香蕉蛋糕

The first thing I ever baked was a banana bread. That goes to show that making banana bread is about as easy as baking can get - so long as you have bananas that are so ripe and freckled they would have otherwise ended up in the reject pile at the supermarket.
While some people make banana bread only as a way to use up forgotten bananas, others like me routinely stake out at the quick sale corner hunting precisely for these often orphaned, blemished, and (heavily discounted) overripe bananas - for none other than to bake the most impossibly scrumptious and moist homemade banana bread. After all, banana bread is half the reason why bananas exist, right?

Over the years I have carried banana bread to the office at my first desk job; brought a slice or two to my hairdresser and bribed a security guard; shared with my fellow chirpy flight attendants during boot camp training as a new recruit; and on countless occasions served it at housewarmings, game nights, or simply as an afternoon treat. Over time, friends, neighbors, co-workers have fallen in love with this banana bread. Some even declared it a favorite.

Banana bread can be something rather ordinary, a usual suspect at coffee shops everywhere; it is so basic and so ubiquitous yet so universally loved it's almost uncanny. Abundant as they are, however, some banana bread may turn out dry, overly sweet or, worse yet, taste of artificial flavoring. What makes homemade ones extraordinary and sets it apart from commercial ones is its texture, the moist and soft crumb, the incredibly rich color and buttery aroma, and the unmistakable natural sweetness from ripe bananas.

Year after year I swear by this simple recipe, deviating only in experimentation with different combinations of sugars. I tend to gravitate towards using brown or even black sugar to imbue the cake with a rich, caramelly flavor and moisture, but also mixing in white sugar just to provide enough sweetness without overpowering the banana flavor. Using white sugar alone will produce a paler banana bread with a more single-noted flavor. The sugar amount is flexible. Most recipes call for one full cup of sugar, but I find 3/4 cup to be just perfect - or even less if you are using very, very ripe bananas or upping banana count to four.

As far as baking goes, banana bread is by far the most beginner-friendly. It is the simplest and most forgiving, especially for someone like me who detests precise measurements and flinch at the thought of baking an angel food cake. There may be plenty of ways to fancy up a good old banana bread; you can add walnuts, pecans, chocolate chips, dark rum, all of which I've tried - but some of my best bakes are the ones that were kept simple and classic. Sometimes simplicity is best (I am a bit of a purist when it comes to banana bread).

Ordinary as it may be, banana bread is surely well loved by all and oddly so it is also one of my most requested recipes from friends. This is my go-to favorite recipe for banana bread, one that I have written out on a loose piece of junk paper and which I have cherished over the years. Calling this the "best-ever" banana bread may be a bold statement, but I am here to admit it might just be the best banana bread you've ever had. It will surely make you go bananas!


Ingredients
1 1/2 cup (195 g) plain flour
1 teaspoon baking soda
1/2 teaspoon salt
3 large overripe bananas
1/2 cup (115 g) unsalted butter, softened
1/2 cup brown sugar
1/4 cup white sugar
2 eggs
1/2 teaspoon vanilla essence

Directions...


Preheat oven at 350F/180C. Cream together the butter and sugar. Crush bananas with a fork or a masher. Add eggs and vanilla essence and combine well with the butter and sugar mixture.

Sift together flour, baking soda, and salt. Fold into creamed mixture. Pour into greased loaf pan. Bake for 50-60 minutes or until toothpick comes out clean.

Do you like your banana bread plain or with nuts?
Share with me or leave a comment below! Tag #alvinspenthousekitchen.
Find me on Instagram @alvinckl and @alvin.penthousekitchen and follow my Facebook Fan Page!

 【 香蕉蛋糕 】


材料:
中筋麵粉               195 克
蘇打粉                   1 茶匙
幼鹽                        1/2 茶匙
無鹽牛油               115 克
紅糖                        110 克
砂糖                        50 克
熟透香蕉               3 條(大)
雞蛋                        2 隻
雲呢拿香油          1/2 茶匙

做法:
1. 預熱焗爐至 350F/180C。
2. 牛油放於室溫軟化,加入糖用攪拌器攪拌至均勻幼滑。
3. 香蕉放在碗裡用叉子壓成泥狀,可以保留一點顆粒口感。
4. 加入雞蛋和雲尼拿香油拌勻,然後跟牛油和糖拌勻。
5. 加入過篩後的麵粉、鹽和蘇打粉,輕輕攪拌均勻。
6. 把粉漿倒入已掃油的糕盤內,放入焗爐焗約 50-60 分鐘至金黃熟透即可。

Do you like your banana bread plain or with nuts?
Share with me or leave a comment below! Tag #alvinspenthousekitchen.
Find me on Instagram @alvinckl and @alvin.penthousekitchen and follow my Facebook Fan Page!


Tuesday, May 5, 2020

Lemon, Garlic & Herb Roasted Spatchcock Chicken | 香草檸檬蒜香烤雞

附中文食譜
Nothing quite beats a perfect chicken roast, especially when it can be done with ease and in a short time! A homey chicken roast sounds sublime for a cozy Sunday dinner in with the family or loved ones, yet it is also impressive enough to wow your friends and neighbors. This roast chicken will fill your kitchen with the tantalizing scent of garlic, rosemary, and lemon, giving you impossibly juicy meat and skin so crispy it easily beats the pants off any rotisserie chicken.

Spatchcocking your chicken is a surefire way to ensure juicy results and crispy skin every time. Not only do you cut short on the cooking time, it also makes for easy marinading the night before. Works great also on the grill for a summery outdoors barbecue. As I shared in my last post, ever since I started spatchcocking I've never turned back; in fact, a simple spatchcock chicken roast has saved me many a time when I invited friends over for dinner!

• Go to my tutorial: How to Spatchcock a Chicken: A Step-by-Step Guide

Lay the bird on a bed of root vegetables, onion, and garlic for a wholesome, easy meal all in one pan!

Let the bird marinate overnight for extra flavor and tenderness
To make for a complete meal in one pan, I like to throw in chopped root vegetables, onion wedges, whole garlic cloves, and hearty vegetables like brussels sprouts to roast together. For a even more scrumptious treat, however, I like to build a layer of thinly sliced potatoes and sweet potatoes underneath the chicken, which soaks up the juices from the roast and crisps up with crunchy bits towards the end. Now, that is truly irresistible.

The roast will generate a copious amount of drippings, which you can use to whip up a luscious gravy if you are feeling extra fancy. Personally, I find the chicken in and of itself so flavorsome and moist that I'd skip completely on the gravy. Rather, I would reserve the lemon-infused, richly-flavored, garlicky drippings for cooking another day - whether it's in roasting baby potatoes, stir-frying vegetables, or cooking another chicken dish. It is absolutely sensational in preparing my Lemon Chicken Piccata with Zoodles recipe!

• Get the recipe: Lemon Chicken Piccata with Zoodles

Pair this roast chicken with a perfect side dish: Brown Butter Roasted Brussels Sprouts with Pancetta, Sage, and Almonds - work on the stove while the chicken is roasting, then pop the dish into the oven once the bird is out resting!

•  Get the recipe: Brown Butter Roasted Brussels Sprouts with Pancetta, Sage, and Almonds

The chicken is so tender the leg freely wriggles off without even using a knife - watch as the juices flow!


Ingredients
1 whole chicken
3 large cloves garlic, minced
1/4 cup fresh herbs, chopped (rosemary/thyme)
3 tablespoons extra virgin olive oil
1 tablespoon coarse salt
1 teaspoon ground black pepper
1 whole lemon
Potatoes (optional) 


Directions
1. Spatchcock the chicken: Pat the chicken dry. Using a pair of kitchen shears, cut along each side of the spine to remove the backbone. Trim excess fat and clean out the cavity. With breast side up, press down firmly in the middle of the breastbone to flatten the bird. (For my step-by-step guide, click here)

Get under the skin: using your fingers, carefully separate the skin and the flesh in the breast and thigh. Spread marinade nicely in these "pockets" and evenly all over the whole chicken.
2. Season the chicken: Combine garlic, herbs, olive oil, salt and pepper in a bowl. Rub marinade evenly throughout the chicken and under the skin. Drizzle with lemon juice from half of the whole lemon. Reserve the squeezed half lemon for roasting. Marinate overnight.

3. Roast the chicken: Preheat oven to 425°F/220°C. Remove chicken from fridge and allow 20 minutes to return to room temperature. In a large cast iron skillet or sheet pan, scatter thinly sliced potatoes and salt generously. Place squeezed lemon half in center to help prop up chicken for better air circulation. Place chicken on top and tuck the wing tips under to prevent burning. Slice remaining half lemon and scatter around chicken.

4. Roast for 20 minutes. Baste the potato slices with drippings. Rotate the pan and return to the oven for an additional 15 to 20 minutes until golden and crispy, depending on size of the chicken. Remove from the oven and let rest for 10 minutes. Dig in!

Tried this recipe?
Share with me or leave a comment below! Tag #alvinspenthousekitchen.
Find me on Instagram @alvinckl and @alvin.penthousekitchen and follow my Facebook Fan Page!


【 香草檸檬蒜香烤雞 】

材料:
急凍全雞                          1 隻
蒜末                                   3 大蒜瓣
新鮮迷迭香/百里香       適量(剁碎)
初榨橄欖油                      3 湯匙
粗鹽                                   1 湯匙
黑胡椒                               1 茶匙
檸檬                                   1 個
薯仔                                   隨意

做法:
1. 先將全雞來個蝶式開邊。(詳細做法:蝴蝶式全雞開邊法)
2. 準備醃料:把蒜末、香草、橄欖油、鹽和胡椒拌勻。
3. 用手指輕輕把雞胸和雞腿的皮與肉之間分隔開,有助塞進醃料。把整隻雞塗滿醃料,擠上半個檸檬汁,放進雪櫃醃過夜。擠完的檸檬半保留備用。
4. 醃好的雞置室內解凍約 20 分鐘。預熱焗爐至 425°F/220°C。
5. 薯仔切薄片,平鋪在烤盤上並撒上鹽和胡椒。擠過的檸檬半放在中間。
6. 放上雞隻,將雞翼尖向下疊好以防止燒焦。剩餘半隻檸檬切片,撒在烤盤上。
7. 放進焗爐烤 20 分鐘。薯仔掃上雞油,再烤 15 - 20 分鐘至雞隻金黃皮脆,即成!

Tried this recipe?
Share with me or leave a comment below! Tag #alvinspenthousekitchen.
Find me on Instagram @alvinckl and @alvin.penthousekitchen and follow my Facebook Fan Page!

Thursday, April 2, 2020

Steamed White Sugar Sponge Cake | 傳統白糖糕

附中文食譜
The classic Chinese steamed white sugar sponge cake is a childhood favorite for many, and it is no exception for me growing up in 1990's Hong Kong. The sheer thought of this humble street snack brings back many sweet memories - of my mother always buying me a couple of slices every time she visited the wet market; and me always looking at her with puppy eyes whenever we passed by a shop selling the familiar triangular slices. It is a symbol of joy in its simplest form.

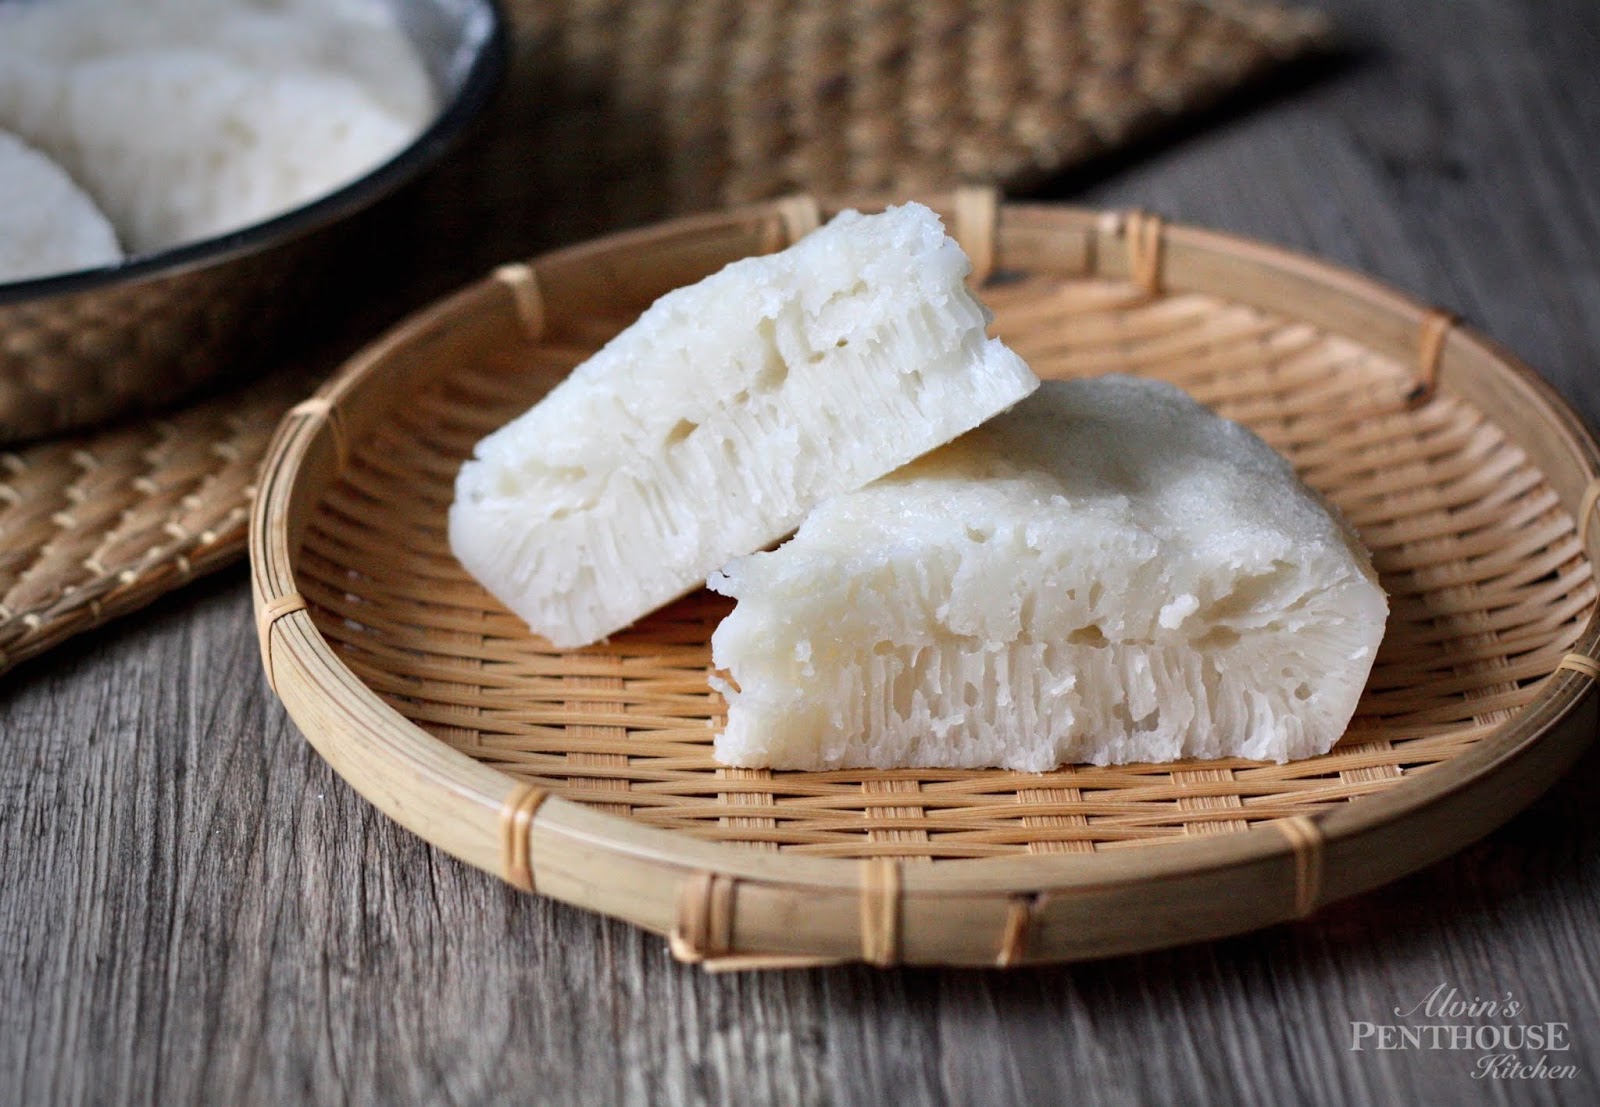
The steamed white sugar sponge cake (白糖糕, bak tong gou) is light and fluffy, glossy and slightly sticky to the touch, and moist and springy on the inside. It is sweet - but not tooth-achingly sweet, with a faint floral aroma that reminds of sweet rice wine and fermented glutinous rice that I adore (even as a child) and later come to recognize as yeast. Tearing into the cake would reveal an intricate honeycomb-like columnar structure that I always, to this day, find absolutely fascinating.

I may have since then left home for the United States for school for a number of years and not had bak tong gou for ages, but my affinity for this childhood favorite never weakened. Even upon my return to Hong Kong, I always made a stop at this old hawker who sold all kinds of traditional homemade confections from a little cart on Wellington Street, Central. This old hawker would have long gone by now. And with this old gentleman being quite possibly the very last hawker vending traditional sweets under the government's non-transferable itinerant hawker license, bak tong gou and the like will now be only found at handfuls of traditional bakeries, congee shops, and occasional dim sum lunches across town. The fond memories that many of us share of this childhood favorite, however, never fades.

Making the steamed white sugar sponge cake at home is really rather simple. With such a simple and inexpensive ingredient list, making this cake yourself and revisiting the memory lane might in fact be easier than finding this cake on the streets these days. As the name suggests, bak tong gou calls for granulated white sugar, giving the cake that pure white appearance that becomes slightly off-white only with the addition of yeast. Using brown sugar would create a sister version of the sponge cake, (黃糖糕) wong tong gou, or as Hong Kongers call it - steamed yellow sugar sponge cake. And like many traditional Chinese cakes, the sponge cake is steamed rather than baked.

The yeast gives the steamed sponge cake a distinct, honeycomb-like columnar texture and appearance
I have tried different methods and measurements for making the bak tong gou, and the one I share here by far trumps all others when it comes to effort and ease. Conventional approach will suggest cooking the rice flour mixture together with the sugar syrup over low heat on the stove top, which would require rigorous stirring and a greater attention span to prevent lumps from forming. I have also tried the double-boiler method which, while providing less direct heat, likewise requires continuous stirring. Instead, to make life and an already easy recipe a whole lot easier (who doesn't like the sound of that?), simply dissolve the sugar and yeast in warm water and add them to the rice flour mixture and give that a good stir, and the mixture is ready to rest.

Bak tong gou should taste sweet but not sour, which is a sign of over fermentation
By doing this, not only will you save loads of time from having to wait impatiently for the mixture to cool down before adding the yeast (lest you kill the yeast), you also spare a whole lot of elbow grease and the risk of ending up with undesirable lumps in the batter. Boom, an easy recipe just made even easier.

After putting together the batter, it is to be simply left covered for hours to allow the yeast to do its thing. The exact amount of time varies with ambient temperature, ranging anywhere from three hours in summer up to seven in colder months. Following the below technique will significantly cut the idle time, regardless the season.

I have long been known to detest precise measurements in the kitchen, relying almost too wholeheartedly on "the senses" and cups and tablespoons and only reluctantly pulling my kitchen scale out when converting recipes into metric units when called for. Most recipes online for the steamed sponge cake come in metric unit. Fortunately, the steamed sponge cake is very forgiving to minor mathematical errors. Out of convenience, here I provide both measurements in cups as well as grams or millimeters. From here on out, with this recipe finally consolidated and added to my collection, I am rejoicing that my kitchen scale can rest in peace inside the cabinet whenever I make bak tong gou. Perhaps I would be making this cake and walking down the memory lane more often from now on!

Ingredients...
1 cup warm water, divided
1 cup water
2 cups (280 g) rice flour
3/4 cup (150 g) white sugar, divided
2 teaspoons active dry yeast
1/4 teaspoon vegetable oil

Proofing the yeast & making the batter
1. Transfer 1/4 cup of the warm water into a cup or bowl. The water should be around or just slightly higher than body temperature (roughly 100°F/38°C) and not hot to the touch. Tip in the active dry yeast along with 1/2 teaspoon of the sugar, stir well and let rest for 10 minutes or until foamy.

2. In a large mixing bowl, combine the rice flour and 1 cup of water (room temperature). Stir until thick and smooth.

3. Add sugar to the remaining 3/4 cup of warm water and mix well until sugar dissolves. Check that the syrup is close to body temperature and not hot to the touch.

4. Add the yeast mixture and syrup to the flour mixture and stir well to combine. Cover with cling wrap and place inside a microwave or oven along with two cups of boiling water to generate heat. Close the door and let the batter rest for 2 hours or until large bubbles form on the surface of the batter. Refresh the boiling water to speed up the process if needed.


Steaming the cake
1. Grease a 9-inch round cake pan generously with oil. Once the batter is ready, remove from the oven, stir well, and transfer batter to a large measuring cup. Add vegetable oil and stir to combine.

2. For a smoother cake surface, pour batter over a strainer into the cake pan and discard the foam. Steam over high heat, covered with the lid wrapped with a tea towel, for 25 minutes.

3. Turn the heat off and allow the cake to rest in the steamer for 10 minutes with the lid off. Remove cake from the steamer and let cool for another 10 minutes on the counter. Slice and enjoy fresh at its best!

Note: Cover and store at room temperature for up to 24 hours. After that, refrigerate for up to 4 days. To reheat, steam gently.

Is Bak Tong Gou also your childhood favorite?
Share with me or leave a comment below! Tag #alvinspenthousekitchen.
Find me on Instagram @alvinckl and @alvin.penthousekitchen and follow my Facebook Fan Page!

【 傳統白糖糕 】

自細對白糖糕就有著一種情意結。想當年媽媽知道我最愛白糖糕,每次落街市都會買來給我吃;人大了,白糖糕依然充滿著童年回憶。別看白糖糕外表平凡,一件好的白糖糕雪白晶瑩、味道清甜芳香而不酸、入口爽滑而稍韌,難怪令人難以抗拒。自家製白糖糕十分簡單,經過屢次改良,終於研製出以下最簡易、最省時、零失敗的食譜跟大家分享、一起懷緬童年!

材料:
溫水*                      240 毫升
清水                        240 毫升
粘米粉                    280 克
砂糖                        150 克
即溶酵母                2 茶匙
菜油                        1/4 茶匙

做法:
1. 先用 60 毫升溫水來開即溶酵母,加入半茶匙砂糖,拌勻備用約 10 分鐘。
2. 粘米粉及清水拌勻至輕微黏稠狀,備用。
3. 剩餘砂糖與溫水攪勻至完全溶解。
4. 將發好起泡的酵母和糖水加入粘米粉漿內拌勻。
5. 蓋上保鮮紙,連同 2 杯滾水放置在微波爐或焗爐裡面發酵 2 小時,直至粉漿出現大氣泡。滾水會製造蒸氣熱力,有助粉漿在受控的環境下迅速發酵。
6. 發酵好的粉漿加入菜油拌勻,隔篩(隔除過量氣泡,白糖糕表面會更加光滑)倒入已掃油的圓形不鏽鋼碟內,用大火蒸約25分鐘。
7.  熄火開蓋,待涼約 10 分鐘後把白糖糕取出再晾涼約 10 分鐘後切件即成!

備註:
1. *注意暖水溫度應接近或輕微高於體溫,不應燙手,不然會「殺死」酵母。
2. 家中如有蒸籠,可以用蒸籠去蒸,不然可以用毛巾包著煲蓋隔水蒸,有助防止倒汗水滴在糕面,影響製成品。
3. 正宗白糖糕其實不該帶有酸味,而酸味可能來自發酵過度。

Is Bak Tong Gou also your childhood favorite?
Share with me or leave a comment below! Tag #alvinspenthousekitchen.
Find me on Instagram @alvinckl and @alvin.penthousekitchen and follow my Facebook Fan Page!
Thursday, November 21, 2019

Pressure Cooker Braised Chinese Mushrooms with Noodles | 珍菌香菇素煨麵

附中文食譜
Earlier this summer I stumbled into a cozy local health-food cafe in the heart of the Mongkok Flower Market looking to fill my midday hunger pang. Nutritious soups, tonics and healthy desserts aside, the menu features a one and only savory and more substantial signature dish - noodles with braised assorted Chinese mushrooms - with a brief description of its health-giving properties. The bowl of noodles was simple, tasty and comforting, and perfect for a light lunch or dinner; I thought I could easily make a similar version at home with my own mix of mushrooms I have in the pantry.

Each type of precious fungi contributes to creating a complex blend of intense flavors, aroma and rich textures

Every now and then, our generally meat-heavy diet at the workplace or in dining out gets me feeling in need of a break - a desperate longing for staying in and cooking something light, satisfying, and completely meat-free, something as basic as braised mushrooms. Dried mushrooms come to the rescue on days when I am just too lazy to go all out on market visits and meal prep. Thanks to their superb meatiness, Chinese dried shiitake and monkey head mushrooms can easily be the star of any vegetarian or vegan main event. As long as they are stored in a cool place and away from direct sunlight (sometimes even in the freezer), dried mushrooms keep well and make a good pantry staple.

Cut cooking time down with a pressure cooker like this Vitavit® by Fissler
Chinese braised mushrooms is familiar to many, as they frequently make appearance at banquets and especially during Chinese New Year celebrations, where special, festive occasions will often call for the most premium grade of mushrooms braised in oyster sauce and served on a bed of greens. As Chinese mushrooms already pack a heady punch of aroma on their own, they do not require heavy seasoning, although a touch of sweet and extra umami does bring out the best of them (in comes the ever indispensable oyster sauce, whose vegetarian version is now widely available in supermarkets).

At home, braised mushrooms can be just as simply prepared, with the cooking time significantly reduced with an instant pot or pressure cooker. You can opt for the most purist of all and use only Chinese dried shiitake, or use a medley of precious fungi to create a complex blend of aroma and texture unique to each type of mushroom.

The soaking liquid, rich with intense mushroom flavor, provides the "stock" - do not discard after soaking!
Monkey head mushrooms - so named for its resemblance - are like sponges that plump up in water and add incredible depth of flavor, aroma, and a juicy, spongey bite. Porcini (I recently picked up a bag on my travels to Yunnan, China) adds richness and earthiness; while the brightly orange Cordyceps militaris brings crunch and a mild bitterness along with its purported potential to improve heart health and fight inflammation, cancer, diabetes and aging. As always, experiment your own blend and use what you have on hand!

To complete the simple dish, add a side of Asian greens and ladle the braised mushrooms over your favorite noodles, be it udon, somen, buckwheat soba, or thin egg noodles. Perhaps the most enlightening light bulb moment I had at the health-food cafe was their use of chopped Chinese celery as a garnish, which adds an uncanny layer of pleasant, medicinal flavor and crunch to the braised mushrooms. Spoon the intensely flavored mushroom "gravy" over and lunch is served!


Ingredients
50 g small Chinese dried shiitake mushroom
2 heads dried monkey head mushroom
12 g dried porcini (or other mushroom of choice)
15 g Cordyceps militaris
2 teaspoons sesame oil
1 inch ginger, sliced
1 tablespoon Shaoxing wine
3 tablespoons oyster sauce, regular or vegetarian
1 tablespoon soy sauce
20 g rock sugar
1 star anise
3 cups (700 ml) water
1 tablespoon cornstarch (mixed with 1 tablespoon water)

Serve with:
Chinese celery, chopped | noodles of choice | greens of choice

Directions
1. Give the Chinese mushroom, monkey head mushroom, and porcini a quick rinse, then place in a large bowl and submerge in 3 cups of water for 30 mins. Trim any hard stems if necessary. Tear the monkey head mushrooms apart into smaller chunks. Squeeze excess water out of the mushrooms, reserving the soaking water. Give the Cordyceps militaris mushrooms a good rinse and set aside.

2. In instant pot, add sesame oil on medium heat. Add sliced ginger and mushrooms and stir fry for 10 seconds. Stir in the Shaoxing wine.

3. Carefully pour in the mushroom soaking water, making sure that you do not pour in any sediment or dirt from the water.

4. When the liquid comes to a simmer, stir in the oyster sauce, soy sauce, rock sugar, and star anise. Then, on medium-high heat, fasten the pressure cooker lid and set the cooking display with traffic light function on level II. Once the green ring becomes visible, reduce heat to low and set timer for 8 minutes.

5. When time is up, set the cooker aside to cool and release pressure after several minutes. Next, mix the cornstarch slurry, unfasten lid, and slowly pour in slurry while stirring constantly. Bring the contents to a boil again then turn heat off.  Remove ginger slices and star anise.

6. Arrange cooked noodles of choice and greens in a bowl, then ladle over a generous scoop of braised mushrooms and sauce. Sprinkle over chopped Chinese celery and enjoy! 

Note: to cook without using an instant pot, simply extend cooking time to 30 - 45 mins or until mushrooms are cooked and tender.

Tried this recipe?
Share with me or leave a comment! #alvinspenthousekitchen 
Find me on Instagram @alvinckl and @alvin.penthousekitchen and follow my Facebook Fan Page!

【 珍菌香菇素煨麵 】


材料:
珍珠冬菇                      50 克
猴頭菇                           2 枚
牛肝菌                           12 克
蟲草花                           15 克
麻油                                2 茶匙
薑                                    1 寸,切片
紹興酒                           1 湯匙
蠔油或素蠔油              3 湯匙
生抽                                1 湯匙
冰糖                                20 克
八角                                1 顆
水                                    700 毫升
粟粉                                1 湯匙,打芡用

拌菜:
芹菜,切粒 | 麵條 | 青菜

做法:
1. 冬菇、猴頭菇、牛肝菌過水略為洗淨後以清水浸軟。猴頭菇去蒂並用手撕成小件。把多餘水份擠出,保留浸菇水備用。蟲草花洗淨備用。
2. 高速煲燒熱後下麻油,爆香薑片及雜菇。
3. 加入紹興酒後調大火加入浸菇水,注意把水中雜質隔開。
4. 加入蠔油、生抽、冰糖及八角。待水滾後蓋上高速鍋蓋,調校至 2 速,用中火煲至見綠環後轉慢火,計時 8 分鐘後熄火。
5. 粟粉加入一湯匙室溫水拌勻。將高速煲裡剩餘蒸氣排放後開蓋,倒入芡汁並以大火收汁,約一分鐘。把火熄掉,去除薑片和八角。
6.  把煮好的麵條、青菜放在碗裡,鋪上珍菌香菇和醬汁,最後撒上芹菜粒即成!

備註:不用高速煲,可依傳統做法 — 只要把所有燉煮材料用大火煮滾後收中慢火,蓋上煲子,煮 30 至 45 分鐘後打芡。

Tried this recipe?
Share with me or leave a comment! #alvinspenthousekitchen 
Find me on Instagram @alvinckl and @alvin.penthousekitchen and follow my Facebook Fan Page!

Tuesday, June 25, 2019

Sweet Potato and Bacon Waffles | 蕃薯煙肉窩夫

附中文食譜
Growing up, waffles were hardly part of my breakfast repertoire. We didn't grow up with a waffle maker at home. Although Hong Kong-style waffles were sold everywhere at hawker stands - generously slathered with peanut butter and condensed milk and sold side by side with egg puffs - I never really developed strong memories of waffles since street food was strictly off limits in my family.

Much in the same way as American style pancakes, waffles always felt to me like empty calories heavy with flour and laden with sugar - nothing more than a vehicle for the river of syrup or pat of butter, or the occasional bells and whistles.

Things started evolving for me when fried chicken and waffles became a thing in the U.S., something of a national obsession really. Don't get me wrong - chicken and waffles have been around for ages, with origins purportedly rooted in the South, but the formidable duo has seen a revival of late as brunch grew to become the top trend in American cuisine and beyond. In an instance, the humble waffle has been propelled to the center stage and under the global spotlight as an increasing number of restaurants worldwide are adding the combo to their menu and coming up with their own signature variations, be it savory or sweet. Waffles were no longer just for breakfast; neither are they simply just plain or sweet. My attitude towards waffles shifted. Next thing I know, I developed a craving for fried chicken and waffle and make a beeline for my favorite spot every time I land in New York.

End of last year, I picked up a multi-function sandwich maker at an appliances blowout sale that came with a waffle griddle. The machine hasn't seen daylight since until this past weekend when I decided a lazy "brunch for dinner" was in order for my little get-together with a couple of good friends. And by lazy, I mean it was just going to be waffle and gazpacho, no cooking required. I wanted the waffle to be the main event, something that was at once comforting, healthy, and satisfying. I also did not want flour to be the bulk of the waffle. So I looked to sweet potato - and sure enough - sweet potato waffles is a thing.

"Brunch for Dinner": a cozy, happy, celebratory weekend reunion!
Sweet potatoes are considered low on the glycemic index scale - meaning the carbohydrates are slowly digested, absorbed, and metabolized and do not cause a spike in insulin levels. Not only are these wholesome sweet potato waffles low in carbs and calories (make them even better for you without the bacon - but hey, baaaaacon), they are naturally gluten-free. Most recipes on the internet call for coconut flour to be incorporated into the mixture, but considering that in some parts of the world coconut flour is not readily available or is plain costly, I recommend other nut flours or cornstarch as a gluten-free substitute.


In this savory version of sweet potato waffles, bacon, spring onions and a touch of garlic powder give incredible flavor, while paprika brings subtle heat that plays off the mild sweetness in the sweet potatoes. Top the waffles with more crisp bacon, a gorgeous, runny sunny-side-up and a generous sprinkle of chopped spring onion, and finish with a light drizzle of maple syrup and hot sauce for a delicious sensory experience. Pair the ensemble with a refreshing, appetizing cup of gazpacho (recipe to come soon!) and you have a complete brunch suited for any time of the day!

What you'll need... (for two)
1 medium sweet potato (2 cups grated)
1 bunch spring onion, chopped
3 tablespoons cornstarch*
1 teaspoon paprika
1/2 teaspoon garlic powder
Large pinch of sea salt
1 slice bacon (optional)
2 eggs, beaten

To serve:
Bacon | Fried or poached egg | Avocado | Maple syrup | Hot sauce | Chopped spring onion

Note*: substitute with 2 tablespoons of coconut flour

Directions...
1. Peel and grate the sweet potato. Give the shredded sweet potato a few quick pulses in a food processor if necessary to break down any long strands. Important: lay grated sweet potato out on paper towels. Place another paper towel on top and press down to absorb as much liquid as possible.


2. Preheat waffle maker or waffle iron.

3. In a small frying pan, cook the bacon (if using) until desired crispiness, drain excess fat and crumble the bacon. In a large bowl, mix together all the waffle ingredients including the crumbled bacon until thoroughly combined.


4. Once the waffle maker is hot, grease with bacon fat or spray with nonstick spray. Spread sweet potato batter evenly onto the waffle maker, making sure it's packed down lightly. Close machine and let cook until golden brown and slightly crispy, flipping once if necessary, about 8 - 10 minutes. Remove and repeat with remaining batter.

5. While waffle is cooking, prepare toppings of choice. If making waffles in batches, lay cooked waffles on a rack and keep warm in an oven. Transfer to a plate and top with desired fixings, enjoy!

 【 蕃薯煙肉窩夫 】

非一般的格仔餅啊!近年美國掀起炸雞窩夫熱潮、加上週末嘆 Brunch 的文化漸催普及化,窩夫不再只局限於早餐或作甜品~ 早餐當晚餐又何樂而不為呢? 用蕃薯製作的格仔餅鹹中帶甜,低卡高纖零麩質、不會令血糖飆升,配上培根煎蛋蘑菇和蕃茄凍湯,是完整完美的「早餐」啊!

材料(兩人份量):
蕃薯                                200 克
蔥                                    1 小札
粟粉*                             3 湯匙
紅椒粉 (paprika)          1 茶匙
蒜粉                                1/2 茶匙
海鹽                                1/4 茶匙
煙肉                                1 片(可免)
雞蛋                                2 隻

伴碟:煙肉 | 太陽蛋 | 水煮蛋 | 牛油果 | 楓糖漿 | 辣醬 | 蔥花
備註*:粟粉可用 2 湯匙椰子粉代替,更為理想

做法:
1. 蕃薯去皮刨絲,建議用食物處理器把蕃薯絲略為打碎。
2. 蕃薯絲鋪在廚房紙上再放上另一層廚房紙,用力按壓,把多餘水份吸乾。
3. 煙肉煎香,切成碎片 (如使用)。
4. 雞蛋打成蛋液、蔥切成蔥花,保留少許綠色部分作裝飾用。
5. 把所有窩夫材料拌勻備用。
6. 窩夫機預熱,掃上少許油,鋪上適量蕃薯蛋漿,蓋好烘至呈金黃色和帶脆,約 8 - 10 分鐘。伴上自己喜歡的配料,即成!

備註:如分批製作窩夫,建議將弄好的窩夫平放焗爐架上用微溫保暖。

[Follow me on Instagram @alvinckl and @alvin.penthousekitchen and check out my Facebook Fan Page!]